Whether you have a Chamberlain, LiftMaster, or Genie, regular upkeep can help prevent unexpected breakdowns. Imagine your garage door opener being your trusty old friend. With the right care and attention, it’ll be there for you whenever you need it—saving you time, hassle, and maybe even the occasional embarrassing moment when you forgot where your car keys were left.
1. Regularly Inspect the Garage Door Components
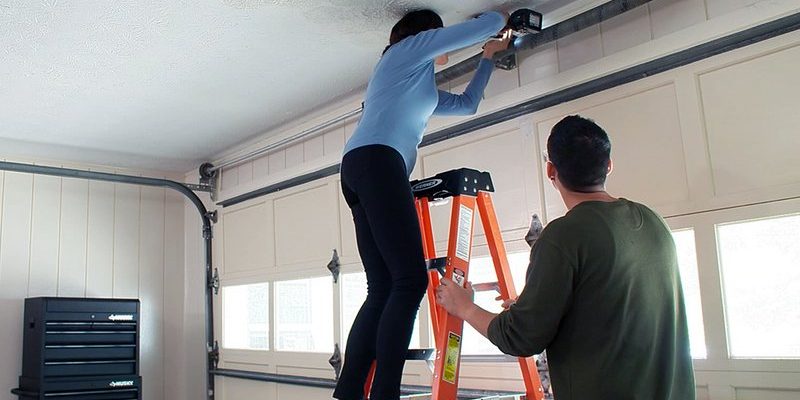
One of the simplest steps to ensure your garage door opener works well is to inspect the components regularly. Start with the door itself. Look for any wear, warping, or damage. A door that’s off-balance can strain the opener, leading to premature wear and tear. Make sure to check:
- Hinges: Look for rust or wear.
- Tracks: Ensure they’re clear of debris.
- Springs: Check if they’re intact and not rusty.
Next, inspect the garage door opener. Check the wiring for fraying or damage. If the opener makes unusual noises—think grinding or squeaking—it’s a signal that something might need attention. Don’t ignore it: those sounds often indicate that the gears or motor are struggling, and addressing them early could save you a bigger headache later.
2. Keep It Clean
Cleaning your garage door opener might sound odd, but it plays a crucial role in its efficiency. Dust, grease, and grime can accumulate over time and affect how the opener works. To give it a proper clean, follow these steps:
1. Unplug the opener for safety.
2. Wipe down the remote with a damp cloth, being careful around any buttons.
3. Use a vacuum attachment to clean any dust and debris from the motor and track.
4. For the tracks, a simple spray with some lubricant can help. Just avoid getting it on the door itself, as it can attract more dirt.
Here’s the thing: a clean opener can operate more smoothly, which means less strain on the motor. Remember, if your opener isn’t working as well as it used to, a good cleaning might just be what it needs.
3. Lubricate Moving Parts
Think of lubrication as the oil in your car; it helps everything function correctly. Regularly lubricating the moving parts of your garage door opener can greatly extend its lifespan. Use a silicone-based lubricant or a garage door lubricant designed specifically for this purpose. Here’s how:
– Use a spray lubricant on the hinges and rollers to keep things moving smoothly.
– Apply a small amount of grease to the chains or screw drive, if you have one.
– Ensure the tracks are clean, then apply a bit on the roller wheels to prevent any squeaking.
You might be wondering, “How often should I do this?” Ideally, aim for once every six months. For areas with harsh weather conditions, every three months is even better.
4. Test the Safety Features
Your garage door opener isn’t just responsible for opening and closing the door; it also plays a vital role in your home’s safety. Most openers have safety features that prevent accidents, like the auto-reverse function. To check:
1. Place a small object—like a piece of wood or a roll of paper—under the garage door.
2. Close the door using the remote.
3. If the door doesn’t reverse after hitting the object, it’s crucial to troubleshoot or have it serviced.
Honestly, staying updated with these safety features can give you peace of mind. Regular testing can also help identify any issues before they become major problems.
5. Replace the Batteries
You wouldn’t let your smoke alarm go without fresh batteries, would you? The same logic applies to your garage door opener remote. Over time, the batteries can lose their charge, leading to frustrating moments when you’re left clicking a non-responsive button. Here’s how to replace them:
– Open the back cover of the remote.
– Remove the old batteries.
– Insert new ones, matching the + and – signs correctly.
– Replace the cover.
It might sound simple, but this step is often overlooked. A fresh set of batteries usually solves the issue of a remote that doesn’t work as well as it should.
6. Keep Track of the Remote Pairing
If your garage door opener and remote seem to be out of sync, it’s time to check the pairing. Sometimes, bumps or drops can cause the remote to lose its connection. Here’s how to re-pair them:
1. Locate the “Learn” button on your garage door opener. This is usually on the back or side unit.
2. Press and release the “Learn” button. A light will blink, indicating the opener is ready to learn.
3. Press the button on your remote. When the opener signals, it’s paired.
And just like that, you’ve got your remote back in action! If your remote is still having issues after pairing, check the batteries again or consider if it’s time for a new remote.
7. Avoid Overusing the Opener
You might not think much about it, but overusing your garage door opener can lead to premature wear. It’s best not to treat it like a toy. If you’re using it multiple times daily, keeping mechanical wear in mind is crucial.
Try to limit the usage by leveraging other entrances when possible. Think of it as a balancing act: the more you use it, the more you need to care for it. If the opener is set to work harder than it should, you might face burnout on components sooner than expected.
8. Schedule Professional Maintenance
Sometimes, even with all the DIY efforts, there’s value in getting a professional opinion. Scheduling a maintenance check at least once a year can uncover hidden issues. Here’s why it matters:
- Experts can spot potential problems before they arise.
- They have tools and expertise to address complex issues.
- It often includes a thorough inspection of all components.
Having a professional handy can save you the stress of figuring out why your garage door isn’t opening. It’s worth the investment for peace of mind.
9. Keep the Sensors Clean and Aligned
Modern openers come with safety sensors that stop the door from closing if there’s something blocking the path. These sensors can become dirty or misaligned, which can cause problems. To maintain them:
1. Ensure they are clean. Wipe them down gently with a cloth.
2. Check that they’re aligned properly. If one sensor is angled differently, it won’t work correctly.
You’d be surprised how a bit of cleaning can often fix these annoying door issues. It’s simple but effective, and it can save you from unnecessary stress.
10. Know When to Replace
Sometimes, no matter how much TLC you give it, your garage door opener might just be nearing the end of its life. Signs can include unusual noises, slow operation, or a complete lack of response. If you’re facing these signs:
– Age is a factor: if it’s over 10-15 years old, consider a replacement.
– Frequent malfunctions can indicate serious problems that repairs won’t fix.
– Look for new models that offer enhancements, like quieter operation and keypad access.
The transition to a new opener can be smoother if you keep an eye out for these signs. Newer models often have improved safety features, making them a worthy investment.
Caring for your garage door opener is essential to keep it functioning smoothly for years to come. By following these simple steps—from regular inspections to professional maintenance—you can prevent unexpected breakdowns and ensure your opener remains a reliable part of your life. With a little attention, you can keep that trusty friend of yours in top shape, ready to swing open your door with just a push of a button. So, the next time you use that remote, you can feel confident knowing you’ve done your part to keep it healthy and happy.