
Not only do timer wall buttons add a modern touch to your garage setup, but they can also provide peace of mind. If you’ve ever left home, wondering if you closed the garage door, you’re not alone. This little upgrade could be the answer to that nagging worry. Just think of it as having a reliable assistant managing your garage door’s schedule while you focus on more important things.
What Is A Timer Wall Button?
A timer wall button is a device that works with your garage door opener to automatically close the door after a set duration. It resembles the standard wall button you already have, but it comes with a neat twist: you can program it to close the door after a specific time—anywhere from 1 to 10 minutes. This is especially useful if you forget to close the door after driving away or if you leave for a quick errand and realize you didn’t shut the garage securely.
Imagine you’re running late for breakfast with friends. You jump in your car, and as you’re driving off, that familiar thought hits you: “Did I close the garage door?” With a timer wall button installed, you don’t have to worry. You can set the door to close automatically, giving you one less thing to stress about.
Why Consider Upgrading?
You might be wondering, “Why should I even think about upgrading to a timer wall button?” Honestly, the benefits can be quite appealing. Here are some reasons to consider making the switch:
- Convenience: Automatically closes the door without your intervention.
- Safety: Minimizes the chance of leaving the garage door open, which can lead to unwanted intrusions.
- Energy Saving: Properly closing the door can keep your garage temperature regulated, saving on heating bills.
With a timer wall button, you might find yourself feeling more secure. You no longer need to imagine someone potentially using your open garage to gain easy access to your home.
How Does It Work?
Using a timer wall button is pretty straightforward. First, you’ll install it on the wall, just like your traditional button. Follow these steps to get going:
1. Turn off power to your garage door opener for safety.
2. Remove the existing wall button carefully. Make sure you note where the wires are connected, as you will need to reconnect them to the new timer button.
3. Connect the wires to the timer button according to the instructions that come with it.
4. Turn the power back on and program the timer according to your preference.
Once installed, the timer can be easily set. Most models involve simply pressing a few buttons to choose the time duration, usually ranging from 1 to 10 minutes. It’s like setting a timer on your kitchen oven—simple and effective!
What Types of Timers Are Available?
Many options exist when considering a timer wall button for your garage door. Here’s a peek at the different types you might encounter:
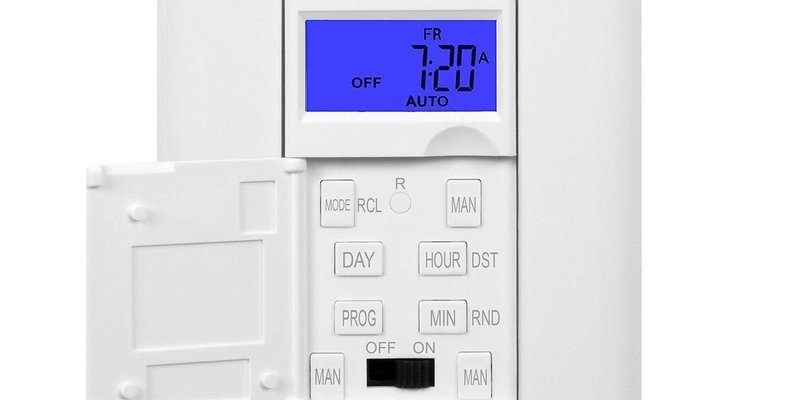
- Digital Timers: These offer easy-to-read displays and programmable settings, making them user-friendly.
- Mechanical Timers: Often simpler and more budget-friendly, they may require manual setting every time.
- Smart Timers: Can sync with your smartphone and allow remote programming, offering advanced control over your garage door.
Before purchasing, assess what features are essential for you. If you love the tech side of things, a smart timer might be just what you’re looking for!
Installation Considerations
While the installation of a timer wall button is generally straightforward, it’s important to consider a few things before diving into the project:
1. Compatibility: Make sure that the timer button you choose is compatible with your current garage door opener system. Some brands may require specific types of timers.
2. Wiring: Understanding your garage’s wiring layout can be critical. If you’re unsure, consulting a professional can save you headaches down the line.
3. Location: Decide on a convenient location for the button. It should be easily accessible but far enough from the door to prevent accidental presses.
Taking these factors into account can make your experience smoother and more enjoyable.
Common Troubleshooting Tips
Like any device, timer wall buttons may experience hiccups from time to time. Here are some common issues and how you can troubleshoot them:
- Button Not Responding: Check if the power is on, and verify the wiring connections. A loose wire can create confusion.
- Timer Not Closing: Make sure the timer settings are programmed correctly. Sometimes, a simple reset can solve the problem.
- Inconsistent Time Delay: Double-check the instructions and possibly reset your timer to recalibrate it.
If your button continues to give you trouble, it might be wise to consult the manufacturer’s manual or reach out to their customer service for assistance.
Final Thoughts: Is It Worth Upgrading?
So, should you upgrade to a timer wall button? If convenience, safety, and peace of mind are important to you, then yes—this upgrade could be a great fit. Imagine being able to hop in your car without that nagging worry about whether you closed the garage door.
In the end, weighing the benefits against the cost and how it fits into your life is crucial. A timer wall button can simply make your everyday routine smoother, allowing you to focus on what truly matters. Plus, when you come home, you’ll have the satisfaction of knowing your garage door closed itself. That’s a little victory worth celebrating!