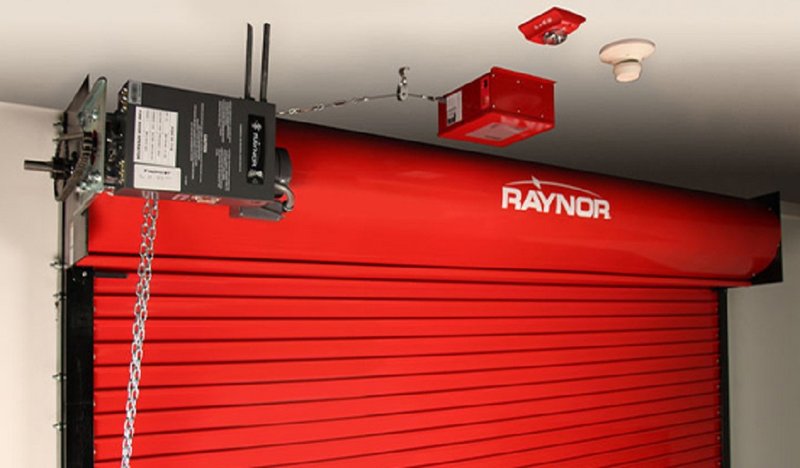
Imagine your garage door is like a big safety net, protecting you and your loved ones. The Raynor safety sensor acts as the eyes of this net, detecting obstructions and preventing accidents. If you’ve recently installed or are considering a Raynor opener, understanding how to use this sensor effectively is vital.
Let’s break this down into manageable pieces so you can be confident in your garage door operation. We’ll cover the basics of installation, troubleshooting common problems, and how to maintain these sensors over time. Ready? Let’s dive in.
What Is the Raynor Safety Sensor?
The Raynor safety sensor is a crucial part of your garage door system. It consists of two small devices located on either side of the door, usually near the ground. These sensors work together to detect if anything is in the way when the door is closing. If something is obstructing the door’s path—let’s say a bike or, heaven forbid, a pet—they’ll stop the door from closing entirely.
This safety feature is more than just a modern convenience; it’s a matter of safety, designed to protect people and property. You may be wondering how they work, exactly. Essentially, the sensors emit a beam of infrared light, and if the beam is interrupted, the sensors signal the door to reverse. This simple yet vital function helps prevent accidents and injuries.
Understanding how these sensors operate is critical to using your garage door safely and effectively. Without them, you could face unnecessary risks every time you open or close the door.
Installing Raynor Safety Sensors
Installing Raynor safety sensors may sound daunting, but it can be done with just a few simple tools and some basic DIY skills. First, you’ll need to gather items like a screwdriver, a level, and your sensor kit.
- Begin by locating the ideal position for the sensors. This is generally about 6 inches above the ground, on either side of the door frame.
- Using a level, ensure that both sensors align perfectly with each other. It’s important they face directly at one another for the beam to function properly.
- Attach the sensors securely to the wall using screws provided in your kit. Make sure they’re exactly positioned; even a slight misalignment can cause issues.
Once the sensors are in place, you’ll connect the wires to your garage door opener’s control unit. Refer to your owner’s manual for specific wiring instructions. After everything is connected, test the sensors by manually blocking the beam. If everything is set up properly, the garage door should reverse when it detects an obstruction.
Pairing Your Remote with the Sensor
Now, you might be asking about your remote control and how it syncs with the Raynor safety sensor. Good question! While the sensors primarily function with the garage door itself, the remote also plays a role in this safety system.
To pair your remote with the Raynor opener, you first need to locate the “Learn” button on the opener itself. It’s often a small, colored button. Follow these steps:
- Press the Learn button once. An LED light will blink, indicating it’s active.
- Within 30 seconds, press the button on your remote that you want to pair.
- You’ll see the LED light blink again to confirm the pairing was successful.
Make sure to test the remote after pairing. Press it and watch as the garage door opens or closes. A successful pairing means your remote and safety sensor are working harmoniously together.
Common Problems with Raynor Safety Sensors
Even the most straightforward systems can run into a few bumps along the way, and Raynor safety sensors are no exception. Here are a few common issues you might encounter:
- Misalignment: If the sensors get bumped or shifted, misalignment can occur. This is when they stop communicating properly, which can prevent the garage door from functioning.
- Obstruction: Sometimes, dirt, dust, or debris can block the sensors, so it’s a good idea to clean them regularly. A quick wipe-down can make a huge difference.
- Wiring issues: If you notice your sensors aren’t working, check the wires first. Loose connections or frayed wires can disrupt the sensor’s functionality.
If you face any of these problems, don’t stress! Most issues can be resolved with a little troubleshooting. Alignment can be fixed by simply adjusting the sensor position, while cleaning and checking wires can keep everything working smoothly.
Testing Your Safety Sensors
Once you’ve installed and paired your Raynor safety sensor, it’s crucial to perform routine tests to ensure everything’s operating as it should. Testing doesn’t take long and can save you from future headaches. Here’s how to do it:
1. Start by clearing the area: Make sure nothing is obstructing the door or its sensors.
2. Close the door: Use your remote or wall button to close the garage door.
3. Interrupt the sensor beam: While the door is closing, walk in front of the sensors. You should see the door immediately reverse upon blocking the beam.
If the door doesn’t reverse, you might have a malfunction. In that case, check for alignment issues, clean the sensors, and ensure connections are secure.
Maintaining Your Raynor Safety Sensors
Proper maintenance is key to extending the lifespan of your Raynor safety sensors. Here are a few easy tips you can follow:
- Regular cleaning: Dust and dirt can accumulate on the sensors, so regularly wipe them down with a soft cloth.
- Checking alignment: Periodically check that the sensors haven’t been knocked out of place.
- Inspect wiring: Make sure cords and connections are in good condition. Look for any signs of wear or damage.
Staying on top of these maintenance tasks will help ensure everything runs smoothly and safely. Plus, a little prevention goes a long way!
Using and maintaining Raynor safety sensors is essential for anyone who wants a reliable and safe garage door experience. By understanding their operation, properly installing them, and performing routine tests, you can ensure that your garage door functions as it should.
Remember to pay attention to common issues like misalignment or obstructions, and keep those sensors clean and well-positioned. The peace of mind that comes from knowing your garage door is equipped with a robust safety system is worth every effort. If you follow these guidelines, you’ll be well on your way to a safer home.
