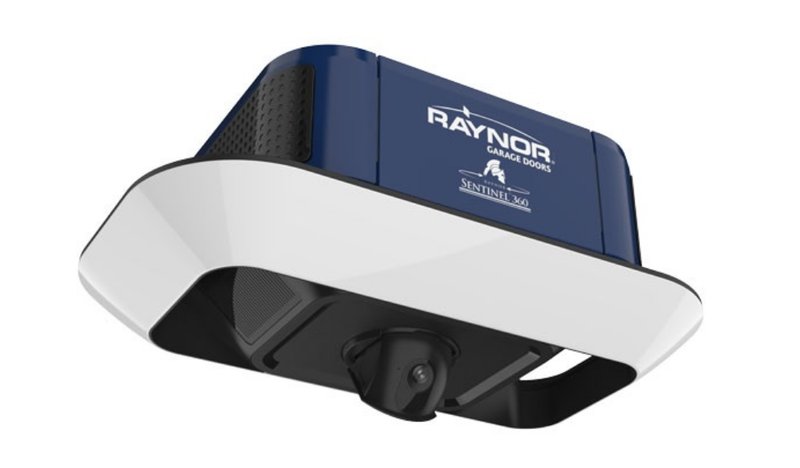
Imagine this: you’re coming home after a long day at work. Instead of stepping out into the rain or wind to lift a massive door, you just press a button on your Raynor remote, and voilà! The garage door opens effortlessly. This article is your go-to guide for mastering that remote, syncing it to your opener, troubleshooting common issues, and more, all while keeping things friendly and relatable.
Getting the Right Remote for Your Raynor Opener
Before diving into how to use your Raynor garage door opener, let’s talk about the remote. Raynor offers different types of remotes, each designed for specific models. If you have an older model, you might have a more traditional remote with fewer bells and whistles. Newer models come with features like backlit buttons and smartphone compatibility.
When choosing a remote, make sure it’s compatible with your specific model. Fortunately, Raynor provides manuals that list compatible remotes, so you can easily find what you need. If you’re confused, you can always ask your retailer or check Raynor’s website for assistance. The last thing you want is to buy a remote that won’t sync!
How to Sync Your Raynor Remote with the Opener
Now that you’ve got the right remote, let’s discuss how to sync it with your garage door opener. Honestly, it sounds trickier than it is, and once you know the steps, you’ll feel like a pro.
1. Find the Learn Button: Start by locating the “learn” button on your garage door opener. It’s usually on the back or side of the unit. The button might be a different color, often green, red, or yellow.
2. Prepare to Teach: Press the learn button once. An indicator light may blink or stay on, signaling that the opener is ready to accept a new remote.
3. Press the Remote Button: Within about 30 seconds, press and hold down the button on your remote that you want to use to open the door. You should see the indicator light on the opener blink, which means it successfully recognized the remote.
4. Test It Out: After syncing, try pressing the remote button to test it. If it works, you’re all set! If not, don’t worry. Just try the steps again.
Operating Your Raynor Garage Door Opener
Once your garage door remote is synced, using your Raynor opener should feel pretty straightforward. Just think of it like turning on a light. You simply point the remote at the garage door and press the button.
The open button usually has an icon that resembles a door opening. Press it once, and your garage door should start moving up or down. There may also be a close button, allowing you to securely shut the door after you’ve parked.
If you want to keep things safe, some Raynor models come with a safety feature called an “obstacle sensor.” This means if something — like a pet or a stray toy — gets in the way, the door will automatically reverse, preventing any accidents. How cool is that?
Common Troubleshooting Tips for Raynor Garage Doors
Even the best technology can give you headaches from time to time. If your Raynor garage door opener isn’t working as expected, don’t panic. Here are some common issues and how to tackle them.
– Remote Not Working: If your remote isn’t working, start by checking the battery. If the remote uses a battery, replacing it is often the first step. Once you replace it, try resyncing it to the opener.
– Door Doesn’t Move: Sometimes, the garage door might refuse to budge. First, check to see if there are any obstructions in its path. Next, make sure that the opener is plugged in and that the power source is functioning. If it’s a power issue, there’s not much you can do beyond getting that fixed.
– Stuck Door: If your garage door is stuck halfway or won’t close completely, there might be an issue with the tracks. Inspect the tracks and remove any debris or dirt. Sometimes a good cleaning can work wonders!
Maintaining Your Raynor Garage Door Opener
You know that saying, “A little prevention goes a long way”? That’s especially true for your garage door opener. Regular maintenance can extend the life of your opener and ensure it operates smoothly.
Here are some easy maintenance tips:
– Lubricate Moving Parts: Every few months, apply a silicone-based lubricant to moving parts like rollers and hinges. This helps prevent rust and keeps everything running smoothly.
– Check the Batteries: Get into the habit of checking your remote batteries every six months. This practice helps avoid surprises when you’re standing in your driveway.
– Inspect the Safety Features: Test the safety features regularly. For instance, place a small object in the door’s path and see if it reverses correctly. If it doesn’t, there may be an issue that needs fixing.
Upgrading Your Raynor Garage Door Opener
If you’ve had your Raynor garage door opener for quite some time, you might consider upgrading to a model with modern features. Technology has come a long way, and newer models can offer benefits you didn’t know you were missing.
For instance, some models come with smart technology that allows you to control your garage door from your smartphone. This means you can open or close it from anywhere, which is super handy if you’re running late!
Additionally, many newer models are built for quieter performance. If the sound of your garage door close has disturbed your peaceful evenings, a quieter opener might be just what you need.
Using a Raynor garage door opener can turn a daily task into an effortless experience. With the right remote and knowledge of how it all works, you’ll feel empowered every time you come home. Whether you’re syncing your new remote, troubleshooting a hiccup, or even considering an upgrade, knowing how to use your Raynor garage door opener will give you one less thing to stress about.
So next time you’re in the driveway, feeling the rain or cold, remember how easy it is to just press that remote and let technology do the heavy lifting for you. Enjoy the simplicity and ease of your garage door, and rest easy knowing it’s got your back!
