Imagine you’ve just gotten a new remote for your car. It’s exciting but also requires a bit of figuring out, right? That’s the same vibe with your LiftMaster setup. From syncing the remote to troubleshooting issues, let’s break it all down together. You’ll soon find that using your LiftMaster motor unit is as easy as pie.
What is a LiftMaster Motor Unit?
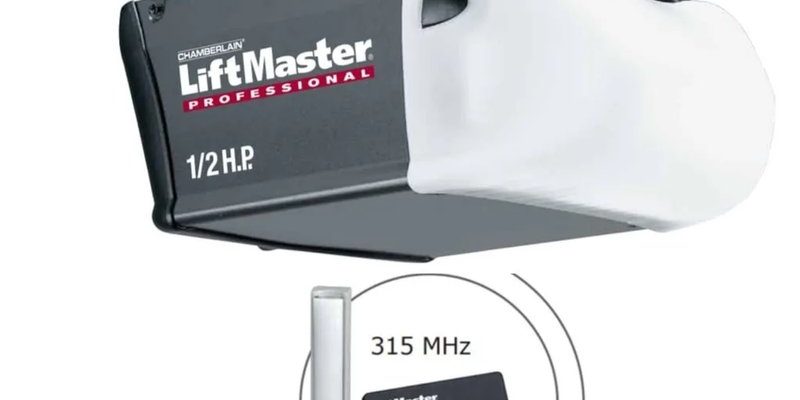
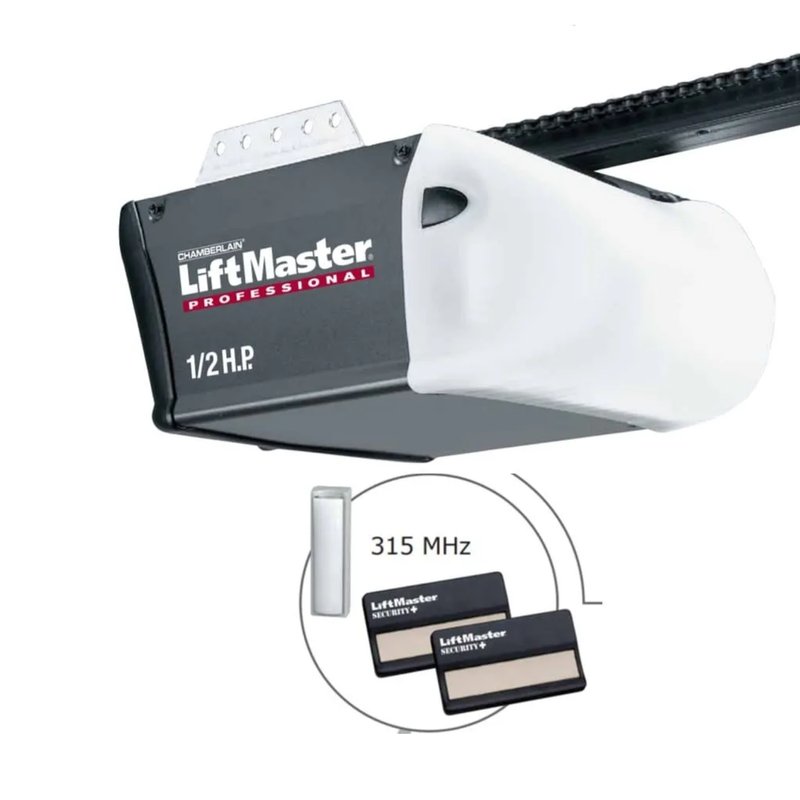
First off, let’s clarify what the LiftMaster motor unit actually does. Essentially, this handy device powers your garage door. It functions like the heart of your garage door system, allowing you to open and close the door at the push of a button. The motor unit is connected to the door and controls its movements.
There are different types of LiftMaster motors, but they usually come with features that enhance safety and convenience. For instance, many have built-in lights that illuminate your garage when you arrive home. Some even come with smartphone connectivity, allowing you to monitor and control the door from anywhere. So, whether you want a basic model or something more advanced, you’ll find a LiftMaster motor unit that suits your needs.
Components of the Motor Unit
Understanding the components of your LiftMaster motor unit can help you troubleshoot common issues. Here’s a quick breakdown:
- Motor: The powerhouse that moves the door.
- Drive Mechanism: This can be a belt, chain, or screw that helps lift the door.
- Remote Control: The handy gadget you use to operate the door.
- Safety Sensors: These detect if something is in the way when the door closes.
Knowing these components will not only help you understand how your garage door works but also make troubleshooting easier if you run into any issues down the road.
Setting Up Your LiftMaster Motor Unit
When you first get your LiftMaster motor unit, setting it up correctly is crucial. Let’s walk through the setup step by step.
1. Install the Motor Unit: Begin by following the instruction manual to attach the motor to the ceiling of your garage. Make sure it’s secure.
2. Connect to Power: Plug the motor unit into a nearby outlet. Be sure to use a grounded electrical outlet to avoid any electrical issues.
3. Attach the Door: Connect the motor unit’s arm to the garage door securely. You want to ensure these mechanics work smoothly together.
4. Test the System: Once everything is connected, test the door using the remote. If it opens and closes properly, congrats! You’re on your way.
Following these steps can seem tedious, but remember, proper installation ensures longevity and functionality.
Pairing the Remote
Now, let’s talk about your LiftMaster remote. Pairing it with the motor unit is usually straightforward. Here’s how to do that:
1. Locate the Learn Button: This small button is usually on the back of the motor unit.
2. Press the Learn Button: Press the button and hold it for a few seconds. You’ll see a light blink to indicate it’s ready to pair.
3. Press the Remote Button: Within 30 seconds, press the button on your remote that you want to program. A light on the motor unit should flash to confirm that the pairing was successful.
4. Test It Out: Try pressing the remote to see if it opens the door. If it does, you’re all set!
If you find that it doesn’t work the first time, don’t worry. Sometimes it takes a couple of tries.
Troubleshooting Common Issues
Even the best technology can throw curveballs sometimes. If you run into problems with your LiftMaster motor unit, here’s how to troubleshoot a few common issues.
– Door Doesn’t Open or Close: Check if the motor is plugged in. If it is, and you still have issues, look at the safety sensors. They should be clean, correctly aligned, and free from obstructions.
– Remote Won’t Work: First, replace the battery in your remote. If that doesn’t fix it, try re-pairing it with the motor as described earlier.
– Motor Unit Makes Strange Noises: If the motor unit sounds different than usual, it could be a mechanical issue. Check for loose or worn-out parts. Sometimes, a bit of lubricant on the moving parts can help too.
By being proactive and attentive, you can often resolve these problems without needing a technician.
Maintaining Your LiftMaster Motor Unit
Just like your car needs regular oil changes, your LiftMaster motor unit benefits from upkeep. Maintenance is key to making sure your motor unit works smoothly for years to come.
Here are some tips for keeping your motor unit in top shape:
– Inspect Regularly: Check the door tracks, springs, and other components for wear and tear. Address any issues as they arise.
– Clear Obstructions: Ensure there is nothing blocking the door’s path or the safety sensors. A clean operating environment promotes functionality.
– Lubricate Moving Parts: Apply lubricant to the door’s hinges, rollers, and tracks at least twice a year. This helps the door open and close silkenly.
– Test the Safety Features: Regularly check if the safety sensors function correctly by placing a small object in the way as the door closes.
By staying on top of maintenance tasks, you’ll help your LiftMaster motor unit perform at its best.
Using a LiftMaster motor unit doesn’t have to be complicated. With a little knowledge of what it is, how to set it up, and how to troubleshoot, you’ll feel much more in control. Think of it as learning to ride a bike: it might seem tricky at first, but soon enough, it becomes second nature.
Keep this guide handy, refer back to the easy steps, and you will maintain not just a functioning garage door but also peace of mind. Remember, whether you’re tackling installation or troubleshooting, it’s all about taking that first step. Happy opening!
Originally posted 2025-02-09 05:04:45.