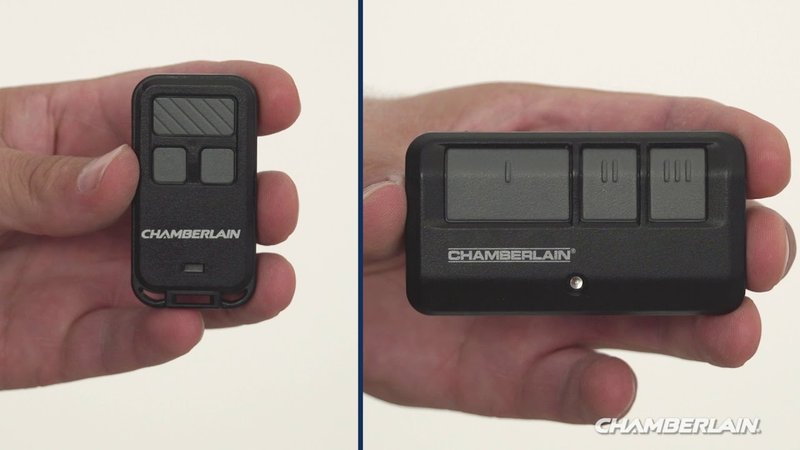
The Chamberlain remote is user-friendly, but getting started might seem daunting. Whether you’re freshly moved into a new home or just purchased your remote, you might be wondering how to navigate this little gadget. From syncing it with your garage door opener to troubleshooting, let’s break down everything you need to know about using your Chamberlain remote.
Setting Up Your Chamberlain Remote
Setting up your Chamberlain remote is the first step to enjoying the convenience it offers. Honestly, it’s not as complicated as it sounds. Most Chamberlain remotes come with a clear instruction manual, but we’ll walk you through the basic steps here.
1. Insert the Battery: First, you’ll need to install the battery. Most Chamberlain remotes need a 3V lithium battery. Look for a small tab or latch at the back of the remote. Open it up, and pop in the battery, ensuring that you’ve aligned the positive and negative ends correctly.
2. Locate the Learn Button: Now, it’s time to sync your remote with the garage door opener. Find the “Learn” button on your opener, usually located on the back or side of the unit. This is often a bright-colored button that stands out.
3. Program the Remote: Press the “Learn” button until the indicator light turns on, then release it. Within 30 seconds, press and hold the button on your remote you want to use. If done correctly, the opener will click, signaling a successful pairing.
Just like that, your remote is ready to use!
Understanding Remote Functions
Once you have your Chamberlain remote set up, knowing how to use its features can maximize your garage door experience. You might be surprised at how versatile it can be.
– Basic Open/Close Function: The primary function of the remote is, of course, to open and close your garage door. Just press the button once, and your door should respond accordingly. It’s as easy as that!
– Group Setting: If you have multiple garage doors, some Chamberlain remotes allow you to program different buttons to control different doors. This feature is super handy for multitasking families with multiple vehicles needing access.
– Light Control: Some models also let you control the lighting in your garage. Again, a simple press of a button can illuminate your space. Imagine getting out of your car at night and having the garage light automatically turn on—it’s a small touch that adds a lot of convenience.
Troubleshooting Common Issues
Even the best devices can run into snags from time to time. If you find your Chamberlain remote isn’t working properly, don’t fret! Here are a few common issues and how to tackle them.
– Remote Not Responding: If your remote isn’t communicating with the garage door opener, check the battery first. A dead battery is often the culprit. Replace it and try again.
– Signal Interference: Sometimes, other electronic devices or radio signals can interfere with your remote’s performance. If you notice erratic behavior, try moving closer to the garage door opener for a stronger signal.
– Reprogramming Needed: If you’ve recently changed the batteries or encountered a power surge, you might need to reprogram your remote. Follow the setup steps we discussed earlier.
Resetting Your Remote
You might find yourself in a situation where you need to reset your Chamberlain remote. Maybe you’ve lost a remote and replaced it, or you’re experiencing persistent issues.
– Performing a Factory Reset: To reset your remote, locate the learn button again on the opener. Press and hold it until the light turns off (this usually takes about 6 seconds). This erases all remote controls from memory.
– Re-pairing the Remote: After resetting, you’ll need to reprogram your remote following the setup instructions mentioned above.
If resetting seems too technical, don’t hesitate to consult your user manual for specific instructions based on your model.
When to Consider Replacing Your Chamberlain Remote
Like any gadget, there might come a day when your Chamberlain remote is just not cutting it anymore. Understanding when to replace it can save you a lot of hassle down the line.
– Frequent Battery Changes: If you find yourself changing the battery every few weeks, it might be a sign that your remote is nearing the end of its life cycle.
– Physical Damage: Cracks or water damage to the remote can lead to functional issues. If the buttons are sticking or the casing is popping off, it might be better to invest in a new remote.
– Broken Pairing: If you’ve reset the remote and the door still doesn’t respond, despite the battery being fresh and the connections visible, you may need a new remote.
Feeling comfortable with your Chamberlain remote is key. Knowing when it’s time for a change can keep your garage functioning smoothly.
Exploring Alternatives to Chamberlain Remotes
While we’ve focused on Chamberlain remotes, you might be curious about alternatives, especially if you need something different.
– Universal Remotes: These gadgets can work with various brands, including Chamberlain. They’re a good option if you have multiple devices or want to reduce clutter from too many remotes.
– Smartphone Apps: More advanced garage door openers are compatible with smartphone apps. Imagine controlling your garage door right from your pocket! Many modern systems offer this tech, making it easy to operate with just a tap.
– Wired Keypads: Mounted outside your garage, these allow you to open the door using a code. This is super helpful for those who often forget their remote inside the car.
As you can see, there’s a wide range of options if you’re looking to explore something beyond your Chamberlain remote.
Maintaining Your Chamberlain Remote
Lastly, keeping your remote in good shape is essential for longevity. Here are some simple tips to ensure yours stays functioning well.
– Regular Battery Checks: Keep an eye on the battery life. Most remotes will give you hints, like requiring several clicks to open the door, indicating that it’s time for a replacement.
– Proper Storage: Protect your remote from extreme temperatures and moisture. Keeping it in a safe place, like your car’s glove box, can help. Consider using a silicone cover for protection.
– Clean It Up: Wipe your remote with a soft cloth every now and then to keep it dirt-free. This small step can prevent sticky buttons and malfunctioning parts from developing.
Taking good care of your Chamberlain remote can extend its life and keep your garage door functioning smoothly.
In conclusion, using your Chamberlain remote doesn’t have to feel overwhelming. With proper setup, understanding its functions, troubleshooting, and proactive maintenance, you can enjoy hassle-free access to your garage. Don’t be afraid to dive in and explore all that your remote can do—once you get the hang of it, you’ll love the convenience it brings to your daily routine!
