Imagine your garage door opener as the conductor of an orchestra, where the wires are the musicians. If one of those connections falters, the entire symphony can go off-key. Getting to the bottom of wiring issues can not only save you time and money but also bring back that smooth operation you’re used to. Let’s dive into how to troubleshoot those pesky wiring problems.
Understanding Your Garage Door Opener’s Wiring System
Before jumping into troubleshooting, it’s crucial to get a solid grasp of your garage door opener’s wiring system. Most openers have a power source, multiple sensors, and a motor. The wiring connects all these components, allowing your opener to communicate.
The power source is usually plugged into an outlet, while sensors are mounted at the bottom of the garage door tracks. Their job is to recognize obstacles, stopping the door from closing on something—or someone—unintended. The motor then pulls up or pushes down the door based on signals received. Each of these parts relies on being wired properly to function harmoniously.
Wiring issues often manifest as intermittent operations or complete failure to respond. Occasionally, you might hear clicking noises or see flashing lights on your opener, signaling something’s gone awry.
Gathering Your Troubleshooting Tools
Before you start investigating, gather a few handy tools. You’ll want to ensure you have:
- A multimeter for checking voltage
- Wire strippers and connectors for any repairs
- Electrical tape to secure connections
- A ladder if you need to reach your opener or wiring
- A flashlight to see into dark corners
These tools can help you diagnose and fix issues more effectively. Having everything on hand means you won’t have to stop mid-process to hunt for supplies—a major time-saver!
Checking the Power Supply
The first step in troubleshooting your garage door opener with wiring issues is to check the power supply. If the opener isn’t powered, it won’t budge, no matter how many times you press the remote. It’s like trying to start a car with an empty gas tank.
Here’s how to check it:
1. Locate the power cord connected to your opener.
2. Ensure it’s securely plugged into an outlet. Sometimes, a loose connection can cause your opener’s brains to stop working.
3. Check if the outlet itself is working by plugging in another device, like a lamp or phone charger. If that doesn’t work, the outlet may need inspection or repairs.
If your opener is plugged in and the outlet’s fine, but it still doesn’t work, let’s look deeper into the wiring.
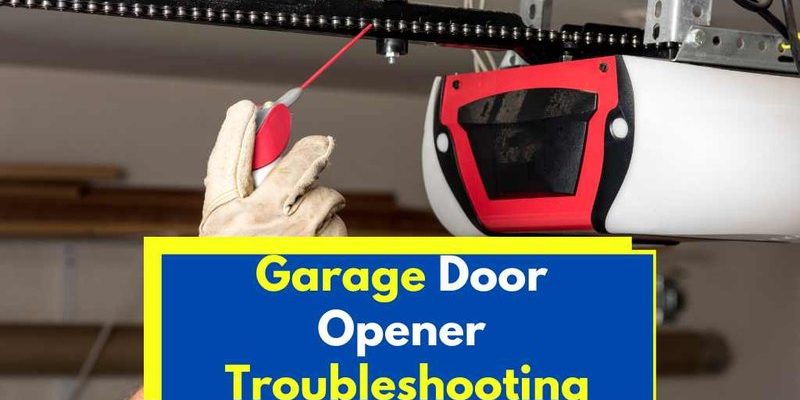
Inspecting the Wiring Connections
Once you’re sure there’s power going to the opener, it’s time to look at the wiring connections. Start by checking all visible wires for any signs of wear or damage.
1. Unplug the opener. Safety first!
2. Look for loose wires or connections; if you see any, use wire strippers to clean them up before reconnecting them properly.
3. Ensure that there are no frayed or broken wires—these can break the communication between components.
If you discover damaged wires, repair them using wire connectors and electrical tape. If there’s severe damage, consider replacing the entire wire, as this could cause further problems down the line.
Examining Safety Sensors
Your garage opener won’t function correctly if the safety sensors (located near the ground on either side of the door) are misaligned or faulty. These sensors are vital for ensuring that the door doesn’t close on anything in its path. You might see “The Door Is Stuck” light flashing if there’s an issue.
1. Check for alignment: Ensure the sensors are facing each other and aren’t blocked by dirt or debris.
2. Clean the sensors: A simple wipe with a soft cloth can remove dust that may block their infrared signals.
3. Test the connections: If the sensors appear dirty or broken, check their wiring connections. Unplug them and then plug them back in to reset their connection.
If everything seems fine visually but it still isn’t working, you may need to replace the sensors, which are generally inexpensive and easy to install.
Resetting Your Garage Door Opener
Honestly, some issues can be fixed with a simple reset. Think of it as giving your opener a good night’s sleep and letting it recharge in the morning.
To reset most garage door openers:
1. Unplug the unit and wait about 30 seconds.
2. Plug it back in and try using the remote.
3. If that doesn’t work, you can try resetting the remote by removing the battery, waiting a moment, and then reinserting it.
This process can help resolve internal errors that cause unresponsiveness or other glitches.
Testing the Remote Control
Now that you’re knee-deep into troubleshooting, don’t forget to assess your remote control. Even the most high-tech openers can be rendered useless by a faulty remote.
1. Check the battery: This is often the simplest fix. If the remote isn’t working, try replacing the battery first.
2. Reprogram the remote: Depending on the brand, this process can differ. For most remotes, you’ll press a button on the motor until a light flashes, indicating that it’s ready to pair. Then, press the button on your remote to complete the sync.
If the remote still doesn’t work, you may need to consider a universal remote or a direct replacement.
Testing the Wall Switch
Do you have a wall switch for your garage door opener? If so, you’ll want to give it a look too.
1. Inspect the switch for any visible damage or wear.
2. Test the connections by unscrewing the switch from the wall and checking the wires. Just like the sensors, they should be secure and free of rust.
3. If the wall switch appears fine but isn’t working, it’s possible it needs to be replaced. They’re generally inexpensive and easy to swap out.
Checking for Interference or Obstructions
Interference can be a sneaky culprit behind garage door opener malfunctions. Other devices, like garage door openers in nearby homes or even your own Wi-Fi, can interfere with the signal.
To check for interference:
1. Inspect the area: Ensure there aren’t any new appliances or devices that might be causing issues.
2. Test the remote from different locations, ideally from about 20 feet away. If it works better from further away, it’s likely interference.
You can also try reorienting your opener or changing frequencies, if applicable, to reduce interference.
Seeking Professional Help
If you’ve gone through all these steps and still find yourself plagued by the garage door gremlins, don’t hesitate to call in a professional. While troubleshooting wiring issues on your own can be satisfying, electrical problems can sometimes lead to bigger issues if not handled properly.
A professional can offer a thorough analysis and might spot something you might have missed. Besides, it’s always better to be safe than sorry when it comes to electrical wiring.
Troubleshooting a garage door opener with wiring issues might seem daunting at first, but by breaking it down step by step, you can usually identify the root cause. Armed with the right tools and a bit of patience, you can bring your opener back to life. Whether it’s checking the power supply, inspecting wiring connections, or resetting devices, each step plays a part in that harmony your garage door opener needs to function.
So, the next time you’re faced with a stubborn opener, remember that the solution might be just a few steps away. With a little effort and insight, you can restore order to your garage and make sure that your door opens smoothly, no drama involved. Happy troubleshooting!