Error codes are like a secret language your garage door opener speaks only to you, but without a translator, they often just become a source of frustration. Maybe your remote isn’t syncing, or perhaps the battery has died. Whatever the issue may be, let’s break down how to troubleshoot those pesky error codes and get your garage door opener back on track.
Understanding Common Garage Door Opener Error Codes
Garage door openers use error codes to communicate specific issues. Each brand has its own set of codes, but many share common meanings. For example, a flashing light might indicate that the opener is “inoperable” due to a safety sensor clash.
Here’s a clearer breakdown of some common error codes:
- 1-1 Flashing Light: This typically means that the opener isn’t receiving power.
- 2-2 Flashes: Indicates an obstacle is blocking the safety sensors.
- 3-3 Flashes: Usually signals a problem with the limit settings.
Understanding these codes can save you a lot of time and frustration. Here’s the thing: before jumping to conclusions, always check if there are any visible obstructions or power issues first. Basic troubleshooting can go a long way in diagnosing the real problem.
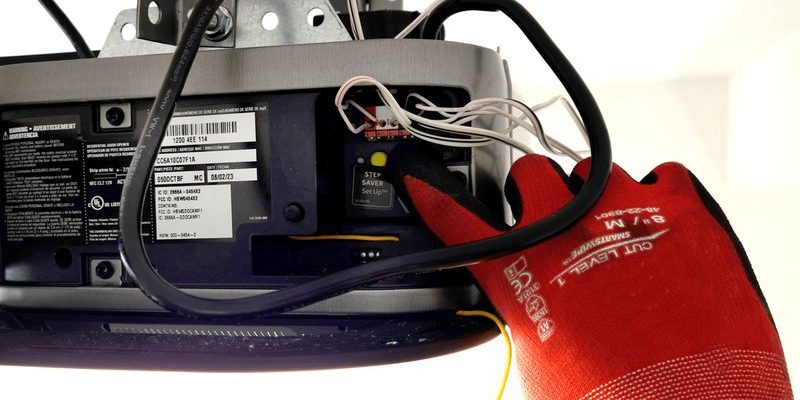
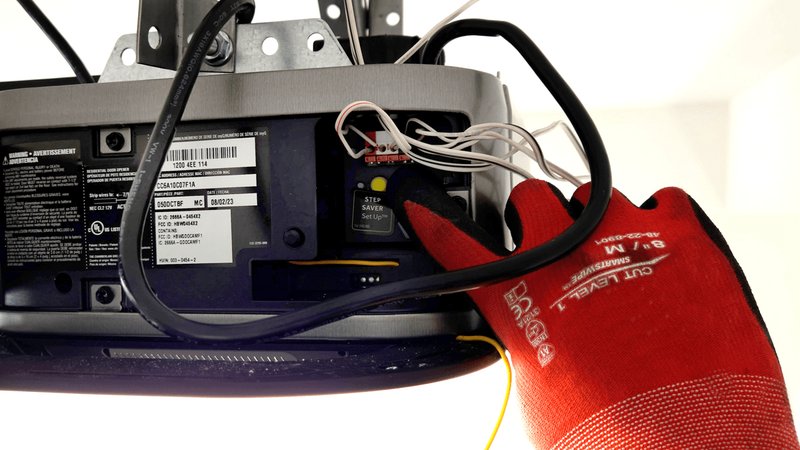
How to Identify the Error Code on Your Opener
Recognizing the error code is your first step in fixing it. Most garage door openers will display these codes through blinking lights on the unit itself or through beeps when you press the remote. It’s like reading a book: you have to start with the cover before diving into the story.
To identify the error code:
1. Inspect the Opener: Look for a blinking light near the power button or control board.
2. Listen for Sounds: If it makes a beeping sound, note the pattern. Many models use specific sequences for different errors.
3. Consult the Manual: Each model comes with its own user manual that details the error codes and their meanings; keeping this handy is super helpful.
Don’t hesitate to jot down what you observe. It’ll come in handy when you dive deeper into troubleshooting.
Resetting Your Garage Door Opener
Sometimes, a simple reset can solve the mysterious ways of error codes. It’s like giving your opener a quick nap—it refreshes the system and clears minor glitches. Here’s how to reset it:
1. Power Off the Unit: Unplug your opener from the power source or flip the circuit breaker off.
2. Wait for at Least 30 Seconds: This allows enough time for the system to reset.
3. Power It Back On: Plug in the opener or switch the circuit breaker back on.
4. Recheck for Error Codes: If the flashing persists, take note of any new codes.
Usually, a reset will clear minor issues, but if your opener is still displaying error codes, more investigation is in order.
Checking Power Supply Issues
Power supply problems are among the top reasons garage door openers misbehave. Imagine trying to binge-watch your favorite series, only for the electricity to cut out—frustrating, right? Your garage door opener operates the same way.
First, check the basics:
– Is it Plugged In? Ensure the unit is securely connected to the power outlet.
– Inspect the Outlet: Use a lamp to see if the outlet provides power. If it doesn’t, it might be a circuit breaker issue.
– Extension Cords? Avoid using extension cords for your opener, as they can fail to deliver the power needed for the unit’s operation.
By ensuring a steady power supply, many issues will resolve themselves.
Examining the Safety Sensors
Safety sensors are essential for the safe functioning of your garage door opener. They prevent the door from closing on objects or people, acting as the guardian of your garage space. If these sensors are misaligned or blocked, they can trigger an error code.
To check the sensors:
1. Locate the Sensors: They’re usually mounted on either side of the door, about 6 inches from the ground.
2. Check for Alignment: Ensure that they are pointing directly at each other. If they’re misaligned, you can gently adjust them.
3. Clear Any Obstructions: Ensure nothing is in the way—dust, cobwebs, or even plant growth can interfere.
If your sensors are in good shape but the error persists, consider inspecting the wiring and connections.
Examining the Remote Control
Your remote control is like the trusty sidekick to your garage door opener. If it’s not functioning correctly, it can leave you literally stuck outside! Here are some tips to troubleshoot a malfunctioning remote:
1. Check the Battery: This is the most common issue. Replacing old batteries is quick and easy.
2. Re-pairing the Remote: If your remote isn’t working after changing batteries, it may have lost its sync with the opener. Check your manual for specific steps on how to re-pair them.
3. Inspect for Damage: Sometimes, remotes can suffer from drops, which may damage internal components. Look for cracks or broken switches.
Honestly, you might be surprised how often a simple battery change or re-pairing can fix the problem.
Ensuring Proper Limit Settings
Limit settings tell your garage door where to start and stop when opening or closing. Incorrect settings can lead to issues where the door lifts halfway or doesn’t open at all—a bit like setting a coffee maker’s timer wrong.
To adjust your limit settings:
1. Locate the Limit Setting Controls: These are usually found on the back or side of the door opener.
2. Use a Screwdriver: You’ll often need a screwdriver to adjust these settings. Turn the dial or screw to raise or lower the limit.
3. Test the Door: After adjustments, test the door to see if it now opens and closes fully.
Adjusting these settings can help you avoid unnecessary problems down the line.
Inspecting For Damage or Wear and Tear
Sometimes wear and tear are unavoidable, especially if your garage door gets daily use. Imagine wearing your favorite pair of shoes every day; eventually, they’re going to show signs of wear. Look for:
– Frayed Cables: Examine the lift cables closely; frayed cables can lead to significant issues.
– Broken Springs: If your door struggles to lift, it could be the springs. Look for any signs of stretching or visible breaks.
– Damaged Seals or Tracks: Make sure the tracks are clear and free from dents or debris.
Addressing these issues promptly can help you avoid more significant repairs and keep your door functioning smoothly.
When to Call a Professional
If you’ve followed all these troubleshooting steps and still see error codes flashing, it might be time to call in the pros. Working on a garage door can sometimes be more challenging than it seems, like tackling a home repair project you’re not quite qualified for. Signs you should consider professional help include:
– Persistent error codes after troubleshooting.
– Issues beyond basic maintenance, like motor or electronics failures.
– Damage that affects the safety and operation of the door.
While DIY is great for many things, sometimes professional expertise is necessary for a safe resolution.
Documenting Your Troubleshooting Journey
As you troubleshoot, keep track of what you’ve done. Documenting each step can provide a clear history if you eventually need to consult a professional. This way, you won’t be rehashing issues that you’ve already addressed, and it will help ensure all parties are on the same wavelength.
Also, this record can provide a timeline for how long various issues have persisted and can add value if you ever sell your home.
In conclusion, troubleshooting a garage door opener with error codes might feel daunting at first, but breaking it down into manageable steps can help. Remember to observe the signs, take it step-by-step, and reach out for help when necessary. With a little patience and the right approach, you’ll have your garage door opener running smoothly again in no time!