Imagine you’re trying to solve a puzzle with a few missing pieces. You need to figure out what works, what doesn’t, and how everything fits together. In this case, the circuit board is the brain of your Skylink device, connecting everything and enabling smooth operation. Once you know how to test it, you’ll feel empowered to diagnose issues and make necessary adjustments. Let’s dive in!
What is a Skylink Circuit Board?
A Skylink circuit board is essentially the heart of your garage door opener or remote control system. It’s a small, flat piece of material that hosts several electrical components, like resistors, capacitors, and microchips. Think of it like the city’s power grid: without it, everything goes dark, and power can’t reach the places it needs to go.
When you press a button on your Skylink remote, a signal travels through the circuit board to perform the desired action—like opening or closing your garage door. If the circuit board is malfunctioning, that signal might not get through, leaving you frustrated and your garage door stuck.
Understanding how this little board works is crucial for testing it. If you suspect issues with your device, knowing how to evaluate the circuit board could save you from unnecessary repairs or replacements.
Gather the Necessary Tools
Before you start testing the circuit board, let’s make sure you have everything you need. Here’s a short list to prepare you for the task:
- Multimeter: This handy tool measures voltage, current, and resistance. It’s essential for diagnosing electrical issues.
- Screwdriver: You might need a basic screwdriver set to access the circuit board.
- Safety Glasses: Protect your eyes from any potential hazards while working.
- Replacement Parts: If you identify faulty components, having replacements on hand can help you get back on track faster.
With these tools ready, you’ll be well-equipped to dive into testing your Skylink circuit board. Honestly, having the right gear makes a complicated job much easier.
Inspect the Circuit Board Visually
You might be wondering where to start. A good first step is a visual inspection. Sometimes, the problem is right in front of you, like a light bulb that needs replacing. Here are some key things to look for:
– Burn Marks: Look for blackened areas or scorch marks. This could indicate overheating or a short circuit.
– Loose Connections: Check the solder joints. If any appear cracked or broken, it might lead to connectivity issues.
– Damaged Components: Look for any components that look out of place. This includes bulging capacitors or broken resistors.
Taking your time to inspect these details can reveal a lot about the condition of your circuit board. If you notice something suspicious, try to document it. This will help you troubleshoot the issue more effectively later on.
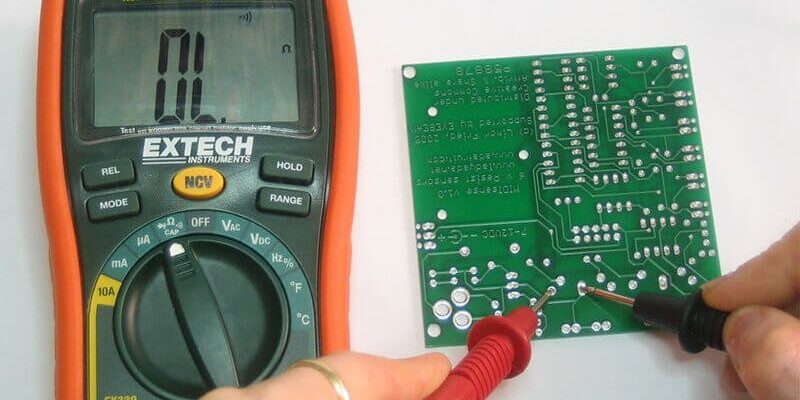
Using a Multimeter to Test Voltage
Once you’re done with a visual inspection, it’s time to bring out the multimeter. Testing voltage is one of the most effective ways to determine if your circuit board is functioning correctly. Here’s how to do it:
1. Set Up the Multimeter: Turn your multimeter to the voltage setting. This could be indicated by a “V” with a straight line.
2. Connect the Probes: Place the black probe on the ground point of the board and the red probe on the power supply’s positive terminal.
3. Take the Reading: Observe the voltage displayed. Compare it with the specifications listed in your user manual.
An abnormal voltage reading can indicate an issue with the power supply or other components on the board. If you’re seeing zero volts where you should read a number, well, that’s a problem.
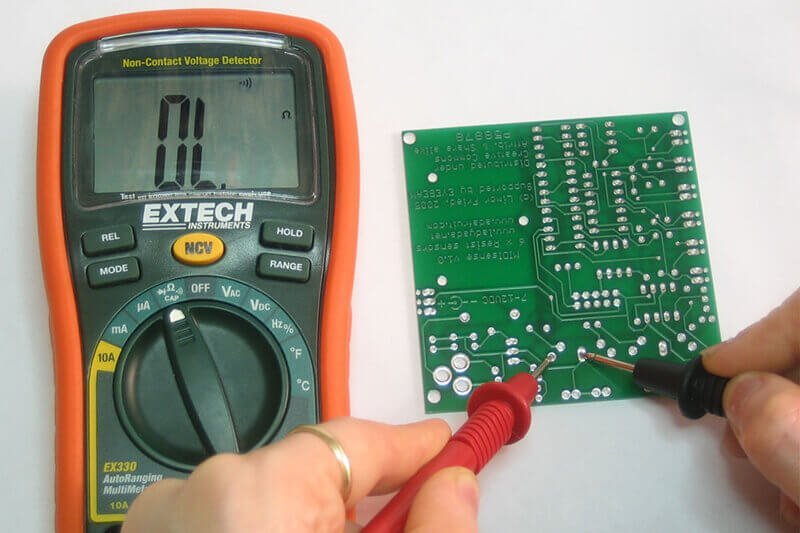
Testing for Continuity
Continuity testing is another important step. This helps you ensure that electricity can flow through the circuit as intended. Follow these steps for an effective continuity test:
1. Turn Off the Power: Always disconnect the device to avoid electric shock.
2. Set the Multimeter: Change the multimeter setting to the continuity mode, which often emits a beeping sound if there’s continuity.
3. Test Points: Place the probes on different points of the circuit board, especially near connections and components.
If your multimeter beeps, congratulations—you’ve got a complete circuit! If not, you probably have a break in the connection somewhere, which might require further inspection or repair.
Resetting Your Skylink Remote
If testing the circuit board has got you worried, fear not! Sometimes, resetting the entire system can do wonders. Thankfully, resetting your Skylink remote is straightforward:
1. Locate the Reset Button: This is usually found inside the battery compartment or on the back of the remote.
2. Press the Reset Button: Use a small object (like a pen) to hold in the button for about 10 seconds.
3. Reprogram the Remote: After the reset, you’ll need to synch it with your garage door system again, which usually involves pressing the “learn” button on the opener followed by hitting the button on your remote.
Resetting can solve many simple issues and might save you from replacing the circuit board in some cases.
When to Contact a Professional
After all your troubleshooting, you might still face issues. Don’t feel discouraged! Sometimes, the best course of action is calling in a professional. Here are a few signs that it’s time to seek help:
– Persistent Problems: If you’ve tried everything and the issue remains, it’s likely something deeper.
– Unfamiliar Components: If you’re unsure about what’s damaged on the circuit board, expert eyes can provide peace of mind.
– Lack of Confidence: If any part of the process feels beyond your skill level, that’s okay! It’s better to get help than to risk further damage.
Remember, not every problem can be solved DIY-style. There’s no shame in reaching out!
Wrapping Up
Testing your Skylink circuit board can feel daunting at first, but breaking it down into steps makes everything more manageable. By gathering the right tools, systematically inspecting the circuit board, and using a multimeter, you can diagnose many common issues. Remember to reset your remote first for minor hiccups before diving deep.
If it still doesn’t work, seeking professional help isn’t a defeat—it’s an intelligent way to ensure the longevity of your garage door system. After all, you want everything to run smoothly and safely, right? Now, with these tips in mind, you can tackle your Skylink circuit board testing with confidence!