Testing your Sears safety sensor is a straightforward process that doesn’t require advanced technical skills. You just need to know what to look for and how to do it. Let me walk you through the steps to ensure your sensors are working like they should. By the end, you’ll have the confidence to troubleshoot any issues that might pop up—and that’s a pretty handy skill to have.
What is a Safety Sensor and Why Does It Matter?
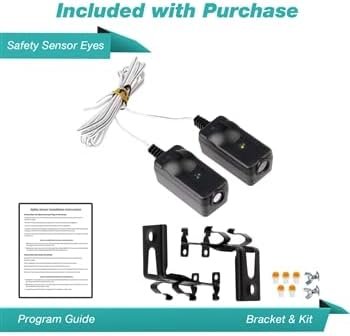
A safety sensor, also known as a photo-eye, is a small device located near the bottom of your garage door tracks. Each sensor pairs with its counterpart—you have one on the left and one on the right. When the garage door is closing, these sensors use an invisible beam of light to communicate with one another. If something interrupts that beam while the door is closing, it will automatically reverse, preventing potential accidents.
Honestly, safety sensors matter because they protect you, your family, and your belongings. Imagine this: you’re running late for work, and the garage door gets stuck because a toy has rolled under it. With working sensors, the door will stop closing and reverse, saving you from a big headache (or worse) later on.
But that’s not all. If your sensors aren’t functioning correctly, the garage door might not open or close as it should, which means a lot of frustration for you. So, maintaining and testing these safety sensors is not just a good idea—it’s a must.
Gathering Your Tools for Testing
Before you dive in, you’ll need a few basic tools. Don’t worry; you probably have most of these at home already! Here’s what to gather:
- Flashlight (to illuminate your sensors if it’s dimly lit)
- Soft cloth (for any cleaning you might need to do)
- Multimeter (if you want to check for electrical connectivity)
- Your Sears remote (because you’ll want to test it with the door)
Having these tools on hand will make your testing much smoother. Honestly, prep work often saves time later on, so let’s get everything together before you start the actual testing!
Visually Inspecting the Safety Sensors
The first step in testing your Sears safety sensor is a simple visual inspection. Start by checking if anything is obstructing the sensors. Look for dirt, debris, or cobwebs—these little nuisances can stop the sensors from working correctly. If you spot any grime, grab that soft cloth and carefully wipe the sensor lens clean.
Next, check if the sensors are aligned properly. You might be surprised to learn that even a slight misalignment can disrupt their functionality. If one sensor is tilted or leaning, gently adjust it until both sensors face each other directly. Honestly, this basic fix solves a lot of sensor issues.
And don’t forget to check the wiring! Look at the wires connected to the sensors. Make sure they’re not frayed, loose, or damaged. If everything looks good, you’re ready for the next step.
Testing the Safety Sensors
Once you’ve visually confirmed that everything seems in order, it’s time to perform a functional test. Start by closing your garage door using the remote. Make sure nobody or any pets are in the way—safety first!
As the door begins to lower, reach out and gently break the beam of light by waving your hand or a small object in front of one of the sensors. If everything is working properly, the door should reverse or stop moving entirely.
Here’s the thing: sometimes you might need to troubleshoot further if the door doesn’t behave as expected. You might want to repeat the test a couple of times to ensure consistent results. If it doesn’t work at all, well, we might need to dive deeper into possible fixes.
Troubleshooting Common Sensor Issues
If your safety sensors aren’t working after performing the above test, don’t panic. Here are a few common problems and solutions to consider:
- Misalignment: As mentioned, the sensors need to be perfectly aligned. If they’re not, a slight adjustment could do the trick.
- Dirty Lens: If dirt is blocking the light beam, you might notice inconsistent performance. Clean them thoroughly and try the test again.
- Wiring Issues: Look for any damaged wires. If they appear frayed, it might be a sign you need to replace them.
- Faulty Sensors: In rare cases, it could be a malfunctioning sensor. If you’ve ruled out everything else, you might need to replace one or both sensors.
Let’s face it; troubleshooting can feel daunting, but remember, each problem has a solution!
Using Your Remote to Test the Safety Sensor
Testing your Sears safety sensor with the remote can yield different insights. After you’ve visually confirmed everything looks good, try operating the door using the remote control.
Once again, allow the door to begin closing. If it halts or reverses when you break the sensor’s beam, you’re in good shape. But if the door continues to close, that indicates a serious problem that requires further investigation.
In some cases, issues with your remote can also mimic sensor failures. So, make sure the remote battery isn’t weak—if you haven’t replaced it in a while, it might be time to do that too. Simply pop in a new battery, and you might find everything works beautifully again.
Wrapping It Up
You’ve just completed a thorough test of your Sears safety sensors, and whether it was straightforward or required a bit of troubleshooting, you now have a better understanding of how they work. Regular checks can keep your garage door functioning safely for years. This small task can save you from larger headaches down the road and keep your family and belongings protected.
Remember, garage door issues often stem from something minor. Whether it’s cleaning the sensors or replacing a battery, being proactive can save you time, energy, and money. So, keep an eye on those sensors, and enjoy a safer garage door experience!