Testing a Raynor wall button isn’t just for those facing issues. Even if everything seems to be working fine, it’s good practice to check that everything’s functioning as it should. Much like you’d inspect smoke detectors at home, making sure your garage door components are in perfect condition is essential for safety and convenience. So, let’s dive into how to effectively test your Raynor wall button.
Understanding the Raynor Wall Button
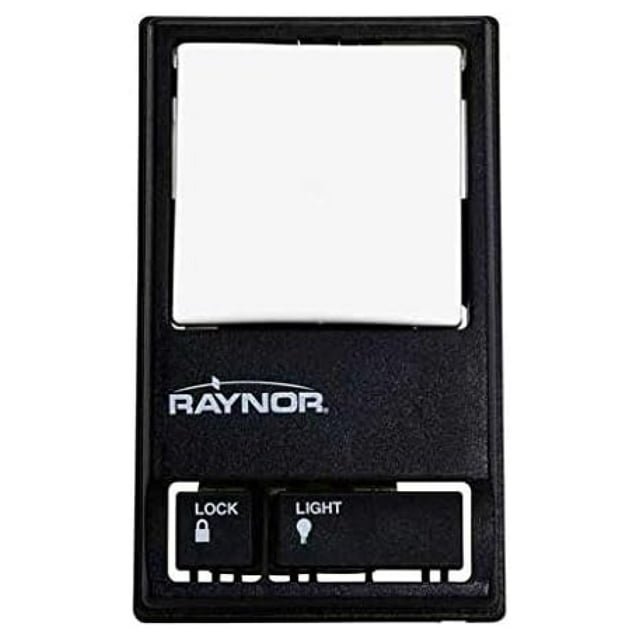
Before we jump into testing the wall button, let’s take a moment to understand what it is. The Raynor wall button is a simple device that sends a signal to your garage door opener, telling it when to open or close the door. Think of it as the command center for your garage door. When you push the button, it’s like sending a text message: “Hey, it’s time to go in or out!”
Typically, these buttons come in a few different styles. You might have a basic push-button model or a more advanced one with additional features like a security code option. Regardless of the model, their function remains the same. If the button isn’t working, your garage door controls might be acting a bit stubborn.
It’s not just about the button itself; the wiring and connections play a crucial role too. Any disruption in the wiring can lead to a situation where your wall button seems unresponsive. It’s like trying to call someone while your phone is out of battery—it’s not the device’s fault but a lack of power that keeps you from communicating!
Gathering Your Tools
Before you begin testing, you’ll need a few basic tools handy. Here’s a quick list to get started:
- Multimeter – This will help you test for voltage and continuity.
- Screwdriver – Depending on your wall button, you might need to unscrew it to access the wiring.
- Replacement Battery – If your button is battery-operated, having a spare on hand can save you time.
Don’t worry if these terms sound a bit technical. A multimeter is just a handy device that measures electrical properties. If you don’t have one, local hardware stores often have affordable options. With these tools ready to go, we can start testing.
Inspecting the Wall Button
Now that you’ve got your tools, let’s begin with a simple visual inspection of the wall button. Start by checking for any obvious signs of wear and tear. Is the button cracked? Are the wires frayed? A damaged button can prevent your system from working correctly.
Next, gently press the button a few times. It should feel responsive and click properly. If it feels loose or doesn’t click at all, that could be a significant indicator of a problem. Keep in mind that dirt or debris can also gather around the button—give it a quick clean if necessary.
There’s a chance that a simple cleaning can restore functionality. A little soap and water might do the trick. Just make sure the button is dry before you attempt to test it again.
Using a Multimeter to Test Voltage
Here’s where the multimeter comes into play. This tool allows you to measure the voltage coming from your wall button. If you’re not familiar with the device, don’t worry—it’s simpler than it sounds.
1. Set your multimeter to the voltage measurement setting.
2. Carefully remove the wall button cover using a screwdriver, exposing the wiring.
3. Touch the multimeter probes to the appropriate terminals on the wall button.
You should expect to see a reading that matches the voltage of your garage opener—typically around 12 to 24 volts. If it’s at zero, then something is definitely amiss. No voltage means your wall button isn’t sending signals to the opener.
If you notice a reading but the garage door isn’t responding, it’s time to dig deeper into the wiring or the opener itself. Sometimes, it’s not the button but the connections that need attention!
Testing Continuity
Sometimes, even if the wall button shows a voltage, issues might still arise with how it communicates with the opener. That’s where testing continuity helps.
Using the same multimeter, switch to the continuity mode:
1. With the wall button still exposed, touch the probes to the two terminals of the button again while pressing the button.
2. If your multimeter beeps or shows a reading, that means the button is functional.
If there’s no continuity, your wall button is likely defective. You can either replace it or attempt to repair it if it’s an option.
Checking the Wiring and Connections
If the button tests fine, it’s prudent to check the wiring connections. Sometimes, it’s a simple loose wire that leads to the hassle. Start by inspecting the wires connected to the button.
1. Look for any signs of damage, such as frays or disconnections.
2. Make sure all connections are tight. Gently tug on the wires to see if anything feels loose.
If you find any issues, carefully reconnect or replace those sections. Be sure to turn off power to the garage door opener before making any changes. Treat this step with care; it’s all about ensuring safety and functionality.
Replacing the Wall Button
If all else fails and your tests indicate the wall button is broken, replacing it is your best bet. Thankfully, purchasing a new Raynor wall button doesn’t have to break the bank. You can find them at local hardware stores or online.
1. Once you have the replacement, turn off power to the garage door opener.
2. Disconnect the old button, carefully noting how it’s wired.
3. Install the new button by connecting the wires to the same terminals as the old one.
After everything is connected, turn the power back on and test the new button. If it works, congratulations! You’ve successfully replaced your wall button.
Why Regular Testing Matters
So, why go through all the effort of testing your Raynor wall button? Regular checks can save you from inconvenient surprises down the road. Just like keeping an eye on your car’s maintenance can prevent breakdowns, testing your garage door components can keep everything running smoothly.
Even if you’re not experiencing problems, consider testing once or twice a year. You wouldn’t wait for a storm to check your roof, would you? It’s about being proactive rather than reactive. Plus, a functioning garage door increases your home’s safety.
By understanding how to test your Raynor wall button, you equip yourself with the knowledge to maintain a vital part of your home. After all, a well-oiled machine runs better, and so does your garage door!
In conclusion, testing your Raynor wall button is not just a task; it’s a skill to keep your garage door smooth and reliable. With the steps detailed above, you can confidently pinpoint issues and make repairs as needed. By keeping everything in check, you can rest easy knowing that every time you press that button, you’re in control.
Originally posted 2025-02-01 03:19:31.
