Raynor is a brand known for its reliable garage door openers and keypads, which help us secure our home’s entryways. If you find yourself struggling with your Raynor keypad or simply want to check if it’s functioning properly, you’re in the right place. Let’s dive into how to test it effectively, so you can have one less thing to worry about.
Understanding Your Raynor Keypad
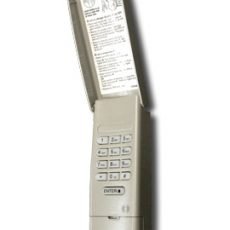
Before we jump into testing, it’s helpful to understand exactly what your Raynor keypad is. At its core, it’s a small device equipped with buttons that send signals to your garage door opener. Think of it like a remote control for your garage door, but instead of sitting in your living room, it’s out in the wild—the great outdoors.
Typically, Raynor keypads are wireless, meaning they communicate with your garage door opener via radio frequency. They require a power source, usually batteries, and can be programmed with a unique code to keep unwanted intruders out. This feature is essential because it not only provides access to your garage but also adds an extra layer of security to your home.
If your keypad isn’t responding, don’t worry—there are straightforward ways to test it and confirm whether it’s functioning properly.
Step 1: Check the Battery
Batteries can be the cause of most keypad issues. Just like your TV remote, if the batteries are dead, nothing happens when you press the buttons. To check, simply find the battery compartment on your Raynor keypad.
Here’s how:
- Open the battery compartment. You might need a small screwdriver for this, depending on your model.
- Take out the old batteries. Check them for any signs of leakage or corrosion. If they look grimy, it’s time to replace them.
- Insert fresh batteries using the correct orientation (look for a + and – sign to guide you).
Once you’ve replaced the batteries, give your keypad another try. If it responds, you’ve solved your problem right there!
Step 2: Test the Programming
If your keypad still isn’t working, it’s possible that it’s not programmed correctly. Raynor keypads can sometimes lose their connection to the garage door opener due to power surges or after changing the batteries. Testing the programming is simple.
Start by checking the user manual for specific programming instructions, as they can vary by model. Typically, you’ll want to do the following:
Follow these steps:
- Locate the “Program” button on your garage door opener unit, usually found on the back or side.
- Press and hold the button until you hear a click or see the indicator light turn on.
- Now, return to the keypad and enter your desired code, followed by pressing the “Enter” button (if your model has one).
If successful, the garage door should respond with a beep, indicating it’s paired and ready to go. If not, you might want to repeat the programming steps or consult the troubleshooting section in your manual for any specific tips.
Step 3: Conduct a Range Test
Sometimes, it isn’t the keypad’s fault—it could be a range issue. If you’re standing too far from the garage door, the signal may not reach it. Conduct a simple range test to see if proximity is the issue.
Here’s what to do:
- Stand outside your garage door, approximately 10–15 feet away.
- Press your assigned code on the keypad, followed by the “Enter” button.
- Watch for any response: does the door begin to open or close? If it does, congratulations! Your keypad works, but you might need to stay relatively close for the best results.
If there’s still no response, try slowly moving closer to the door to see if it activates. If this is successful at a closer distance, you might want to check for any obstructions, like tall plants or walls, that could interfere with the signal.
Troubleshooting Common Issues
Even after testing the battery, reprogramming, and checking the range, you might still encounter problems. Let’s touch on a few common issues and their solutions.
Your keypad could be facing interference from other wireless devices. If you have a lot of electronics around, it’s worth trying to turn them off temporarily to see if that clears things up. Another common issue is factory resets. Sometimes, performing a reset can help return the keypad to its original settings.
Here are some additional troubleshooting tips:
- Inspect the keypad for physical damage. Look for cracks or stuck buttons that may prevent it from functioning.
- Ensure that your garage door opener is powered and operational. If the opener isn’t working, the keypad won’t either.
- If your keypad has an LED indicator, check if it lights up when a button is pressed. A lack of response might indicate it needs replacing.
Considering Replacement Options
If, after all your efforts, the keypad still isn’t functioning, it might be time for a replacement. Thankfully, Raynor produces various models, and finding a new one shouldn’t be a headache. When shopping for a replacement, consider whether you want to stick with a Raynor product or explore universal options that may be compatible.
Here’s a quick comparison:
| Raynor Keypad | Universal Keypad |
| Designed specifically for Raynor systems | Compatible with multiple brands |
| Usually offers more features | Can require more setup time |
| Standard warranty support | Varying levels of support |
Choosing a keypad that suits your needs can save you time and frustration down the line.
Final Thoughts
Testing your Raynor keypad doesn’t have to be a headache—think of it as a troubleshooting adventure! From checking the batteries to adjusting the programming, each step brings you closer to solving any issues. Remember that most problems can be fixed quickly, and if not, you always have great replacement options. Your garage door should be as reliable as your best friend; so don’t hesitate to give your keypad the attention it deserves. With patience and these steps, you’ll ensure smooth operations for years to come!