When you press that button, you expect results: either the door opens smoothly or it indicates there’s something off. In this guide, we’ll dive into how to effectively test your overhead door wall button, using examples from popular remote types and brands like LiftMaster, Chamberlain, and Genie. Get ready to troubleshoot life with your garage door!
Why Test Your Garage Door Wall Button?
Testing your overhead door wall button is crucial for a few reasons. First, it ensures safety. A malfunctioning button could lead to the door not closing when it should, creating potential hazards. Second, it can save you money. If the wall button is faulty, you might think you need a whole new opener when all you need is a simple fix. Lastly, understanding how your garage door operates can give you peace of mind.
A garage door system is more complex than it appears. It involves a wall button, a garage door opener, safety sensors, and sometimes a keypad. Common issues may arise with any part of this mechanism. Regularly testing the wall button helps you stay ahead of these problems, avoiding bigger headaches down the line.
The Tools You’ll Need
Before diving into the testing process, gather a few basic tools and items. You won’t need any fancy gadgets, just the essentials:
- Flathead screwdriver – Useful for updating connections.
- Multimeter – This device measures voltage and continuity.
- Replacement batteries – If using a battery-operated model.
- Cleaning cloth – To wipe away any dirt from the button.
- Owner’s Manual – It’s helpful to keep your manual handy for any brand-specific instructions.
Having these tools ready can streamline the testing process. Think of them as your toolbox; you wouldn’t try to fix a leak without a wrench, right?
Visual Inspection of the Wall Button
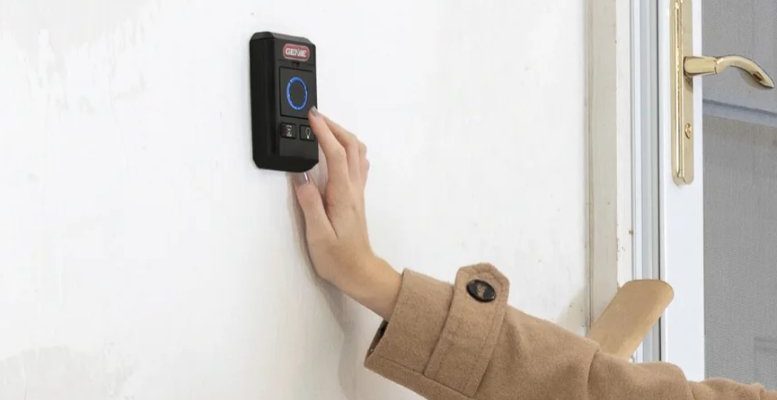
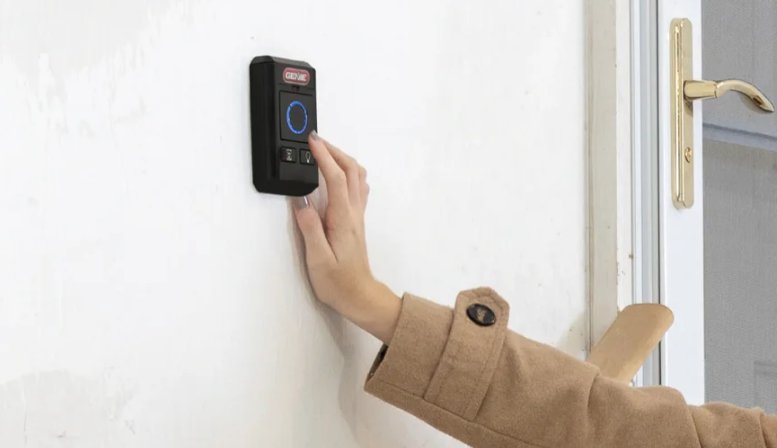
The first step in testing your overhead door wall button is conducting a visual inspection. Start by simply looking at the button itself. Is it damaged, cracked, or covered in grime? Dirt can build up over time, hindering its performance.
Use your cleaning cloth to wipe away any dust or debris. Sometimes, even the smallest amount of gunk can interfere with functionality. Next, check the wiring. If you see any exposed or frayed wires, that’s a red flag.
Once you’ve cleared the area, give the button a push. Does it feel solid under your finger? If it’s stuck or feels flimsy, there might be an internal issue. Remember, the state of the wall button can directly impact how well your garage door operates.
Testing the Button with a Multimeter
Now, let’s get a little technical. If your visual inspection didn’t reveal any obvious problems, you’ll want to test the button’s electrical connections using a multimeter. Here’s how to do it:
1. Turn Off Power: Safety first! Ensure the power to the garage door opener is turned off.
2. Access the Wall Button: Remove the button from its mounting. You might need that flathead screwdriver for this.
3. Set the Multimeter: Turn your multimeter to the resistance (ohms) setting, which is often indicated by a symbol that looks like a horseshoe.
4. Connect the Probes: Touch one probe to each terminal on the wall button.
5. Read the Meter: If the multimeter shows a reading (usually close to zero), the button is functioning properly. If it reads “OL” or infinity, the button may be faulty and requires replacement.
Using a multimeter can feel daunting at first, but it’s a straightforward way to confirm if your wall button is alive and well.
Checking the Opener’s Response
After testing the button, it’s essential to see how well the garage door opener responds to the signals from the wall button. First, turn the power back on and press the button again. If the door moves up or down smoothly, congratulations! Your wall button is working.
However, if there’s no response, try these steps:
– Inspect the Opener: Check for blinking lights on the garage door opener unit. A specific flash pattern can indicate an issue.
– Perform a Power Cycle: Sometimes, simply unplugging and plugging the opener back in can reset the system.
– Consider the Remote: If the remote operates the door perfectly, but the wall button doesn’t, the issue likely lies solely with the wall button.
It’s like playing detective; you’ve got to rule out all the other options before narrowing in on the problem.
Troubleshooting Common Button Issues
Even after testing and inspecting, you might find problems persisting. Here are a few typical issues and their solutions:
– Sticking Button: If the button sticks, it may need a little lubrication or might just need cleaning. If that doesn’t help, it may be time for a replacement.
– Intermittent Functionality: If the button works sometimes but not others, check the wiring and connections again. Loose wires can cause this issue, so ensure all connections are snug.
– No Power at the Button: If the button isn’t receiving power, there may be an electrical issue tied to the wall outlet or the opener’s main power supply.
Remember, troubleshooting is about patience and thoroughness. Understanding these common issues prepares you for any hiccup along the way.
When to Call a Professional
While you’re certainly capable of testing and troubleshooting your overhead door wall button, sometimes it’s best to pass the baton to a professional. If you’ve gone through all these steps and the problem isn’t resolved, a technician can help.
Here’s when to consider getting that extra help:
– Electrical Problems: If you suspect issues with electrical wiring beyond the wall button.
– Opener Malfunctions: When it seems the opener itself isn’t functioning properly, despite the wall button being operational.
– Replacement Complexity: If you are uncertain about how to replace the wall button without causing further issues.
Having professional help can save you time and potential additional repairs. Plus, it can give you peace of mind knowing the job is done correctly.
Testing your overhead door wall button isn’t as scary as it may first appear. With a little patience and the right tools, you can keep this critical part of your garage door system functioning smoothly. Regular checks not only enhance the safety of your door but also save you from larger, costlier issues.
Whether you’re cleaning it, testing with a multimeter, or simply checking its responsiveness, knowing how to troubleshoot issues with the wall button will empower you as a homeowner. Remember to take it step-by-step, and don’t hesitate to call a pro if things get tricky. After all, it’s much more fun to have a functioning garage door than to worry about the little things!