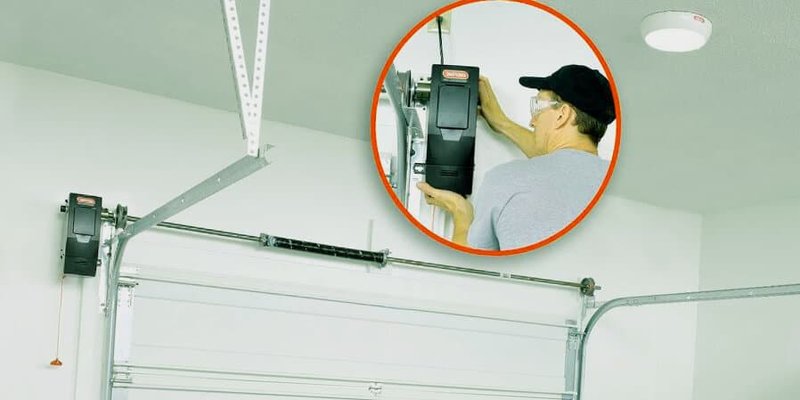
If you’re using a LiftMaster or Genie opener, the control panel is your command center. This small device allows you to open and close your garage door, and sometimes even has extra features like lights or security codes. So, whether you’re troubleshooting a problem or just doing routine maintenance, knowing how to test it is incredibly important. Let’s dive into the nuts and bolts of how this works.
Understanding Your Control Panel
Before you dive into testing, it’s good to know what you’re working with. Most overhead door control panels are pretty straightforward, typically featuring buttons to open and close the door and, in some cases, a keypad for entering codes. You might find a light that illuminates when you press a button, which is usually a good sign that things are working.
Here’s the thing: Familiarize yourself with your specific model. While most panels operate similarly, there can be slight variations based on the brand or model. If you have a manual, it can be a lifesaver for troubleshooting. If not, a quick online search can turn up all sorts of resources on your specific control panel. Take a moment to look it over; trust me, it’ll make the testing process smoother.
Getting Prepared for Testing
Now that you understand your panel, it’s time to prepare for testing. First, ensure that your garage door opener is plugged in and that the outlet is working properly. If you have other devices in the garage, plug them into the same outlet to check for power. If they don’t work either, the issue might be with your outlet rather than the control panel itself.
Next, gather a few tools. You’ll likely need a screwdriver (to access any covers) and your smartphone or a notepad to jot down any notes. If you’re comfortable, it might help to bring a multimeter to test the voltage. Remember to turn off the power when getting into the wiring section (safety first!), and if at any point you feel uncomfortable, reach out to a pro.
Testing the Buttons
Once you’re set up, it’s time to test the buttons on your control panel. Start by pressing the “Open” button. Did the door move? If not, give the button another press. Oftentimes, the connection is just a little off. If you’re noticing no reaction at all, it might suggest something is wrong with the panel or the opener’s motor.
If you get a response, try the “Close” button next. If it works, that’s a great sign! You might be wondering what to do if only one of the buttons works. Sometimes, the issue could be related to how the buttons are wired internally. It’s a good idea to look up schematics for your specific control panel to understand the layout better. If both buttons are unresponsive, you may need to investigate further into the panel’s circuitry.
Checking the Power Supply
Testing the power supply is a critical step. If your control panel is unresponsive, it might not be getting the necessary juice. Check the power cord and ensure there are no visible signs of wear or fraying. A damaged power cord can interrupt the power flow and render your control panel useless.
If everything looks good, you might want to take it a step further. Use a multimeter to check the voltage coming to the control panel. A good battery should read around 12 volts. If you register a significantly lower number, your control panel may not be receiving enough power to function properly.
Resetting the Control Panel
Resetting your control panel is like giving it a quick breather. Sometimes, all it needs is a hard reset to get back on track. To do this, unplug the garage door opener from the power source. Wait about 30 seconds, and then plug it back in. This can often resolve minor glitches that might be causing issues.
After you reset, try testing the buttons again. If they start responding properly, wonderful! If not, there may be a deeper issue at play. You might need to dig deeper into the wiring or internal components.
Pairing a Remote Control
If you have a remote control, now could be a great time to test its connection just to ensure it’s synced properly with the control panel. Begin by pressing the button on the remote to see if it operates the door. If it doesn’t respond, verify that the remote’s battery isn’t dead.
Here’s a little tip: If you need to re-pair the remote, locate the “Learn” button on the back of the garage door opener unit. Press it, and then immediately press the button on your remote. You might see a light flashing; that’s a good sign, indicating that the devices are communicating.
Final Troubleshooting Steps
If you’ve tested everything and your garage door still isn’t responding, it might be time for a little more extensive troubleshooting. Consider checking the wires linked to the control panel for any signs of wear, rust, or loose connections. Even a minor wiring issue can cause big problems.
Don’t hesitate to consult the manufacturer’s manual or website for specific troubleshooting tips related to your model. Many brands provide in-depth solutions for common problems, which can save you time and headaches. If you’re feeling stuck, reaching out to a professional might be your best bet.
Ultimately, testing the overhead door control panel doesn’t have to be a daunting task. With a little patience and the right techniques, you can ensure everything is running smoothly. Remember, regular maintenance not only extends the life of your opener but also gives you peace of mind every time you pull into the garage. Plus, you’ll have a better understanding of your system, making you less reliant on others for repairs in the future!