Maybe you recently installed a new Genie remote, or perhaps you’re just troubleshooting an older model. Either way, understanding how to test the Genie circuit board can save you a lot of time and headaches. In this guide, we’ll break it down step-by-step to ensure you feel equipped to tackle this task confidently and safely.
Understanding the Genie Circuit Board
Before diving into the testing process, let’s spend a moment getting familiar with what we’re dealing with. The Genie circuit board is essentially a compact electronic board that controls the functions of your garage door opener. It’s responsible for interpreting the signals from your remote and executing the corresponding action.
When you press the button on your remote, the circuit board decodes the command and sends power to the motor. If something goes wrong at this stage, like a disconnection or a faulty component, the door might refuse to budge. It’s a bit like trying to communicate with someone who has their headphones on — they can’t hear you until you get their attention!
Gather Your Tools
Before you start testing, you’ll need to make sure you have the right tools on hand. Here’s what you’ll typically need to get started:
- A multimeter to measure voltage and continuity
- A screwdriver to open the casing of the opener
- Safety goggles to protect your eyes
- A notebook to take notes on your findings
Having these tools ready will streamline the process and keep you organized. Remember, safety first! Always ensure your opener is unplugged before you begin any inspection or testing. You wouldn’t want an unexpected buzz while you’re elbow-deep in electronics.
Locating the Circuit Board
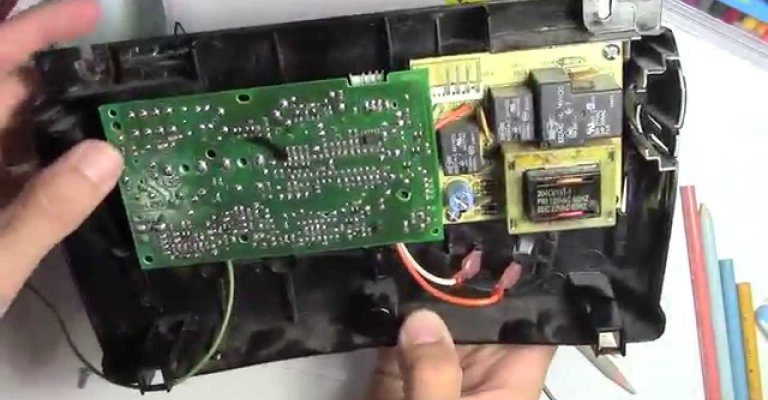
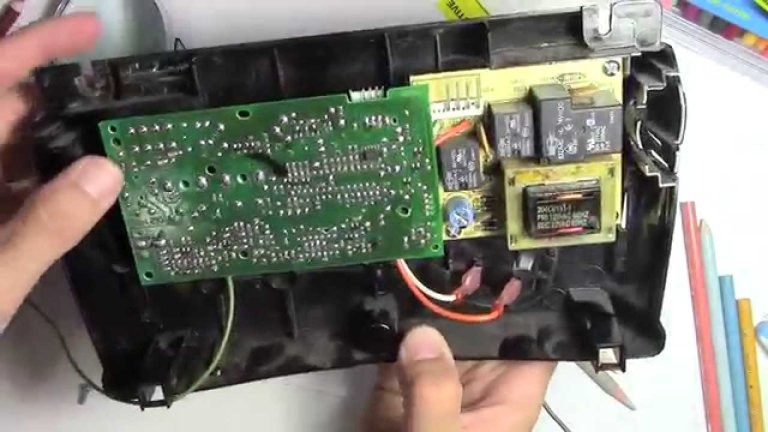
Now that you’re geared up, it’s time to locate the circuit board inside your Genie opener. Most Genie garage door openers have a removable cover, which typically requires just a few screws to detach.
Once you take off the casing, you’ll see the circuit board, usually attached to the back panel. It’s often a shiny green board with various components attached — resistors, capacitors, and those little connectors that look like they’re in a permanent game of Twister.
If you’re unsure where to look, consult your user manual. This sometimes-overlooked resource can be incredibly helpful for identifying the right parts of your opener.
Checking for Damage
With the circuit board in full view, the first thing you should do is perform a visual inspection. Here’s what to look for:
- Burned Components: Any signs of burn marks or melted parts are red flags.
- Loose Connections: Ensure all the wiring is securely connected. If you spot anything loose, that might be the source of your trouble.
- Corrosion: Look out for rust or discoloration that could affect electrical connections.
Taking a closer look at these components can help you identify obvious issues before you even fire up your multimeter.
Using a Multimeter to Test the Board
Once you’ve done a visual inspection, it’s time to get hands-on with your multimeter. If you’re unfamiliar with how to use one, don’t worry—I’ll walk you through it.
1. Set the Multimeter: Start by setting your multimeter to measure voltage. If you’re checking for continuity, change it to the continuity setting.
2. Test Connections: Touch the probes to various points on the circuit board where connections meet. If you hear a beep, that’s a good sign your connection is solid. No beep? You might need to replace that part.
3. Measure Voltage: With the opener plugged in (safety first!), measure the voltage at the input and output of the circuit board. It should match the specifications in your manual.
This process will help you determine if the circuit board is functioning properly or if there’s a fault somewhere in the line.
Common Issues and Fixes
Sometimes, identifying the problem is half the battle. Here are some common issues you might find while testing:
- Poor Remote Communication: If your remote isn’t syncing, you might need to reprogram it. Clear any old codes and try pairing again.
- Unresponsive Circuit Board: If the board shows no signs of life, it might be time to consider replacing it entirely
- Power Surges: Frequent trips can damage the board. Adding a surge protector can help prevent this.
Addressing these issues early can save you money and extend the life of your garage door opener.
When to Replace the Circuit Board
You might be wondering how to know when it’s time to replace the circuit board rather than just fix it. Here are a few indicators:
1. Multiple Issues: If you’ve encountered several problems with various components and repairs haven’t helped, replacement might be your best option.
2. Age of the Opener: If your Genie opener is an older model, a circuit board replacement can sometimes be a more cost-effective solution than fully repairing an outdated system.
3. Frequent Failures: If you find yourself constantly testing and repairing the same problems over and over again, it might not be worth the effort anymore.
Replacing the circuit board might seem daunting, but for many DIY enthusiasts, it can be a straightforward task with the right tools and a little patience.
Testing your Genie circuit board may feel a bit intimidating at first, but once you break it down into manageable steps, it really isn’t so bad! Just remember to take your time during the inspection and testing process, and don’t hesitate to consult resources like your user manual or repair guides along the way.
After your tests, whether you end up making a simple fix or deciding it’s time for a replacement, you’ll walk away with a clear understanding of how your garage door opener works. This knowledge not only empowers you to troubleshoot issues in the future but might also save you from unnecessary repair costs. So roll up those sleeves and dive in—your garage door will thank you!