
Raynor is a popular brand of garage door openers, and their motor units often come with specific resetting methods. If you’re equipped with a Raynor remote, you might be wondering why it’s suddenly acting up. Maybe the door won’t open or close, or perhaps the remote isn’t communicating with the motor. Whatever the reason, resetting the motor unit can often resolve these issues and get things running smoothly again.
Let’s dive into the step-by-step process on how to reset your Raynor motor unit, making it as easy as possible!
Understanding the Raynor Motor Unit
Before we jump into the resetting process, it’s helpful to understand what a Raynor motor unit is. Picture this unit as the brain behind your garage door. It communicates with your remote and controls the door’s movements. Inside, it includes various components such as sensors, a motor, and the control board. Each of these parts needs to work together seamlessly for everything to function correctly.
Imagine your Raynor motor unit as a orchestra. Just like a conductor needs to ensure all the musicians play in harmony, your motor unit must coordinate between the remote and the door. When things go off-key—perhaps because of a power surge, dead battery, or interference—you may find the door acting up. Meeting challenges like these often leads owners to seek the reset.
In many cases, a simple reset will help restore harmony and improve the overall function of your garage door opener. So let’s get into how to perform that reset!
Gather Your Supplies
Starting a reset is much like preparing for a recipe—you need to gather your ingredients first. For this task, here’s what you’ll need:
- Your Raynor remote – This is the key tool you’ll use to perform the reset.
- Access to the motor unit – Make sure you can easily reach the motor, often located in the garage’s ceiling.
- A step ladder (if necessary) – Sometimes, the motor unit can be a bit out of reach.
- Clean cloth – Use this to wipe away any dust or debris.
Having your supplies in order not only helps you work efficiently but also minimizes interruptions during the reset. Once you have everything ready and within reach, you’ll be set to tackle the reset.
Power Down the Unit
Once your supplies are ready, it’s time to move on to the actual reset. First, you need to power down the motor unit. You accomplish this by unplugging it from the electrical socket. Think of this as switching off your computer before you reset it.
Make sure to find the power cord that leads to the motor unit. This can usually be found at the back of the motor itself. If you can’t reach it easily, you might need to climb your step ladder to access it safely. Once you’ve unplugged it, let it rest for at least 30 seconds to clear any lingering memory or instructions stored in the system.
Don’t skip this step! Allowing the unit to fully power down is crucial for a successful reset.
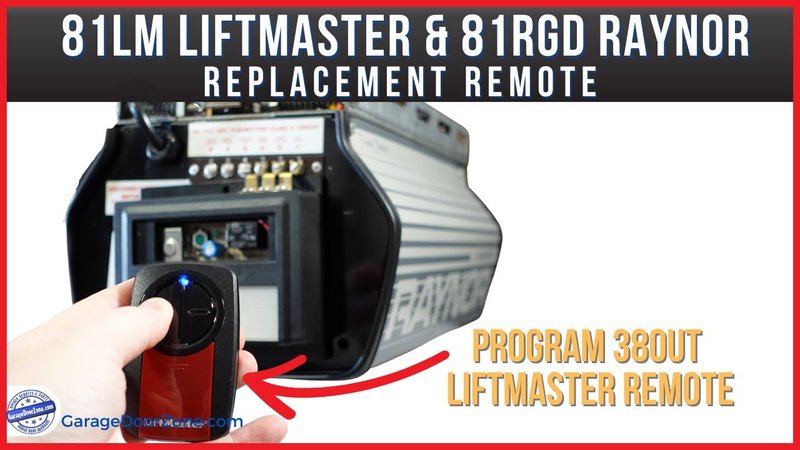
Locate the Reset Button
Next, you’ll want to locate the reset button on your Raynor motor unit. This button is typically red or orange and is often found on the back or side of the unit. Here’s a handy tip: if you’re unsure, look for a small pinhole—sometimes you’ll need a sharp object like a paperclip to press the button.
Feeling unsure about where to find it? Imagine it as a secret door. The reset button is your key to re-establishing communication between the remote and the motor unit. Once you’ve pinpointed it, you’re ready to move forward.
Press the Reset Button
Now it’s time for the important part: pressing the reset button. It’s simple, but here’s how to do it properly.
1. Hold down the reset button for about 10 seconds.
2. While doing this, watch for a light on the motor unit. It may start blinking, which is a good sign that the resetting process has begun.
By pressing the button, you’re telling the motor unit to refresh its connections and forget any previous signals it may have received from your remote. Think of it like wiping the slate clean. After you’ve held the button for the specified time, release it and stand by for the next steps.
Reprogram the Remote
After resetting the motor unit, you’ll need to reprogram the remote to make it work with the newly reset system. This step is essential for ensuring that the communication is re-established smoothly.
Here’s how to do it:
1. Press the “Learn” button on the motor unit. This might also be known as the “Program” button.
2. Once the light on the motor unit begins to blink, quickly press and hold the button you want to program on the remote.
3. You should hear a click or see the light on the motor unit stop blinking and remain steady, indicating that the programming was successful.
It’s a bit like marrying your remote back to the motor unit after a short breakup. With just a few presses, you’ve completed the pairing process once again.
Test the Garage Door
Now that everything has been reset and reprogrammed, it’s time for the moment of truth. Give your garage door a test run!
Standing at a safe distance, press your remote’s button to see if the door opens and closes smoothly. Make sure to watch for any issues that might crop up, such as delayed movements or strange noises. This is your chance to ensure everything is working as it should be. If the door responds well, congratulations—you’ve successfully reset your Raynor motor unit!
However, if you’re still experiencing problems, you may need to check the batteries in your remote or inspect the infrared sensors near the door. They could also be part of the problem if they’re misaligned or blocked.
Common Issues and Solutions
While a reset usually solves the majority of issues, there are a few common problems that can arise. Here are some tips if things still aren’t working:
1. Remote Battery: If the door won’t respond, check your remote’s battery. A fresh battery could make all the difference.
2. Obstacle Sensors: Ensure that the sensors are clean and aligned. If they’re dirty or blocked, the door might not function properly.
3. Power Issues: Confirm that the motor unit is plugged in and receiving power.
By keeping these simple troubleshooting tips in mind, you can often find quick resolutions and avoid unnecessary frustrations.
Wrapping Up the Reset Process
Resetting your Raynor motor unit may seem like a big task, but as you can see, it involves just a few straightforward steps. By understanding the function of your motor unit and following the instructions carefully, you can effectively handle most issues you encounter with your garage door opener.
Whether you find yourself troubleshooting problems or simply maintaining your device, feeling confident in your ability to reset your motor unit is vital. When your garage door runs smoothly, it saves you time, frustration, and can even enhance your home’s security. So next time you face a hiccup with your Raynor motor unit, remember that a reset might just be the quick fix you need!