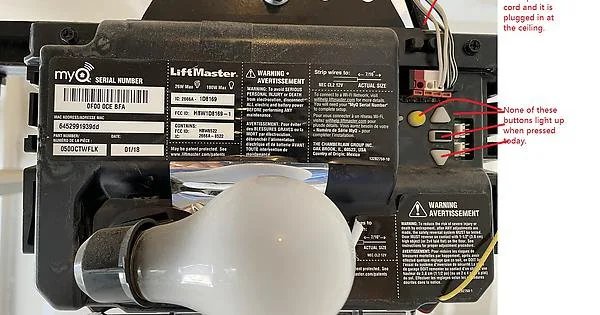
Resetting this device might sound technical, but I promise it’s easier than it sounds—like fixing a Wi-Fi issue by just restarting the router. Just like you might need to clear your browser’s cache or restart your phone now and then, your Smart Hub might need a little refresh too. Let’s walk through how to reset it step by step so you can get back to enjoying seamless control of your garage.
Why Resetting Your LiftMaster Smart Hub is Important
Resetting your smart hub can resolve a variety of issues. You might find that the connection drops or that the hub fails to pair with your devices. Just like your smartphone will act glitchy if it hasn’t been updated, your Smart Hub might need a reset now and then to ensure it operates smoothly. This action clears out any minor bugs or interruptions in the service.
When you reset the hub, it goes back to its factory settings. This means it will disconnect from all devices and the Wi-Fi network. While this might sound a bit drastic, it’s crucial for restoring proper function. If you are experiencing constant connectivity issues, resetting could make a world of difference.
Preparing for the Reset
Before diving into the reset process, there are a few things you need to check. First, make sure you have all the necessary tools and information handy. Here are some quick prep tips:
- Check your Wi-Fi connection: Ensure your Wi-Fi is working properly.
- Have your LiftMaster app ready: Make sure it’s updated.
- Keep the Smart Hub handy: You’ll want to be close to it during this process.
Having these items ready will make the process smoother. It’s like prepping your workspace before starting a project. The more organized you are, the easier everything will be.
How to Perform the Reset
Now comes the fun part—performing the reset! Follow these steps closely for the best chance of success:
1. Locate the Reset Button: The reset button is usually on the back of the Smart Hub. Grab a small tool like a paperclip for easy access.
2. Press the Reset Button: With the Smart Hub plugged in, press and hold the reset button. Hold it for about 10 seconds or until the indicator lights flash—this indicates that it’s resetting.
3. Wait for a Complete Reset: After releasing, the hub will go through its reset process. This can take a minute or so. You’ll know it’s done when the lights settle into their normal blinking pattern.
4. Reconnect to Wi-Fi: After the reset, you’ll need to reconnect the Smart Hub to your home Wi-Fi network through the LiftMaster app.
Each of these steps is important, so take your time and double-check that everything is set up correctly before moving on.
Reconnecting to Your Devices
Once your Smart Hub has been reset, the next step is to reconnect it to your devices. Here’s how you do it:
1. Open the LiftMaster App: If you haven’t already, download it from your app store.
2. Create a New Account or Log In: If you’ve set up an account previously, log in. If not, you’ll need to create an account.
3. Select ‘Add Device’: In the app, look for an option like ‘Add Device’ or ‘Set Up New Device.’
4. Follow the Prompts: The app will guide you through connecting your Smart Hub to your Wi-Fi. Make sure your phone is connected to the same Wi-Fi network.
This step can feel a bit tedious, but it’s key to restoring communication between your Smart Hub and app.
Troubleshooting Common Issues
Sometimes, even after a reset, you might run into hiccups. Here are a few troubleshooting tips if you’re still having trouble:
– Double-check the Wi-Fi password: Ensure the password is correct; even a small typo can prevent the Smart Hub from connecting.
– Relocate the Hub: If the Wi-Fi signal isn’t strong in the area where your Smart Hub is located, try moving it closer to your router.
– Power Cycle: If the reset didn’t do the trick, try unplugging the hub for a minute and then plug it back in. This can sometimes clear up remaining issues.
If you catch yourself feeling frustrated, take a deep breath—technical issues happen to everyone. Just give it time and revisit the troubleshooting steps.
Alternative Reset Methods
While the reset method I explained is usually effective, there are other approaches. If you’re comfortable, you can try these alternatives:
– Factory Reset via App: Some LiftMasters allow you to reset through the app itself. Check your device settings to see if this option exists.
– Use the Remote: If your Smart Hub has an associated remote, check the user manual for reset instructions specific to your model.
These alternative methods can sometimes be quicker and easier, depending on your comfort level with technology.
Final Thoughts
Resetting your LiftMaster Smart Hub isn’t just about troubleshooting; it’s about ensuring you have reliable control over your garage door system. A reset may seem simple, but it can resolve many frustrating issues that pop up. By following these steps, you’ll not only regain control but also deepen your understanding of your Smart Hub’s functionality.
Remember, technology can sometimes feel counterintuitive, but with patience and practice, you can navigate these little bumps in the road. If you have any lingering questions or concerns about resetting your system, don’t hesitate to reach out to LiftMaster’s support team for assistance. Happy resetting!