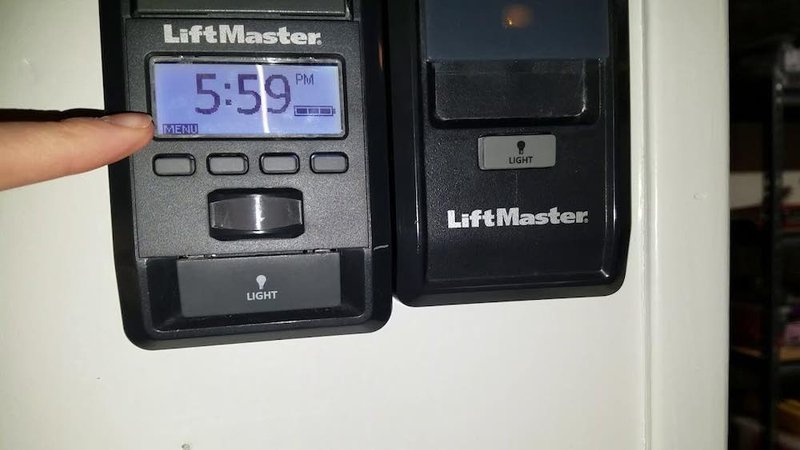
Liftmaster is a popular brand, known for its reliable and user-friendly garage door openers. However, even the best gadgets have their off days. Resetting the control panel is a straightforward process, but if you’ve never done it before, it might feel a bit daunting. Don’t worry! I’m here to walk you through each step, so you can get back to using your garage without a hitch.
Why You Might Need to Reset Your Control Panel
Understanding why you might need to reset your Liftmaster control panel is the first step. There are a few common scenarios that can trigger the need for a reset.
First, let’s talk about smart technology. Your Liftmaster garage door opener may be integrated with smart home devices, meaning it relies on consistent communication between the devices and the central system. If things are out of sync—perhaps after a power outage—you might notice the remote isn’t working. A reset could re-establish that connection.
Another scenario is when you change the batteries in your remote. Sometimes, after replacing the batteries, the remote’s code isn’t recognized by the opener. This is an easy fix with a simple reset, which allows you to re-pair the remote seamlessly.
Lastly, if your garage door opener behaves erratically, perhaps opening or closing without command, a reset might just be what you need. This is your garage door’s way of telling you it’s time for a little refresh.
Gathering Your Tools
Before you dive in, let’s make sure you have everything you need. Setting yourself up properly makes the process smoother and less stressful. Here’s what you’ll need:
- Your Liftmaster garage door opener: Make sure you know the model number, just in case you need to look up specific instructions or troubleshooting tips.
- A working remote: If you’ve recently changed its battery, ensure it’s functional. You’ll want to test it right after the reset.
- Step ladder: If you need to reach the unit mounted on the ceiling, having a sturdy ladder will keep you safe and sound.
- Workspace: Clear some space around the control panel so you can work without distraction.
Having everything set up beforehand means you won’t be rushing around mid-process, which can lead to mistakes. Trust me, it’s less stressful to take a moment to prepare.
Steps to Reset the Liftmaster Control Panel
Now that you’re ready, let’s walk through the step-by-step process of resetting your Liftmaster control panel. Grab your remote, and let’s get to it!
Step 1: Locate the “Learn” Button
Start by finding the “Learn” button on the control panel. It’s usually a colored button (either yellow, red, green, or purple) located near the antenna wire on the back or side of the unit. Once you spot it, you’re a step closer to getting your garage door functioning correctly.
Step 2: Press and Hold
Next, press and hold the “Learn” button for about 10 seconds. You should see a light on the control panel blink or stay lit. This indicates that the system is in reset mode. If you see the light go out, it means you’ve successfully cleared the memory.
Step 3: Re-Pair Your Remote
After resetting, you’ll need to re-pair your remote with the control panel. To do this, press the “Learn” button again—it should light up. Within 30 seconds, press any button on your remote. If done correctly, you’ll see the light blink on the control panel again, confirming that the remote is now synced.
Troubleshooting Common Reset Issues
Sometimes, resets don’t go as planned. Here are a few common issues you might encounter and how to resolve them:
- Remote Not Pairing: If your remote isn’t syncing after following the reset steps, try replacing the batteries again. Old batteries can lead to poor performance.
- Light Blinking Issue: If the control panel’s light is blinking even after holding the “Learn” button, it could indicate a different problem. Check for any obstructions in the door’s path or ensure the antenna isn’t damaged.
- Power Issues: If nothing seems to respond, check if the opener is getting power. Sometimes, a tripped breaker or blown fuse is to blame.
Don’t hesitate to consult the manual for your specific Liftmaster model if you run into unexpected problems. Each model might have unique quirks.
When to Call for Help
If you’ve gone through the process and still can’t get your Liftmaster to collaborate with your remote, it might be time to reach out for professional help. There’s no shame in asking for assistance—sometimes, the issues are more complex than a simple reset can fix.
Consider calling a garage door technician if you notice:
– Consistent malfunctioning despite resets.
– Unusual sounds when operating the door.
– Visible damage to the motor or remotes.
Taking action now can prevent bigger headaches later.
Resetting your Liftmaster control panel doesn’t have to be overwhelming. With a few simple steps, you can restore the connection between your garage door opener and its remote. Remember, having the right tools ready and understanding the process can make a world of difference.
Follow these instructions at your own pace, and don’t hesitate to ask for help if needed. Garage doors are part of our lives, making it important to keep them running smoothly—after all, nobody wants to struggle with a garage that won’t budge when it’s pouring rain or bitter cold outside. Now, get ready to enjoy that seamless access to your garage again!
