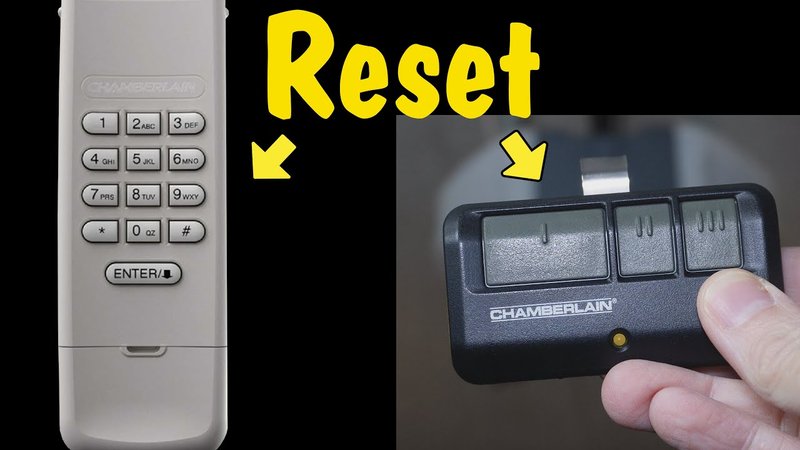
Think of it like a computer that needs a little reboot; a reset can revive it from minor glitches. Resetting your Craftsman control panel can often fix issues without the need for complicated troubleshooting or service calls. The process is simpler than most people imagine, and you might just need a few common tools and a sprinkle of patience. Let me break down how to get your garage door back on track without breaking a sweat.
Why Resetting Your Craftsman Control Panel Matters
You might be wondering why resetting is necessary in the first place. There are a few reasons. For starters, your Craftsman garage door opener control panel manages both the remote and the door’s functions. Over time, it can become confused or unresponsive due to electrical interference, a dead battery in the remote, or even power surges. A reset clears these issues and helps restore communication between the panel and the door.
Additionally, if you’ve changed batteries in your remote or added a new one, resetting the control panel allows you to sync up everything neatly. This is particularly useful for multi-car households where garage doors can sometimes feel like they’re trying to control a traffic jam. A quick reset prevents hiccups and misunderstandings, ensuring your door opens smoothly when you need it.
Lastly, you might encounter scenarios where your garage door opener seems to work fine one moment and be unresponsive the next. It can be confusing! But don’t worry; a reset is often all it takes to get things working again.
Gathering Your Tools and Materials
Before diving into the reset, let’s make sure you’ve got everything you need. You won’t require much, but a little preparation goes a long way.
- Flathead screwdriver: Some Craftsman models require you to pry open the panel for access.
- Replacement batteries: If your remote is involved in this process, you may need fresh batteries.
- Instruction manual: Your model’s manual can provide specific details you might need.
- Soft cloth: For cleaning the panel and its components.
Having these tools at your side can streamline the process and help you avoid unnecessary trips to find the right gadget.
Steps to Reset Your Craftsman Control Panel
Now that you’re geared up, let’s dive into the steps. They’re pretty straightforward. Here’s what to do:
1. Power Down the Opener: Unplug the garage door opener from the outlet. This is to ensure a complete power reset. If it’s hardwired, just flip the circuit breaker that supplies power to it.
2. Wait a Minute: It’s like letting your tech take a breather. Wait for around 60 seconds before plugging it back in. This allows the system to clear out any glitches or held memory codes.
3. Replug It In: Plug the garage door opener back into the outlet.
4. Test the Control Panel: Look for signs that the panel is responding. You should see lights flashing or hear a beep, meaning it’s alive and kicking again.
Remember, this step is essential to ensuring that all previous signals are wiped clean before you set up new ones.
How to Reprogram Your Remote
After you reset the control panel, your remote may need to be reprogrammed. This is where things get a little hands-on. Don’t worry; it’s simpler than you might think.
1. Locate the Learn Button: Find the red “Learn” button on your Craftsman garage door motor. This button is essential for syncing the remote.
2. Press the Learn Button: Press and release the learn button. You should notice a light blinking or staying on.
3. Press the Remote Button: Within 30 seconds, press the button on your remote that you want to program. The light on the opener should blink or turn off, indicating a successful sync.
4. Check the Functionality: Finally, test the remote by pressing the button again. If it works, congratulations! If not, repeat the process.
This step ensures that your control panel and remote are communicating effectively, reducing future hiccups.
Troubleshooting Common Issues
Sometimes, even after resetting, little gremlins can still haunt your garage door opener. If you find it isn’t working as expected, consider these troubleshooting tips:
– Check the Power Source: Ensure that you’ve plugged the opener back in and that the outlet is functional. A non-responsive door could simply be a power issue.
– Inspect the Remote Batteries: It might sound silly, but dead batteries can easily lead to remote failure. Make sure to replace them and check if that resolves the issue.
– Look for Blocked Sensors: Make sure that the safety sensors at the bottom of the garage door tracks are not blocked by dirt or debris, as this could prevent the door from opening.
– Recheck Syncing: If syncing was unsuccessful, retry the programming steps from above.
Following these troubleshooting tactics often helps clarify what’s gone wrong, allowing you to pinpoint the issue without calling in a professional.
Resetting your Craftsman control panel isn’t just about getting your garage door moving again; it’s about maintaining a smooth-running household. Whether it’s for your safety, convenience, or peace of mind, knowing how to reset your garage door opener gives you control over something that can otherwise feel frustrating.
Next time you face hiccups, remember the steps we’ve covered. With a little patience and the right tools, you can tackle almost any garage door issue at home. It’s like being your own handyman—where every reset brings a little bit of mastery. Happy resetting!
