Now, let’s dig into how to tackle this process. The wall button for Sears garage door openers is designed with user-friendliness in mind. Even if you’re not the most tech-savvy person, you can follow some simple steps to reprogram it. In this guide, we’ll walk through the process together, ensuring you’re confident and well-prepared to get back to opening your garage door effortlessly.
Understanding Your Sears Garage Door System
Before we jump into the reprogramming steps, it’s crucial to understand how your Sears garage door system operates. At its core, your garage door opener is a motorized device that opens and closes your garage door when prompted by a signal. The wall button acts as a hardwired control that sends that signal.
If your wall button stops working, it could be due to various reasons, such as a drained battery if it’s wireless or a disruption in programming caused by a new opener. Recognizing these potential issues can save you time before you begin troubleshooting. Now, let’s clarify what that means when we say “reprogramming.” Reprogramming is the process of pairing the wall button back with the garage door opener, similar to how you re-sync your Bluetooth devices when they lose connection.
Gathering Your Tools
Before diving into reprogramming, it’s essential to have the right tools on hand to simplify the process. You won’t need a toolbox full of equipment; just a few basics will do. Here’s what to prepare:
- A small flathead screwdriver – Often used to detach the wall button if it’s still mounted.
- Your garage door opener remote – We’ll be using it for the programming process.
- A stool or ladder – If your wall button is mounted high, you’ll need to reach it safely.
- A friend – Not required, but having someone nearby can be helpful for testing.
By organizing these items ahead of time, you’ll make the reprogramming process much smoother. Think of it like getting the ingredients ready before cooking a meal; it just makes everything easier!
How to Reset the Wall Button
Resetting your Sears wall button is the first step to reprogramming it. Here’s a simple way to do this:
1. Disconnect Power: If your Sears system has a power unit, unplug it from the outlet. This is akin to hitting the pause button on a movie before you switch scenes.
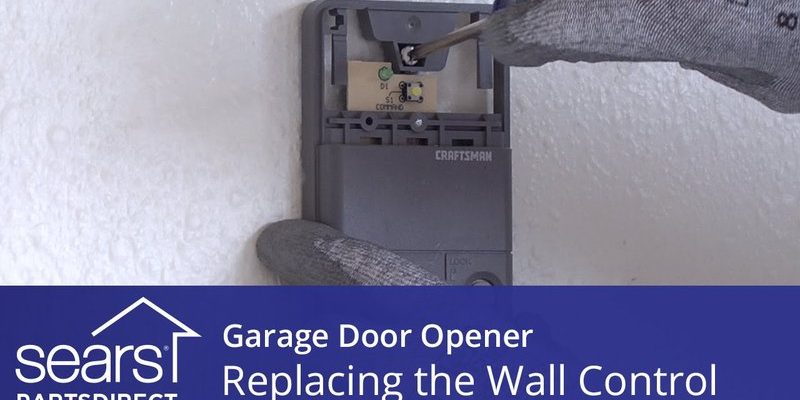
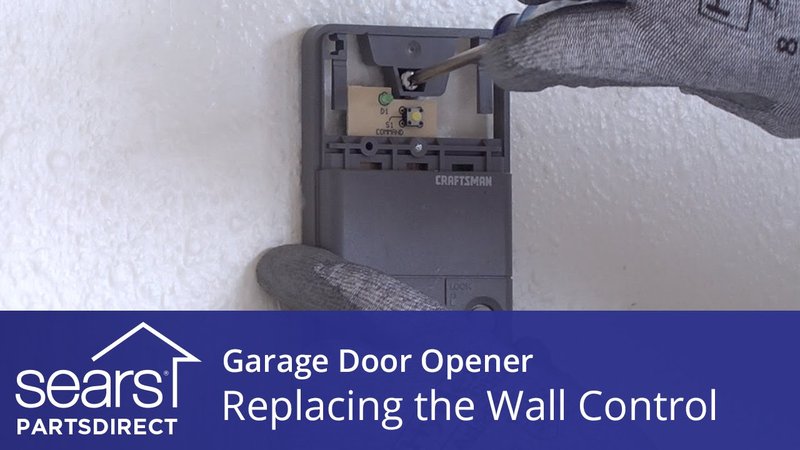
2. Remove the Wall Button Cover: Use the flathead screwdriver to gently pry off the cover of the wall button. Be careful not to damage it—think of it as unboxing a new gadget.
3. Locate the Reset Button: Most Sears wall buttons feature a small reset button on the back. Press and hold this button for about 10 seconds. This action can help in clearing any old codes that might hinder the reprogramming.
Now that you have reset the wall button, let’s move on to pairing it back with the garage door opener.
Programming the Wall Button
With the wall button reset, you’re ready to program it. Here’s how to go about it step by step:
1. Power Up the Garage Door Opener: Plug the garage door opener back in. When powered on, listen for the light flashes indicating it’s ready to accept new codes.
2. Press the Learn Button: Find the “Learn” button on the garage door opener unit. This button is typically on the back or side, near where the power source is connected. Press this button and hold it until the indicator light turns on.
3. Activate the Wall Button: Within 30 seconds of pressing the Learn button, press the wall button you just reset. You should see the lights on the opener blink, indicating that the reprogramming was successful.
This step is like connecting your new smartphone with a wireless network. It’s essential for establishing communication.
Testing the Setup
Once you’ve programmed the wall button, it’s time to test whether everything is working correctly. Here’s how you can do it:
– Stand Clear: Ensure that nothing is blocking the garage door’s path. Safety first!
– Press the Wall Button: Hit the button you just programmed. If the door opens or closes as expected, congratulations! You’ve successfully reprogrammed your Sears wall button.
However, if it doesn’t work, don’t worry. Let’s troubleshoot a few common issues you might encounter.
Troubleshooting Common Issues
Sometimes, things don’t go according to plan. If your wall button isn’t functioning after reprogramming, consider these troubleshooting tips:
– Check the Power Supply: Is the opener plugged in? Sometimes it’s as simple as ensuring it has power.
– Inspect the Wiring: If your wall button is hardwired, double-check all connections to make sure they’re secure.
– Battery Check: If you’re using a wireless button, ensure fresh batteries are installed. Old batteries can cut off communication altogether.
If all else fails, consulting the user manual or reaching out to Sears customer support can guide you further. It’s akin to calling a friend when you’re stuck in a game!
Maintaining Your Garage Door Opener
After successfully reprogramming, it’s essential to keep your garage door opener and wall button in good shape. Here are a few maintenance tips:
– Keep It Clean: Dust and dirt can clog the mechanics. Wipe down the surface of the opener and wall button regularly.
– Test the Safety Features: Make it a habit to test your safety sensors. Ensure they work by placing an object in the door’s path when it’s closing. If it stops, that’s a great sign the safety features are working.
– Regular Inspections: Check the batteries in the wall button and remote every few months to avoid sudden hiccups.
These habits help ensure that your system runs smoothly, making your life easier in the long run.
Final Thoughts
Reprogramming your Sears wall button doesn’t have to be intimidating. With a little patience and the steps outlined above, you can get your garage door system running smoothly once again. Remember, the wall button is there to make your life easier, much like that friendly doorman we talked about earlier. Following this guide not only helps in troubleshooting but also ensures that you’re ready for any future issues.
So, take a deep breath, gather your tools, and enjoy the satisfaction of a job well done. You’ve got this!