Sears keypads, often built for their garage door openers, are pretty user-friendly. Like a trusty sidekick, they help you get in and out of your garage without having to fumble for your opener—especially handy when your hands are full. Plus, changing the code can give you peace of mind, especially if you feel your existing code might have become less secure. In this guide, I’ll walk you through the simple steps to reprogram your Sears keypad so that you can get back to your day with confidence.
Understanding Your Sears Keypad
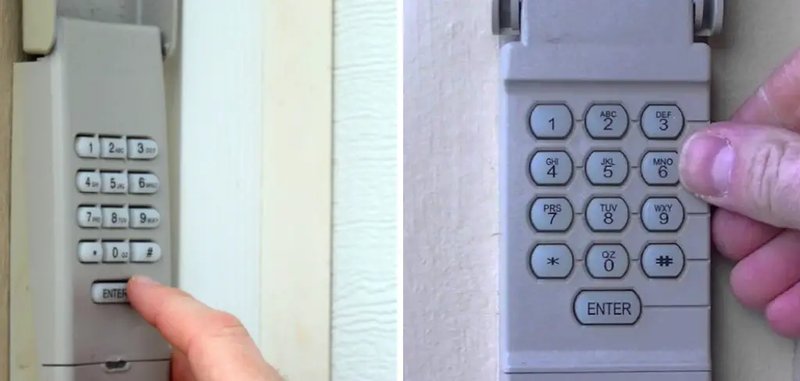
Before diving into the reprogramming process, it’s wise to familiarize yourself with the functional aspects of your Sears keypad. This unit typically consists of a numerical keypad, a few functional buttons, and often a small LED display. Think of it as more than just a set of buttons; it’s the gateway for your garage door to open and close at your command.
When you press those buttons, signals are relayed to the garage door opener, triggering the mechanism to move. If your Sears keypad is unresponsive, you might be dealing with battery issues or a need for reprogramming. Always check that you have fresh batteries installed, as low power can impact performance.
Most Sears keypads can operate without requiring additional equipment, making them a convenient choice for modern households. Just remember, knowing your keypad is key to troubleshooting common issues.
What You’ll Need for Reprogramming
Before starting the actual reprogramming process, gather a few essential items. Having everything on hand means you can focus on the task without interruptions.
- Your Garage Door Opener’s Manual: This will have specific instructions regarding your model and any unique codes you may need.
- A Pen and Paper: To write down the new code or any temporarily set codes during the process.
- New Keypad Code: Think of a secure code and remember it! Using a combination of numbers that are easy for you to remember but hard for others to guess is essential.
- Fresh Batteries: It’s always good to replace the batteries before starting, just to eliminate any potential power issues.
With these items on hand, you’ll be fully prepared to navigate the programming process without unnecessary hiccups.
Steps to Reprogram Your Sears Keypad
Now that you’ve got everything you need, let’s get to the meat of this task. Following these steps will help you effectively reprogram your Sears keypad. Take a deep breath, and let’s get to it!
1. Locate Your ‘Learn’ Button: Start by heading to your garage door opener unit. Look for a button often labeled as “Learn,” “Program,” or even just a small colored button. This is usually positioned on the back or side of the unit.
2. Press the Learn Button: When you’ve located it, press this button until the LED light next to it turns on. Some models might require you to hold this button for a few seconds to trigger the activation.
3. Input Your New Code on the Keypad: Head over to the keypad. Enter a new 4-digit code that you’d like to set. If you’re using the keypad for the first time, you may have to follow with the “Enter” button or another specific key as instructed in the manual.
4. Finalize the Process: After entering the new code, return to the opener and press the Learn button again to save your settings. Watch for the LED light to flash or turn off. This usually means the new code has been successfully programmed.
5. Test the New Code: It’s time for that pivotal moment! Go back to your keypad and enter the new code. The door should respond by opening or closing. If it doesn’t, don’t panic! You may need to repeat these steps, ensuring you followed each part precisely.
It’s not as tough as it sounds, right? With patience and careful attention, you’ll have your Sears keypad reprogrammed in no time!
Troubleshooting Common Problems
Just like with any technology, things can go awry. It’s important to know common issues that may arise during the reprogramming process and how to fix them.
One frequent problem is *non-responsiveness*. If your keypad isn’t responding even after changing the batteries, it might require resetting or may not be paired correctly. Always ensure that you’ve successfully completed your programming steps.
Another common hiccup is entering an *incorrect code*. If you can’t seem to get it right after several tries, double-check that you didn’t accidentally hit an extra button or that you’re simply entering the code correctly.
Lastly, if the keypad works intermittently, you might have a battery or connection issue. Make sure that all wires are intact and that the keypad is securely attached.
Alternative Options if Reprogramming Fails
If you’ve gone through the programming process and still find yourself at a loss, all is not lost! Consider some alternative options:
1. Consult the User Manual: Your garage door opener and keypad manual will often contain specific information and troubleshooting tips tailored to your model.
2. Contact Customer Support: Sears has customer support available, and they can guide you through further troubleshooting steps.
3. Consider Universal Keypads: If you’ve tried everything and your Sears keypad still won’t cooperate, consider getting a universal keypad compatible with your garage door. These can often be programmed to work with various brands, including Sears.
In these cases, adding a new keypad could save you time and frustration.
Securing Your New Code
Once you’ve managed to program your Sears keypad successfully, it’s crucial to keep your new code secure. Just as you might not share your Netflix password with everyone, think of your garage code similarly. It’s one of the first lines of defense for your home.
Make it unique—try not to use easily guessable numbers like your birthday or house number. Instead, consider memorable sequences that only you would know. This way, you can maintain a layer of security for your garage and home.
Lastly, it’s a good idea to review and change your keypad code periodically, especially if you’ve had any recent visitors or workers in your home.
Reprogramming your Sears keypad doesn’t have to feel daunting. With a few steps, a little patience, and the right tools, you can ensure your home remains safe and secure. Each step you’ve learned is a small victory, and when it’s completed, think of it as a newfound skill. Confidence in handling your tech makes everyday life easier, right?
If you encounter any bumps along the way, simply refer back to this guide. Soon enough, you’ll be a pro at navigating your Sears keypad like a seasoned veteran. Happy reprogramming!