Most overhead door systems have a circuit board that controls this communication. So, if your garage door isn’t responding to your remote, it might be time to dive into the world of reprogramming. Brands like Chamberlain and LiftMaster often have similar processes, but we’ll cover the basics that apply across a range of systems. Grab your remote, and let’s get into the details.
Understanding Your Overhead Door System
Before getting your hands dirty, it’s good to know what you’re dealing with. An overhead door system consists of various components: the door itself, the opener, the remote control, and crucially, the circuit board. This board is like the brain of your garage door opener—it’s what processes the signals that come from your remote control to raise and lower your door.
The circuit board works with specific codes, which are unique signals that help ensure your remote communicates only with your door. If you’ve got a new remote or the original one seems to be malfunctioning, it might need reprogramming to redo those codes. It’s a simple, but necessary step—much like resetting your Wi-Fi router when Internet connectivity goes haywire.
Gathering the Right Tools
You don’t need a toolkit that looks like it’s from a DIY show on TV to reprogram your overhead door circuit board, but having a few essentials on hand can make the process smoother. Here’s what you’ll need:
- Remote Control: This is your primary tool for reprogramming. Make sure your batteries are fresh!
- Screwdriver: Depending on your garage door model, you might need a Phillips or flathead screwdriver to access the circuit board.
- Owner’s Manual: If you’ve got it handy, this will have specific instructions based on your brand and model.
- Step Ladder: For those hard-to-reach circuit board locations, a ladder can be a lifesaver.
Having everything organized beforehand will help save time and prevent missteps as you work your way through the process.
Preparing to Reprogram
Before you start poking around the circuit board, it’s smart to prepare the area and ensure safety first. Start by turning off the power to your garage door opener to prevent any accidental activations. You don’t want your door closing unexpectedly while you’re in the middle of troubleshooting.
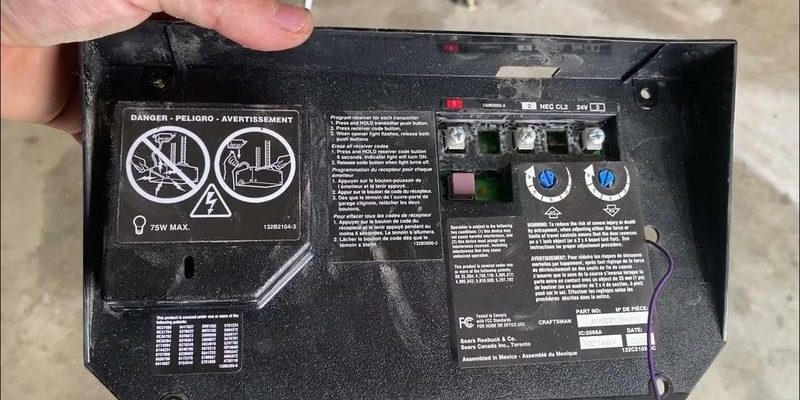
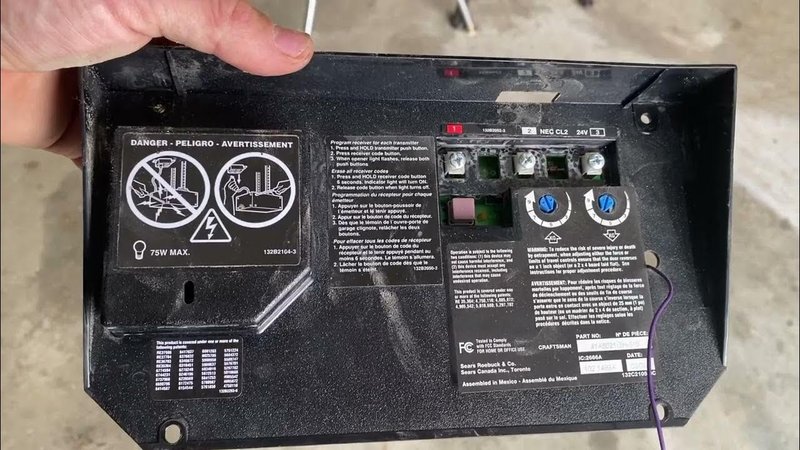
Next, locate the circuit board, which is often found near the motor unit of the opener. Gently remove any panel or cover that’s obstructing access. It’s a bit like peeling away the layers of an onion, revealing what you really need to work with underneath.
You might be wondering why it’s important to reprogram the board. Well, reprogramming essentially refreshes how your remote communicates with the opener. It’s a simple troubleshooting step that often resolves issues with non-functioning remotes.
Steps to Reprogram the Circuit Board
Now we’re getting to the meat of the process. Here’s a step-by-step guide on how to reprogram your overhead door circuit board:
1. Access the Circuit Board: Remove the cover carefully with your screwdriver. Be gentle; you don’t want to damage the panel.
2. Locate the Learn Button: Look for a button labeled “Learn” or “Program” on the circuit board. This is usually a small, round button, sometimes colored yellow or red. The exact location may vary by brand.
3. Press the Learn Button: Press and release the Learn button. You’ll typically see a light indicator that will come on or start blinking. This tells you the circuit board is in learning mode.
4. Activate Your Remote: Now grab your remote and press the button you want to use for the garage door. Hold it for a few seconds until you see the light on the circuit board blink, confirming that the remote is successfully paired.
5. Test the Remote: Press the same button again. The garage door should respond! If nothing happens, repeat the steps to ensure you’ve followed everything correctly.
Remember, if this doesn’t work the first time, don’t sweat it. Check your battery, ensure the remote is functioning, and try the process again. Sometimes it just takes a little finesse.
Troubleshooting Common Problems
Sometimes, despite doing everything right, the remote still won’t work. Here are some quick troubleshooting tips:
– Check the Batteries: Make sure you have fresh batteries in your remote. It might sound obvious, but it’s often the simplest solution that gets overlooked.
– Interference Issues: Other devices like home security systems or Wi-Fi networks can interfere. Try reprogramming from a different location if possible.
– Consult Your Manual: If you still can’t get it to work, refer back to your owner’s manual. Sometimes, specific guidance for your brand can save you time.
If none of this works, it could be time to check if the circuit board itself needs replacing or if there’s a mechanical issue with the door itself.
When to Call a Professional
While reprogramming your overhead door circuit board is often a straightforward task, there are times when it’s better to call in an expert. If you’ve tried all the above steps and nothing works, or if you’re uncomfortable working with electrical components, reaching out to a professional is a wise choice.
Sometimes, deep inside the technology, issues can arise that require specialized diagnostic tools and knowledge. Professionals not only have the right expertise but also bring peace of mind knowing you won’t accidentally cause other issues.
Final Thoughts on Reprogramming Your Overhead Door Circuit Board
Reprogramming your overhead door circuit board may seem like a daunting task initially, but with the right tools and a bit of patience, you can easily navigate the process. Think of it as refreshing your tech setup—you wouldn’t let your devices sit unprogrammed, so why let your garage door do the same?
Remember to always prioritize safety, consult your manual when in doubt, and don’t hesitate to reach out for help if you need it. Once your overhead door is back in action, you’ll marvel at the ease of driving in and out without a hitch! Happy programming!