Chamberlain remotes come in several models, from small handheld devices to keychain types. They are designed to make your life easier by allowing you to open and close your garage door with just a press of a button. But like any tech, they can experience hiccups or lose their connection. In this guide, I’ll walk you through how to reprogram your Chamberlain remote step by step so that you can get back to smooth operation in no time.
Understanding Your Chamberlain Remote
Before diving into the reprogramming process, it’s essential to familiarize yourself with your Chamberlain remote. Most of these devices operate on a rolling code system, meaning the code changes every time you use it. This keeps your garage secure but can also present challenges when it comes to reprogramming.
Typically, a Chamberlain remote has a few important buttons: the Open/Close button, which opens or closes your garage door, and the Program button, used to sync the remote with the garage door opener. You’ll also notice small LED lights that signal when the remote is functioning correctly. If your remote isn’t responding, it’s often due to low battery power, a lack of signal, or the need for reprogramming.
Once you understand the basics, you’ll feel more comfortable working with the remote. Keep that friendly little gadget handy because we’re about to make it work for you again!
Gathering Your Tools
Before we start reprogramming, let’s make sure you have everything you need. This process doesn’t require much—just a few simple items that are likely within arm’s reach:
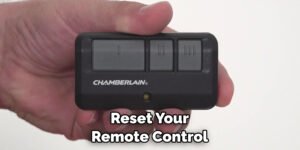
- Your Chamberlain garage door opener
- Your Chamberlain remote
- A ladder, if needed to reach the garage door opener
- New batteries for the remote, if necessary
While that list is pretty short, not having one of these items can delay your progress. It’s a bit like trying to bake cookies without flour—you’ll just end up disappointed! Double-check that your remote has fresh batteries. Many times, poor performance is simply due to low battery power. If you’re set, let’s get to reprogramming!
How to Reprogram Your Chamberlain Remote
Now that you’ve gathered your tools, let’s dive into the steps to reprogram your Chamberlain remote. This process may vary slightly depending on your specific model, so let’s keep it straightforward.
1. Locate the “Learn” Button:
– This is often found on the back or side of your garage door opener unit. It might be labeled as “Learn” or “Smart.”
2. Press the “Learn” Button:
– Press and release this button. You should notice an LED light turning on, indicating it’s ready to sync. The light will typically stay on for about 30 seconds—this is your window to complete the next step.
3. Press the Remote Button:
– While the LED light is still on, press and hold the button on your remote that you wish to program. You are essentially telling the garage door opener which remote button you want it to respond to.
4. Wait for Confirmation:
– The opener’s LED light should flash or turn off, confirming that the remote has been successfully paired. If that doesn’t happen, repeat the process from step one.
With these steps, you’ll have your remote reprogrammed and ready to roll! If you find you’re having repeated issues with syncing, there might be a more significant issue at play, which we’ll address in troubleshooting.
Troubleshooting Common Issues
Sometimes, even after following all the steps, you might encounter problems. Don’t panic—you’re not alone! Here are a few common issues people face when reprogramming their Chamberlain remotes, along with solutions:
– Remote Not Responding: If the remote is unresponsive after reprogramming, it could be due to low batteries. Simply replace the batteries and try syncing again.
– Error with the Learn Button: If the LED on the opener doesn’t turn on when you press the Learn button, there could be an issue with the door opener itself or a bad connection. Ensure that everything is plugged in and functioning properly.
– Multiple Remotes: If you have several remotes, unsync the older remotes first. Press the Learn button for 10 seconds until the light turns off, clearing all previous codes.
These troubleshooting tips can help you pinpoint the problem and return to smoother operation.
Why Regular Maintenance Matters
After reprogramming your remote, it’s crucial to think about maintenance. Have you ever noticed how a car runs better with regular oil changes? The same principle applies here. Regular maintenance for your garage door opener ensures it operates efficiently.
Here are a few maintenance tips:
- Test the Remote: Regularly check that the remote is functioning correctly.
- Inspect the Garage Door Mechanism: Look for any obstructions or wear and tear that may affect performance.
- Keep Batteries Fresh: Change the remote batteries at least once a year.
Implementing a maintenance routine can save you time and money down the line. Just like watering a plant, a little upkeep prevents bigger problems later.
Considering Alternatives: Universal Remotes
If reprogramming your Chamberlain remote seems like more work than it’s worth, you might wonder about alternatives like universal remotes. A universal remote can control multiple devices, including your Chamberlain opener.
These remotes are convenient, but they do require different programming methods. Be sure to follow the manufacturer guidelines specific to the universal remote as the steps may vary. If you frequently use different devices for your garage, a universal remote could bring added convenience, but for most users, reprogramming the original is a simpler and more effective solution.
Reprogramming your Chamberlain remote doesn’t have to be a daunting task. With the right steps and a little patience, you can have your garage door working smoothly again. Remember that understanding how your remote works, gathering the right tools, and practicing regular maintenance can make a world of difference.
In case you run into trouble, don’t hesitate to revisit this guide. Keep your remote nearby, and before you know it, you’ll be cruising in and out of your garage with a simple push of a button. Good luck, and enjoy your newly functioning setup!