Skylink is known for its smart home solutions, including their versatile hub that connects various devices in your home. If you find yourself needing to swap out your hub, it’s a manageable task with a bit of guidance. In this article, we’re diving into the nitty-gritty of replacing your Skylink Smart Hub, ensuring you can get everything connected and running smoothly.
Understanding Your Skylink Smart Hub
Before getting your hands dirty, it’s important to understand what a smart hub does. Think of your Skylink Smart Hub as the conductor of an orchestra. It coordinates signals between your devices, such as your garage door opener, security cameras, or smart lights. Without it, these devices wouldn’t communicate effectively.
Here’s the catch: sometimes, your hub might start acting up. Maybe it’s not syncing properly, or perhaps you bought a new model packed with great features. Whatever the reason, knowing the ins and outs of your Skylink Smart Hub will make the replacement process smoother.
Start by identifying the specific model of your Skylink hub. This will help you find the correct instructions and compatibility with other devices you may own. It’s like knowing which app to use when you get your new smartphone.
Gathering the Right Tools and Parts
Now that you have a grasp on your smart hub, it’s time to prepare for the replacement. You wouldn’t head into a race without your gear, right? For this task, you’ll need a few essential items:
- Replacement Skylink Smart Hub – Ensure it’s compatible with your existing devices.
- Screwdriver – Most likely Phillips or flathead, depending on your installation.
- Step Ladder – If your hub is mounted high up, don’t forget safety first!
- Wi-Fi Connection – Make sure you have stable access since your new hub will need to connect to your network.
Once you have everything in hand, you’re ready to kick off the replacement. This preparation can save you from frustrating mid-task runs to find a tool or part.
Removing the Old Hub
You might be wondering: how do I safely take out my old Skylink Smart Hub without causing a fuss? Here’s a simple, structured approach:
1. Power Down: Before you begin, unplug the hub from any power source. This is crucial for avoiding any electrical mishaps.
2. Disconnect Wiring: If your hub is wired into other devices, gently disconnect these cables. Take a photo of the connections beforehand if you’re worried about forgetting where they go.
3. Unscrew & Remove: If your hub is mounted, use your screwdriver to remove it from the wall or ceiling. Be gentle to avoid damaging the mounting area.
Once you’ve successfully taken down the old hub, place it in a safe spot. You can now breathe a little easier knowing you’re one step closer to a functional device.
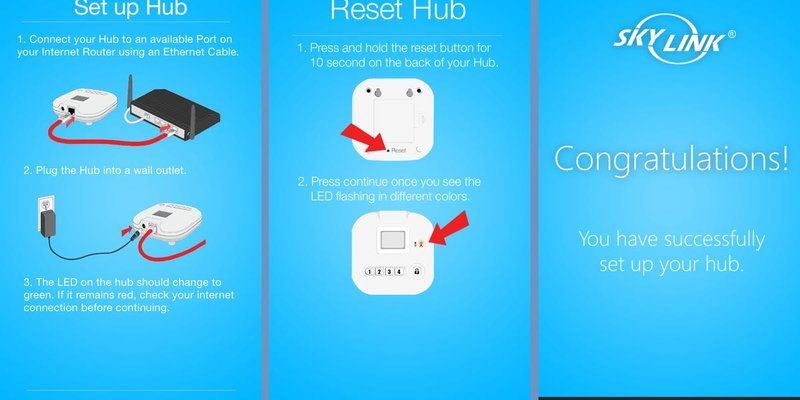
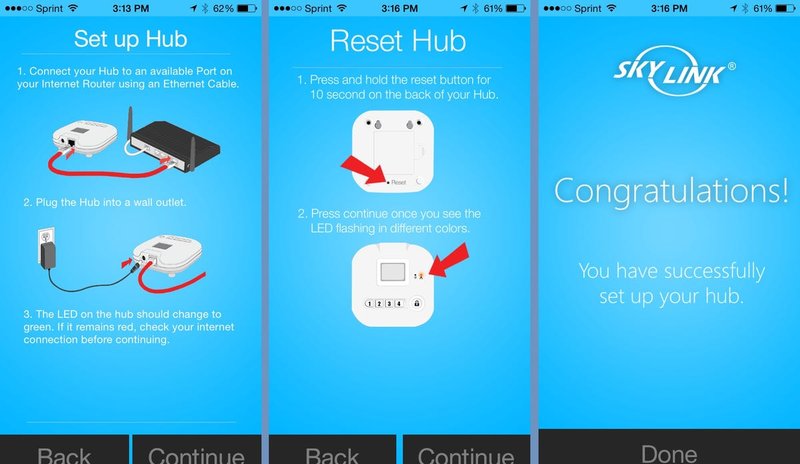
Installing the New Skylink Smart Hub
Installing the new hub is like putting together a new piece of furniture—it’s exciting, but you need to follow the steps to get it right. Here’s a straightforward way to set it up:
1. Position the Hub: Find a suitable location for your new Skylink Smart Hub. Ideally, it should be central to your home for the best range with your devices.
2. Connect Wiring: Refer to the photo you took earlier to reattach any wires correctly. It’s critical these connections are tight to ensure everything functions well.
3. Secure it in Place: If it was mounted, now is the time to screw it in securely. You want to make sure it’s stable—like ensuring a shelf can hold the books you’re placing on it.
4. Power Up: Plug it back into a power source and watch for the indicator lights. A blinking light often means it’s getting ready to sync with your devices.
Syncing Your Devices
You’re almost there! Now comes the fun part—getting your devices connected to the new hub. Here’s how:
1. Open the Skylink App: If you haven’t already, download the Skylink app on your smartphone. This app makes syncing everything as easy as pie.
2. Follow Prompts: Within the app, you’ll go through a guided process to find and connect your devices to the new hub. Just like putting in a new code for a lock, it’ll take you through each step.
3. Test Each Device: Once everything is paired, take a moment to test your devices. It’s like a rehearsal before the big performance; make sure every piece is working harmoniously.
Troubleshooting Common Issues
Even with the best plans, things can sometimes go sideways. Let’s talk about some common problems you might face and how to tackle them:
– Device Not Detected: If a device isn’t syncing, double-check the connection. Sometimes, a hard reset on the device itself can help, kind of like refreshing a webpage that’s not loading properly.
– Weak Signal: If you notice your devices have a weak signal range, consider moving your hub to a more central location or upgrading your Wi-Fi boost.
– Updating Firmware: Occasionally, your new Skylink hub may need a software update. The app will typically notify you about this, ensuring everything runs smoothly.
Making the Most of Your New Skylink Smart Hub
Congratulations! You’ve successfully replaced your Skylink Smart Hub, and it’s time to explore all it has to offer. Take a moment to familiarize yourself with the extra features or devices you can connect. These may include smart assistants like Alexa or Google Home, turning your setup into a more integrated smart home experience.
Remember, technology is meant to enhance our lives. Don’t hesitate to experiment with settings, create automation routines, or even explore the help sections if you’re keen on learning more about maximizing your hub’s potential.
By following these steps, you’ve not only replaced your Skylink Smart Hub but also empowered yourself to handle similar tasks in the future. Whether you’re troubleshooting or exploring new features, you’re equipped with a solid understanding of your new system. Enjoy your upgraded smart home!