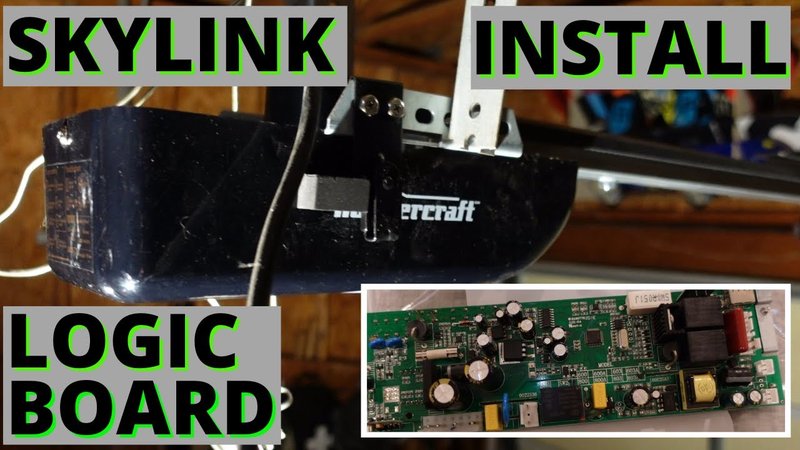
With a little patience and the right tools, you can take on this project. You won’t need to be a tech whiz; just follow some straightforward steps, and you’ll be feeling empowered in no time. Let’s dive into this handy guide on how to replace the circuit board in your Skylink remote, ensuring your garage door reliably opens and closes without a hitch.
Understanding Your Skylink Remote
Before we jump into the nitty-gritty of replacement, let’s take a moment to understand what we’re working with. Skylink remotes, popular for their easy usability with garage door openers, come in various models. The most common ones are the Skylink 318 and Skylink 433. Each of these remotes has a unique circuit board that communicates with your garage door opener.
Now, it’s essential to know that the circuit board is typically housed in the remote’s casing. It controls all the functions, sending a signal to the garage door opener when you press a button. Over time, the circuit board may wear out due to age, frequent use, or even exposure to harsh weather conditions. If you notice inconsistent behavior—from delayed responses to failures—this often signals a problem with the circuit board.
Gathering Your Tools
Alright, let’s gather everything you’ll need for the task. Here’s a quick list to make sure you’re fully equipped:
- A replacement circuit board specifically designed for your Skylink model
- Small Phillips or flathead screwdriver
- Pair of tweezers (optional but handy)
- Multimeter to test the remote (optional)
Before starting, double-check that you have a compatible circuit board. You can usually find one online or at a local hardware store. If you’re unsure about compatibility, referring to your user manual or the manufacturer’s website can help. Feeling prepared makes a world of difference, and you’ll be ready to tackle the task without unnecessary detours.
Step 1: Opening the Remote
Now that you have your tools at the ready, it’s time to pop open your remote. Start by taking your screwdriver and carefully removing the screws on the back of the remote. If your remote is of the push-style variety (like some Skylink models), you might need to press a tab or two to release the casing.
Here’s a tip: Do this over a clean, flat surface. Believe me, a spring could pop out, and you don’t want to lose it! Once you’ve opened the remote, take a moment to admire the little circuit board inside. It’s kind of cool, right?
Another thing to note: gently disconnect any wires attached to the current circuit board. More often than not, they’ll be fitted with clips or plugs that you can easily detach. Be cautious; you don’t want to break them off as you remove the board.
Step 2: Removing the Old Circuit Board
With the remote open and wires disconnected, we can move on to the next step: pulling out the existing circuit board. Your remote might have screws securing the circuit board in place, so unscrew those and lift it out gently.
Inspect the old circuit board for any visible damage. Look for burnt spots or cracked components—these signs confirm why the remote is malfunctioning. If you see anything off, you definitely made the right choice in replacing the board.
To remove the board, you may need to gently wiggle it back and forth until it releases from its housing. Don’t rush this; sometimes a little patience goes a long way, especially with fragile components.
Step 3: Installing the New Circuit Board
Now, it’s the moment of truth! Take your new circuit board and align it with the mounting area of your remote. Make sure that any connectors line up properly. If your board fits snugly, you can secure it with the screws you set aside earlier.
If your remote has any plugs for wires, this is the time to reconnect them. Gently press down until you hear that satisfying click. It’s a small sound, but it means everything’s now snug and ready to transmit signals.
Before you close up the remote, it’s wise to test your new setup. Put in fresh batteries and press a button to see if the light on the remote activates. If it does, that’s a good sign! You might not need a multimeter for this test, but if you have one, you can ensure that the board is getting power correctly.
Step 4: Closing Up and Testing
With everything securely attached and the circuit board installed, it’s time to close up your remote. Carefully place the cover back on and secure it with the screws. If you used tabs to open the remote, make sure they snap back into place.
Once it’s sealed up, go ahead and try out your newly repaired remote! Stand a few feet away from the garage door and press the button to see if it activates correctly. If everything works smoothly, congrats! You’ve just replaced your Skylink circuit board like a pro.
In cases where it hasn’t worked, don’t panic. Double-check your connections and ensure that the new circuit board is compatible. Sometimes, a simple reset of your garage door opener can also help establish a solid connection.
Troubleshooting Common Issues
Even with all our careful steps, it’s possible to run into hiccups when replacing the circuit board. Let’s address a few common issues:
– Remote Not Responding: This often points to connection issues. Double-check that all wires are snugly connected, and ensure the batteries are fresh.
– Garage Door Doesn’t Open Fully: This can indicate that the signals from the new circuit board aren’t syncing correctly with the garage door’s motor. Again, a reset might be in order.
– Intermittent Functionality: If the remote works sometimes and not at others, there might be interference or weak connections. Move closer to the door during testing, and ensure nothing blocks the signal.
Each of these problems typically has a straightforward fix. Troubleshooting can feel frustrating, but every little issue you solve is another win!
Final Thoughts
Taking on a project like replacing your Skylink circuit board can be empowering. Not only did you learn something new, but you’ve also saved yourself some money on professional repairs. Plus, there’s nothing quite like the satisfaction of DIY success!
Remember, if you run into any issues, it’s perfectly fine to consult the user manual or online resources specific to your model. DIY isn’t just about fixing things; it’s about feeling confident in your skills. So, go ahead and enjoy the smooth operation of your garage door, knowing you tackled the problem head-on. Happy DIYing!
