In this guide, we’ll walk you through the process of replacing your Raynor wall button step by step. This way, the next time you find yourself locked out of your garage because the button isn’t working, you’ll be well-prepared to tackle the challenge. Grab your tools, and let’s dive into how you can easily swap out that wall button!
Understanding the Raynor Wall Button System
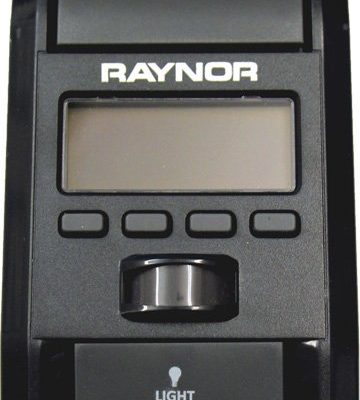
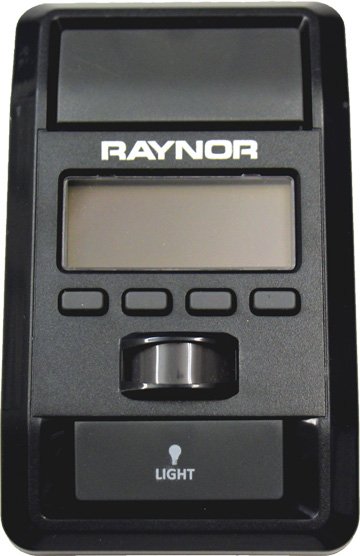
Before we get into the nitty-gritty of replacing your Raynor wall button, it’s helpful to understand how these systems work. Essentially, a wall button is a control device that allows you to operate your garage door opener from inside the garage. It sends a signal to the opener to either lift or lower the door.
Most Raynor systems feature a simple *push-button switch*, often with added features like a light function or safety override options. You might be wondering why you should replace it. Well, if the button is unresponsive or damaged, it’s not just an inconvenience—it could pose security risks. A malfunctioning button might leave your garage door wide open or unable to close, which can be a significant safety concern.
To figure out whether replacement is necessary, check if the button is making any sounds when pressed. If not, it might be time for a new unit. You’ll also want to make sure that any remote controls are working properly, as they often work in tandem with your wall button.
Gathering the Necessary Tools
Before diving into the replacement, it’s crucial to have everything you need at your fingertips. Here’s a quick list of tools and items you’ll require:
- Screwdriver: A Phillips or flathead depending on your screws
- Wire cutters: For stripping wires if necessary
- Electrical tape: To secure connections
- Replacement Raynor wall button: Ensuring compatibility is key
- Voltage tester: Optional, but useful for safety
Gathering these tools beforehand will make the process smoother. Think of it like preparing your kitchen before a big recipe—you’ll be glad you took the time to organize when you’re in the thick of the project.
Removing the Old Raynor Wall Button
Now that you’ve got your tools gathered, it’s time to remove the old wall button. Start by turning off the power to your garage door opener. This prevents any accidents while you’re disconnecting wires. Next, use a screwdriver to remove the screws holding the wall button in place.
Once you’ve removed the screws, gently pull the wall plate away from the wall. Take note of how the wires are connected—it’s a good idea to take a picture for reference. You’ll typically find two wires: one for power and another for the signal. Carefully disconnect the wires, making sure not to damage them.
If you’re unsure about handling wires, it’s okay to take it slow or ask a knowledgeable friend for help. That way, you ensure that you’re working safely.
Connecting the New Wall Button
With the old button gone, it’s time to install your new Raynor wall button. Start by connecting the wires to the new button, matching them up to the same configuration as before. Most systems are color-coded, with typically red and white wires for power and signal, respectively.
Here’s what to keep in mind while connecting:
– Secure connections: Use wire nuts or electrical tape to ensure a snug fit.
– Double-check: Compare with the photo you took earlier to make sure everything lines up correctly.
Once you’ve securely connected the wires, place the new button in the wall box and screw it into place. It’s like fitting a new puzzle piece—it’s satisfying to see it perfectly align!
Testing the New Setup
Before you call it a day, it’s crucial to test your new wall button. Restore power to the garage door opener, then give the button a press. If everything is connected correctly, the door should respond immediately.
If it doesn’t work, don’t panic! Double-check your connections and ensure that the wires are correctly aligned and secured. You may also want to check the garage door opener remote to see if it is functioning properly, as it might share power issues with the wall button.
Safety tip: If your garage door opens or closes erratically, consider consulting a professional to avoid any hazards.
Softening the Transition: Syncing With Your Remote
Once the wall button is working, you might want to sync it with your remote if you haven’t done so already. This ensures all controls are working in harmony. Depending on the model of your Raynor system, the process may slightly differ. Typically, it involves holding down the “program” button on the garage door opener while also pressing the remote button until you see a light blink.
Give it a try! It’s like teaching your dog a new trick—at first, it might take a few attempts, but eventually, both tools will communicate seamlessly.
Maintaining Your New Wall Button
Now that you’ve successfully replaced your Raynor wall button, it’s time to think about maintenance. Here are a few tips to ensure its longevity:
- Keep it clean: Dust and debris can build up and cause issues. Wipe down the button regularly.
- Check connections: Periodically, ensure that the wires remain secure and free of corrosion.
- Stay alert: If you notice any irregular behavior, don’t hesitate to troubleshoot early on.
Taking these simple steps will help your new wall button function smoothly and effectively over time.
Wrapping It All Up
Replacing a Raynor wall button doesn’t have to be complicated. With the right tools, a little patience, and a clear plan, you can tackle it like a pro. From gathering your materials to ensuring everything functions seamlessly, you’re now equipped to handle any wall button issues with confidence.
Remember to maintain it over time, keep an eye on its performance, and troubleshoot when necessary. Garage doors are vital to your home’s security and everyday convenience. So go ahead, enjoy your newly functional wall button, and feel good knowing you tackled this DIY project like a champ!