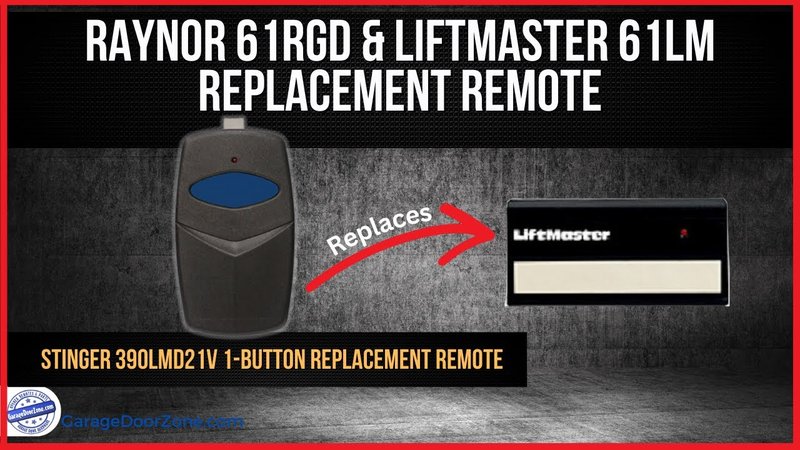
Identifying the Right Raynor Remote
First things first, you need to know which Raynor remote control you have. There are various models, and each one can have slightly different controls and features. Check your old remote for a model number, often found on the back or under the battery cover.
If you’re unsure, you can always consult your garage door opener’s manual or the Raynor website. Knowing your model is key because it ensures you purchase a compatible replacement. Imagine trying to fit a square peg into a round hole; it just won’t work!
Once you’ve identified your model, you can either head to your local hardware store or shop online. Many retailers keep a good stock of Raynor remotes, so finding a suitable replacement shouldn’t be too tough.
Using a Replacement Raynor Remote
After you’ve got your new remote in hand, it’s time to set it up. Here’s where the fun begins. First off, unbox your new remote and take note of the buttons. Typically, these small gadgets have several buttons, including one for opening and one for closing the door.
Before syncing, you might want to check the battery. Most remotes come with a battery included, but it’s good practice to ensure it’s fresh. Installing the battery is usually as simple as slipping it into the back of the remote.
Here’s the thing: if the battery isn’t installed correctly, the remote won’t work. Make sure the positive and negative sides match the symbols inside the battery compartment. Trust me, I’ve made the mistake of putting in a battery upside down, and it’s frustrating when nothing happens!
Synchronizing Your Raynor Remote with the Opener
Now, let’s get that new remote synced with your Raynor garage door opener. This process can vary a bit depending on the model of your opener, but don’t worry; I’ll walk you through the general steps.
1. Locate the Learn Button: Usually found on the back of the garage door opener, this button activates the programming mode. You may need a step stool to reach it.
2. Press the Learn Button: Once located, press and hold it until the LED light turns on. This typically takes a few seconds.
3. Press Your Remote Button: Within about 30 seconds, press and hold the button on your new remote that you want to use. If you have a multi-button remote, test each button to see which one syncs best.
4. Watch for Confirmation: The LED light on the garage door opener should blink or remain solid, indicating that the remote is programmed successfully.
If all goes well, you should hear the garage door click as it prepares to open. If not, repeat these steps. Sometimes, it takes a few tries to get everything synced properly.
Common Troubleshooting Tips
Even after following all the steps, there might be times when your new Raynor remote doesn’t work as expected. Don’t panic! Here are some quick troubleshooting tips to help you out:
– Check the Battery: Yes, it’s that simple. A dead battery is often the culprit. If the remote is new, just ensure it’s installed properly.
– Range Issues: Test the remote from different distances. Sometimes, if you’re too far away, it won’t register.
– Reset the Opener: If syncing doesn’t work, perform a full reset on the opener. Refer to your manual for the specific steps on how to do this.
You might be wondering about how to fix these problems without losing your sanity. Just remember that these hiccups happen to everyone! It’s perfectly normal to run into some snags.
Alternatives to Raynor Remotes
If replacing your Raynor remote doesn’t seem like the best option, consider alternatives. Universal remotes are available on the market and can typically program with various brands, including Raynor. They offer the convenience of operating multiple devices with a single remote.
Here’s what to keep in mind:
– Compatibility: Make sure the universal remote lists Raynor as a compatible brand.
– Programming Process: Universal remotes can sometimes have a different programming process, which might require a bit more research.
Using a universal remote can save you the hassle of managing different remotes for each function, making it a sensible choice if you need a seamless experience.
Final Thoughts on Replacing Your Raynor Remote
Replacing a Raynor remote may feel a bit overwhelming at first, but once you break it down into steps, it’s quite manageable. Just remember to identify the right model, sync it correctly, and troubleshoot as needed. In no time, you’ll have everything working smoothly again.
Whether you choose to go with the same brand or explore universal options, having a functioning remote makes entering and exiting your garage so much easier. And seriously, isn’t that what it’s all about? Enjoy the convenience that comes with a properly working garage door remote!
