So, what’s a circuit board, really? Think of it as a tiny control center that relays information from the remote to the opener. When you press that button on your Raynor remote, it’s the circuit board that tells the door to go up or down. It’s important to get this right because a malfunction can leave you locked out—literally! Let me guide you through this straightforward process step by step.
Identifying the Need for a Replacement
Before diving into the replacement process, it’s crucial to figure out if your circuit board really needs replacing. Sometimes, what seems like a circuit board issue could be a more straightforward problem, like a dead battery in your remote. So, take a moment for some troubleshooting.
First, consider the symptoms. Does your garage door opener make noises when you press the remote but doesn’t respond? Or perhaps it only works intermittently. These are signs that the circuit board could be the problem. To put it simply, if your remote seems to be in good shape and the door still won’t budge, it’s time to investigate the circuit board.
Another thing worth checking out is the wiring connected to the circuit board. Over time, connections can loosen or corrode, which might be enough to inhibit communication. If you spot any melted wiring or burnt smell near the circuit board, clearly, you’ve identified your culprit. It’s like finding a needle in a haystack but essential to check before committing to a replacement.
Gathering Tools and Supplies
Once you’re convinced that the circuit board is at fault, it’s time to gather your tools and supplies. Think of this step as preparing for a mini-project. You wouldn’t go camping without the right gear, right?
Here’s a quick list of what you’ll need:
- Screwdriver set: You’ll need both flat and Phillips heads to remove screws.
- Replacement circuit board: Make sure it’s compatible with your Raynor model. Confirm the model number before buying!
- Wire cutters/strippers: Handy for disconnecting wires and preparing the new board.
- Multimeter: Great for checking if there are any electrical issues.
- Safety goggles: Protect your eyes since you’ll be working with electronics.
It doesn’t take much to be prepared, but having these tools on hand makes the process smoother and minimizes the chances of running into problems mid-way.
Powering Off and Disassembling the Opener
Now that you’re geared up, the first action step is to power off your garage door opener. Think of it as turning off your phone before you do a reboot. Safety first! This ensures you won’t get shocked or short-circuit anything.
Unplug your garage door opener from the power source. Once that’s done, pull out the ladder and reach for the unit hanging from your ceiling. You’ll see screws holding the cover in place. Use your screwdriver to remove these screws carefully. If you have a manual, refer to it. If not, keep the screws in a safe spot where they won’t roll away.
After taking off the cover, it’s time to expose the inner workings. Depending on your model, you may need to remove additional screws or even detangle some wires. Keep track of how everything fits together; it’s like solving a puzzle. You might even consider taking photos of your wiring setup for reference when you put the new board in.
Removing the Old Circuit Board
With everything disassembled and the circuit board in view, it’s crucial to remove the old board carefully. You might be wondering, “How do I do this without damaging anything?” Good question!
Start by disconnecting any wires attached to the old circuit board. It’s helpful to take note of which wire goes where. If you took photos earlier, now’s the time to look at them. Use your wire cutters/strippers to make clean cuts as needed.
After all the wires are disconnected, unscrew the circuit board from its housing. It’s a simple task, but keep in mind that some boards might be held by clips or brackets instead of screws. Be gentle to avoid breaking any connectors. Once it’s free, hold it up and give it a good look. Sometimes, a visual inspection reveals burnt areas or damaged components that weren’t initially obvious.
Installing the New Circuit Board
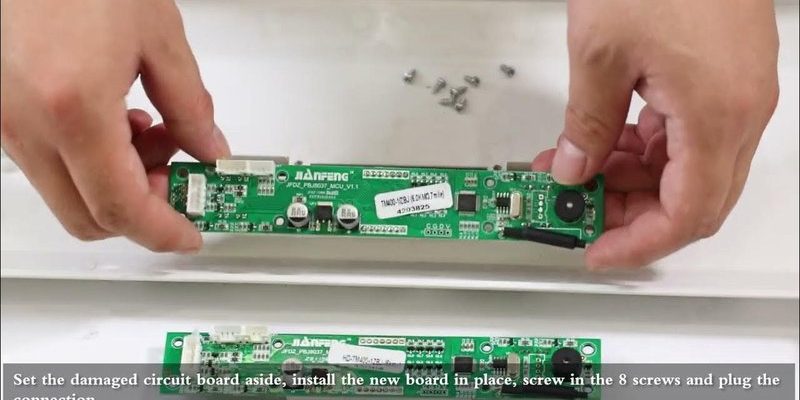
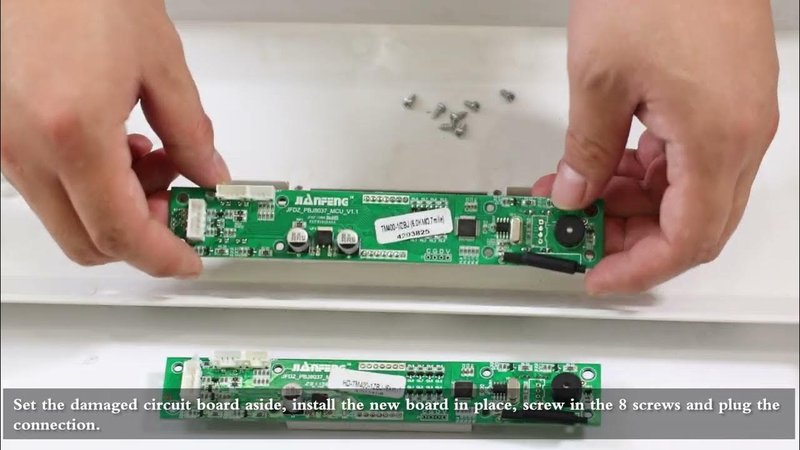
Now comes the exciting part: installing the new circuit board! You’ve reached the finish line after removing the old one, and it feels good, doesn’t it? Grab your replacement board and make sure it matches what came out—compare them side by side.
To install it, first, screw the board into its place. Next, follow the wiring connections you documented earlier, reconnecting each wire to its respective spot. If you have any colored wires, remember that matching colors often indicate where they belong. If you didn’t take photos, just keep your notes handy.
As you make connections, ensure they’re secure but not overly tight. It’s all about finding that sweet spot—like making sure your shoelaces are tight enough to stay tied but not so tight that they pinch your foot. Once all wires are connected, give everything a final once-over to make sure everything looks right.
Testing Your Install
Before celebrating your victory, it’s time to test the new circuit board. This is where the multimeter comes into play. You want to ensure everything is powered properly and functioning as it should.
Plug the garage door opener back into the outlet and position yourself near the door. Press the remote to see if the door responds. If it does, yay! You did it! If not, don’t panic; take a step back and troubleshoot. Check for loose connections or consult the manual again.
Sometimes, a simple reset of the opener can solve any lingering issues. Look for the learn button on the motor unit and follow the instructions to reprogram your remote. When all else fails, double-check your notes to see if anything was overlooked.
Final Thoughts
Replacing a Raynor circuit board may seem daunting at first, but with a bit of patience and the right approach, it’s a task many can successfully accomplish. Just remember: diagnosing the problem accurately is half the battle. Gather your tools, take your time, and keep track of how everything fits together.
If you run into any issues during the process, or if the door doesn’t function as expected after the replacement, it’s perfectly fine to seek help from a professional. After all, the goal is to have your garage door opener working smoothly and efficiently, allowing you seamless access to your space. Now, you can proudly say you tackled a significant home repair project—and that’s no small feat!