Today, we’re focusing on how to replace the battery backup for your Raynor garage door opener. Don’t worry if you’re not the handiest person; I’ll break this down step-by-step, just like how you’d explain a recipe to a friend over coffee. We’ll cover everything from tools you’ll need to step-by-step instructions, ensuring you’ll have a fully functioning garage door opener in no time.
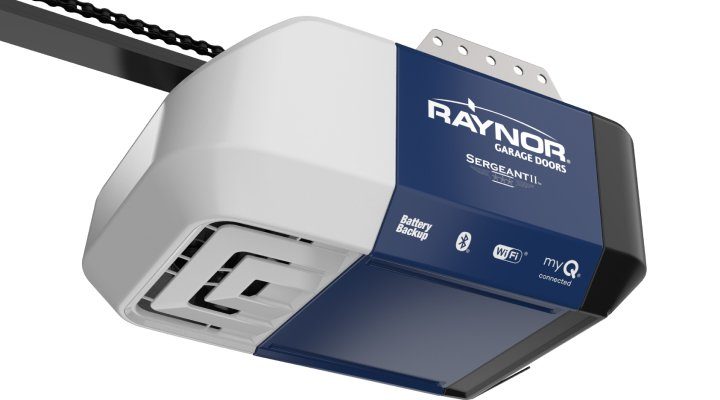
Understanding Your Raynor Battery Backup System
Before diving into the replacement process, let’s get a grasp on how Raynor’s battery backup system works. This backup unit is designed to keep your garage door operational even when the electricity is out. It’s like carrying a spare tire—you hope you never need it, but you’ll be thankful you have it when the time comes.
The system typically consists of a sealed lead-acid battery, housed within the garage door opener unit. When installed correctly, it automatically starts charging whenever the power is on, so you have a charged battery ready for those unexpected outages. This means you won’t find yourself in a situation where your garage door refuses to budge because the lights went out. Isn’t that nice?
Tools You’ll Need
Before you start the replacement process, gathering the necessary tools is essential to prevent any last-minute scrambling. Here’s a quick checklist to get you prepared:
- A flat-head screwdriver
- A Phillips screwdriver
- A replacement battery compatible with Raynor models
- A pair of gloves (just in case!)
- A flashlight (if you’re working in a dim space)
Having these tools handy will streamline the replacement process, allowing you to focus on getting that battery swapped out efficiently. If you’re unsure about which replacement battery to purchase, check the manufacturer’s recommendations. They often list specific battery types that work best with each model.
Safety First: Preparing for Replacement
Safety should always be your number one priority. Begin by unplugging the garage door opener from the outlet. This is crucial because you’ll be dealing with electrical components, and you want to avoid any shocking surprises—literally!
Once it’s unplugged, it’s a good idea to let the unit rest for a few minutes. This will allow any residual charge to dissipate. If your Raynor opener has a light that indicates the power status, check that it’s off before you proceed. Wearing gloves can also protect your hands from any accidental bumps against sharp edges or small components inside.
Accessing the Battery Compartment
Now that you’ve ensured safety, it’s time to access the battery compartment. Locate the cover of the battery compartment, often found on the back or side of the motor unit. Usually, a flat-head screwdriver is all you need to gently pry the cover open.
As you do this, be patient. The cover might be secured tightly. If it’s stubborn, apply a little more pressure but watch for any breaks in the plastic. Once you’ve successfully removed the compartment cover, you should see the battery resting inside, ready for a swap.
Removing the Old Battery
With the compartment open, it’s time to remove the old battery. Start by noting how the battery is positioned: the positive and negative terminals should be easy to identify. Make use of your Phillips screwdriver to remove any screws securing the battery in place.
Once you’ve removed any fastening screws, gently pull the battery out by the connectors. Make sure to disconnect the wires from the terminals—remove the negative wire first before the positive. This helps prevent any electrical shorts. If you feel any resistance, double-check that you’re detaching the correct wires.
Installing the New Battery
Now for the exciting part! You’ll want to grab your new Raynor-compatible battery. It’s essential to verify that you match the voltage and size with your previous battery. Place the new battery into the compartment, following the same orientation as the old one. It should fit snugly, like a puzzle piece.
Reconnect the positive wire first, followed by the negative wire. This ensures a safe installation. Once connected, screw the battery down (if applicable) to secure it in place. Double-check that the connections are tight and that no wires are pinched or frayed—this step is crucial for the optimal function of your garage door opener.
Closing Up and Testing
With the new battery installed, it’s time to close up the battery compartment. Simply replace the cover and secure it with any screws you removed earlier or press it firmly until it clicks back into place.
Now, plug your garage door opener back into the outlet. You should see lights indicating it’s receiving power. To ensure everything is functioning accordingly, press the garage door remote button or the wall control to open the door. If the door opens smoothly, congratulations! You’ve successfully replaced your Raynor battery backup.
Troubleshooting Common Issues
Occasionally, things might not go as smoothly as planned. If your garage door doesn’t respond after replacing the battery, don’t panic! Here are a few troubleshooting tips:
1. Check the connections: Ensure the battery terminals are connected firmly.
2. Reset the system: Sometimes, resetting your opener can help. Refer to your user manual for the exact steps.
3. Pair the remote: If it’s not responding to the remote, you might need to sync it again. Look for the learn button on your opener and follow the pairing instructions.
By following these steps, you should be able to switch out your Raynor battery backup without any complications. Just remember to keep your new battery maintained, and check on it periodically to prolong its life.
In conclusion, being able to replace your Raynor battery backup empowers you to ensure your home remains secure, even during unexpected power outages. It’s one of those maintenance tasks that pays off big time in convenience and peace of mind. With a little know-how and the right tools, you’ve got everything you need to be your own garage door technician. Happy fixing!