In this guide, we’ll walk through the steps to replace your overhead door battery backup easily. We’ll reference common models—like those from LiftMaster or Genie—to keep it relatable. Whether you’re a DIY enthusiast or just someone wanting to save a little cash on service calls, this guide is tailored to guide you step-by-step, ensuring you feel confident as you tackle the job.
Understanding Your Battery Backup System
Before diving in, it’s crucial to understand what a battery backup system does. Essentially, it provides power to your garage door opener when the electricity goes out. This is especially important if your garage door is your main entry point, allowing you to come and go without hassle, even when the lights are out.
Most overhead doors utilize a sealed lead-acid battery or a lithium-ion battery as part of their backup system. The type of battery often depends on the brand and model of your garage door opener. These batteries are typically designed to last, but just like any power source, they will need replacing eventually. Let me explain how to identify if your battery needs replacing.
Common signs include the garage door not operating smoothly, error lights flashing on the opener, or a lag in response time when using the remote control. If you’ve noticed any of these issues, it’s time to replace the battery.
Gathering Your Tools and Supplies
Before you begin the replacement process, it’s smart to gather all the necessary tools and supplies. Here’s what you’ll likely need:
- Screwdriver (Phillips or flathead, depending on your model)
- Replacement battery (make sure it’s the right type for your opener)
- Safety glasses (just in case)
- Work gloves (to protect your hands)
If you’re unsure about the type of battery you need, check your garage door opener’s manual or look online using the model number. Remember, getting the right battery is crucial for the system to work effectively. Though it might seem like a hassle now, taking time to prepare will save you time and frustration later on.
Powering Down Your Garage Door Opener
Safety first! Before replacing the battery, you need to power down your garage door opener. Here’s how:
1. Locate the power source: Look for the outlet or the breaker supplying power to the garage door opener.
2. Unplug it: If it’s plugged in, simply unplug the unit. If it’s hardwired, flip off the corresponding circuit breaker.
3. Activate the emergency release: Many openers have a manual release mechanism. Pull this cord to ensure there’s no tension on the door.
You might be wondering why these steps are necessary. Well, ensuring the power is off minimizes the risk of electrocution and prevents any accidental engagement of the opener while you’re working. Safety is key to a successful DIY project!
Removing the Old Battery Backup
Now that you’re safely powered down, let’s get to the heart of the job: removing the old battery. Here’s the step-by-step process:
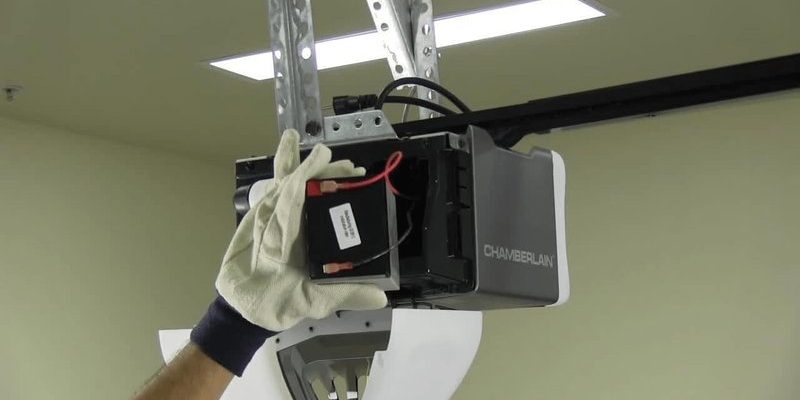
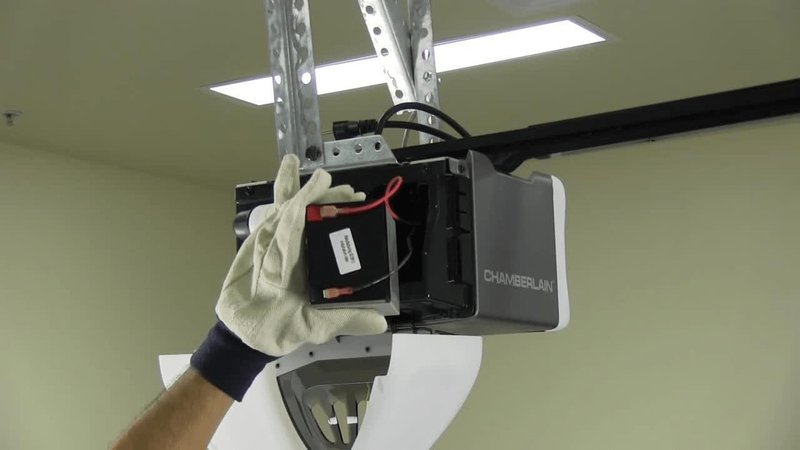
1. Locate the battery compartment: This is usually found on the back or side of the garage door opener. You’ll often see clips or screws holding it in place.
2. Open the compartment: Using your screwdriver, carefully remove screws or detach clips. Be gentle here to avoid breaking any plastic components.
3. Disconnect the old battery: Take a moment to note how the old battery is connected. Often, there are two wires, one positive (usually red) and one negative (usually black). Detach them carefully.
Don’t forget to handle the old battery with care. If it seems to be leaking or damaged, you should wear gloves for added protection. Once you’ve got the old battery out, you’re on to the exciting part—installing the new one!
Installing the New Battery Backup
Now that you’ve removed the old battery, it’s time to install the new one. Here’s how to do it right:
1. Connect the new battery: Start by connecting the positive wire to the positive terminal on the new battery, and then do the same for the negative wire. Make sure the connections are snug but don’t overtighten to avoid damaging the terminals.
2. Secure the battery in place: Whether your setup has clips or screws, make sure the battery is firmly in place, ensuring it won’t move around while the garage door operates.
3. Close the compartment: Once the battery is secured, close up the compartment and fasten it with screws or clips.
Here’s the thing: a poor connection can lead to issues down the line, so take a moment to double-check your work. If everything looks good, you’re ready to power up.
Powering Up and Testing Your Garage Door Opener
With the new battery in place, it’s time to reconnect your garage door opener and test everything out:
1. Reconnect the power: Plug the opener back into the outlet or reset the circuit breaker.
2. Test the door: Grab your remote or the wall switch and try pressing the button. Does the door move? If it does, great! If not, don’t panic just yet.
3. Check your remote: Ensure that your remote control is synced with the opener. Sometimes, after replacing the battery, you might need to reset or reprogram it, especially if it’s a universal remote.
If anything seems off, recheck your connections. It’s common for people to miss a step—or even forget to reattach something—so don’t hesitate to retrace your steps.
Troubleshooting Common Issues
If you find that your garage door isn’t operating as expected after replacing the battery, you might face a few common issues. Here are some troubleshooting tips:
– Battery not charging: If the new battery isn’t charging, ensure it’s the correct type for your model. Checking connections—particularly the wiring—can also be a simple fix.
– Remote issues: If your remote is unresponsive, try reprogramming it according to the manufacturer’s instructions. Sometimes resets are needed after maintenance.
– Error codes: Some garage door openers are equipped with diagnostic features that display error codes. Consult the manual for guidance on what these codes may indicate.
You may feel frustrated if things don’t work seamlessly at first, but approaching troubleshooting like a puzzle can help. The solution is often just a few tweaks away!
Maintaining Your Battery Backup
Once you’ve completed the replacement, don’t forget about maintenance! Here are a few tips to ensure your battery backup operates smoothly over time:
– Regularly check the battery: Give your battery a look every few months. You want to catch any signs of wear early, such as corrosion around the terminals or a decrease in performance.
– Test your garage door: Make it a habit to test your garage door opener with the battery backup engaged at least once a year. You’ll want to know it operates effectively in case of an outage.
– Keep the area clear: Ensure that there’s no debris or clutter near your garage door opener, as this can affect its performance and the lifespan of your backup.
A little attention goes a long way and could save you from a stuck door in the dark. Taking these steps will help ensure you have a reliable battery backup when you need it.
In conclusion, replacing the overhead door battery backup might seem daunting at first, but with the right tools and a clear step-by-step approach, it can be a straightforward task. Now that you know how to do it, you’ll have the confidence to tackle this kind of project whenever it comes up. Stay safe and powered up!