Whether you’re dealing with a malfunctioning control panel because it won’t respond or because the buttons are worn, getting a new one isn’t just about aesthetics. It’s about ensuring your garage door operates smoothly. The Genie brand is widely recognized for its reliability, making it a popular choice. Let’s dive into the steps you’ll take to get that control panel replaced, so you can get back to living your best life—door-opening included!
Why You May Need to Replace Your Genie Control Panel
There are a few reasons why you might find yourself needing to replace the control panel of your Genie garage door opener. The most common issue is the symptoms of malfunction. If you notice the buttons are sticking, not responding at all, or if the panel isn’t lighting up, it’s a strong signal that it may be time for a replacement.
Another reason could be wear and tear. Over time, dust, moisture, and even everyday use can take their toll. Just like any electronic device, a control panel has a lifespan. If you find that it’s failing more often than not, think of it as a sign that it’s time for a fresh start.
Finally, if you’ve recently upgraded to a smarter home system, pairing a new control panel is a great way to harmonize your devices. The Genie control panel can sometimes feel a little outdated compared to the sleek, modern remotes or apps available today.
Gathering the Right Tools
Before you start the replacement process, it’s essential to gather all the necessary tools. This will save you time and minimize frustration. Here’s a simple list of what you’ll need:
- *Screwdriver (usually Phillips-head)*
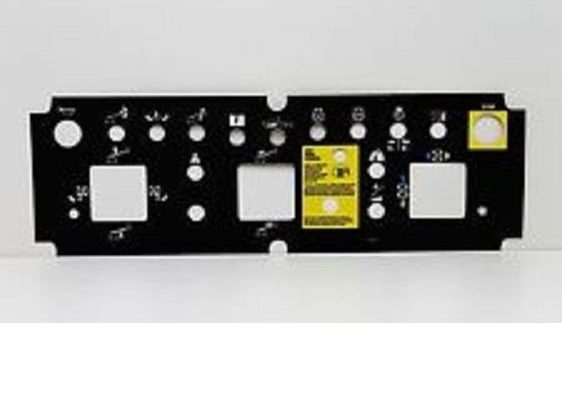
- *Replacement Genie control panel* – Make sure it’s compatible with your model!
- *Drill (optional)* for installing the new panel
Let me explain why each of these tools matters. The screwdriver is your primary tool; it allows you to remove the screws holding the old panel in place. If you’re drilling, it typically is to fix any issues with mounting that may have occurred with the old panel.
And don’t forget about the replacement control panel. Always double-check that the part you’ve bought matches your Genie opener model. You can usually find this information on the device or in its manual. Ensuring compatibility is vital; a mismatched part will only add to your troubles.
Safety First: Powering Down Your Garage Door Opener
Before diving into the replacement, safeguarding yourself is crucial. Start by disconnecting the power supply to your garage door opener. You can usually find a power switch on the motor assembly, or you may opt for unplugging it directly from the outlet.
Why is this step so important? Well, imagine trying to change a tire while the car is running—definitely not safe. Similarly, working on the control panel while the opener is powered can lead to electrical shock or accidental operation of the door.
Additionally, if your unit has a battery backup, make sure to disconnect that as well. It’s better to be safe than sorry, trust me!
Removing the Old Control Panel
Now that you’re all powered down, it’s time to remove the old control panel. First, inspect where the panel is mounted. You might see screws or fasteners. Using your screwdriver, carefully loosen these screws—avoid force. If they’re stubborn, a little gentle wiggling can go a long way.
Once the screws are out, gently pull the panel away from the wall. You’ll find wires attached to it that connect the panel to the opener. Take note of how these wires connect; it’ll help later when connecting the new panel. Most control panels use connectors, allowing you to disconnect them easily.
It’s wise to take a quick photo during this step. That way, if you forget which wire goes where, you have a handy reference. Keeping each wire organized during this process will save a lot of headache.
Connecting the New Genie Control Panel
With the old panel removed, it’s time to get your hands on that shiny new Genie control panel. Start by connecting the wires to the new unit. If you took a photo, now’s the time to check it!
You’ll probably notice that the new panel comes with a technology that ensures easy pairing and connectivity. Make sure each wire is firmly seated in its corresponding connector to ensure stable performance.
Next, mount the new control panel securely where the old one was. If you’re using screws to fasten it, make sure it’s firmly in place. You want to avoid any rattling or movement that could cause future issues.
Powering Up and Syncing Your New Control Panel
Once everything is installed, it’s time to power up your garage door opener. Go ahead and plug the unit back in or flip the breaker back on. You should immediately check that the control panel lights up; if it doesn’t, revisit your connections.
To pair your new control panel with the garage door opener, you often have to press a set-up button on the motor. It’s usually a small red or purple button located near where the power is connected. Pressing that button sets the two devices in sync.
Here’s the thing: if the door doesn’t respond right away after syncing, don’t panic. Sometimes it takes a few tries. Just repeat the sync process, making sure to follow the manual that came with your new control panel.
Troubleshooting Common Issues
After replacing your Genie control panel, you may face some hiccups. For instance, if the door doesn’t open or close consistently, make sure that all the wiring is still intact. Sometimes, a loose wire can throw everything off.
If you’re experiencing intermittent issues, consider checking your power source. Ensure that the outlet is functioning correctly and that the backup battery, if included, is charged properly.
Sometimes, resetting the system can clear out any minor glitches. Find the reset button on the motor unit and give it a press. This can restore functionality and performance.
Maintaining Your New Genie Control Panel
Once you’ve successfully replaced your Genie control panel, keeping it in good shape is key. Regular maintenance helps prevent issues down the road.
Start by cleaning around the control panel. Dust can build up and cause buttons to stick or stop functioning. Wipe it down monthly with a damp cloth. Secondly, check the connections periodically to ensure everything is still firm and secure.
Lastly, keep an eye on battery levels if your control panel has battery backup. If you notice any signs of malfunction, act promptly. Addressing issues early can save you from bigger headaches later on.
In the end, replacing a Genie control panel can seem tricky, but with a little prep work and the right tools, it’s a manageable DIY task. A few steps can lead you to a smooth-operating garage door, making your life just a little bit easier! Happy garage door operating!