
Replacing a Genie circuit board may seem daunting, but it’s a task you can tackle on your own. Armed with a bit of patience and the right tools, you can get your garage door back into shape. In this guide, we’ll go through all the steps you need to take, making sure you feel confident every step of the way. So let’s dive into the world of garage door openers and circuit boards!
What Is a Garage Door Circuit Board?
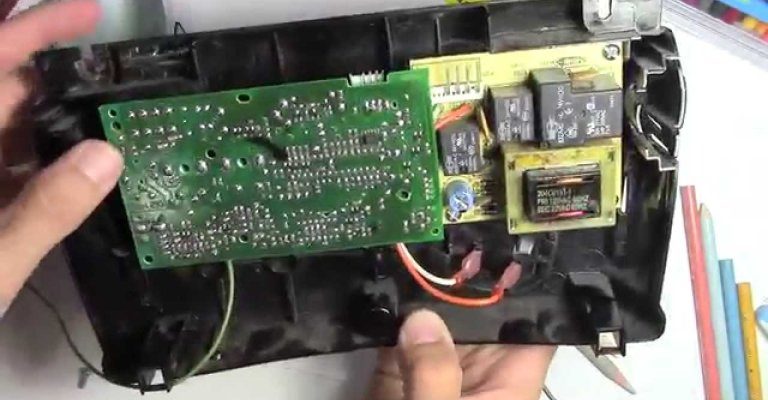
The circuit board in your Genie garage door opener is like the control center for your remote and motor. It takes signals from your remote and translates them into actions—like opening or closing the door. If the circuit board is damaged or malfunctioning, you might notice symptoms like inconsistent door movement, failure to open or close, or blinking lights.
It’s crucial to understand how common issues can arise. For example, power surges, water exposure, or even just age can lead to wear and tear on the board. When you find yourself constantly troubleshooting or resetting your opener, the circuit board is often the prime suspect. This makes learning how to replace it essential for maintaining your garage door’s functionality.
Gather Your Tools and Materials
Before jumping in, you need a few tools to make the process smoother. Here’s a quick list of items you’ll want to have handy:
- Toolbox: A basic set containing screwdrivers, pliers, and wire cutters.
- Replacement circuit board: Make sure it’s compatible with your Genie model. You can typically find this at hardware stores or online.
- Work gloves: These protect your hands from sharp edges while you work.
- Multimeter: This is optional, but it’s handy for checking voltage and ensuring your opener has power.
Make sure you have all your materials ready before starting. It’s like prepping before cooking—you don’t want to be scrambling around mid-recipe, right?
Prepare for the Replacement
Now that you have your tools ready, it’s time to prepare for the replacement. First, disconnect the power to the garage door opener. Safety is the top priority here! Pull the motor unit’s power cord out or trip the circuit breaker to ensure you’re safely working without any electrical risks.
Next, take a moment to clear the area around the garage door opener. You want plenty of room to maneuver while you’re working. If you’re in a tight space, consider moving the car out of the way. Once that’s done, grab your toolbox—it’s time to get to work!
Remove the Old Circuit Board
When you’re ready to tackle the circuit board replacement, start by removing the cover of your Genie opener. This usually requires unscrewing a few screws. Once the cover is off, you’ll see the circuit board—often strapped to the unit with a few screws or clips.
1. Locate the circuit board: It should be attached towards the back of the motor unit.
2. Take photos: Before you disconnect anything, snap some photos of how the wires are connected. This will be a lifesaver when you’re connecting the new board!
3. Disconnect the wires: Carefully detach the wires from the old circuit board. Use your screwdriver if needed, but be gentle—don’t pull too hard on the wires.
4. Remove the screws: Finally, unscrew the board from its mount. And voilà, the old board is out!
Install the New Circuit Board
Now you’re at the fun part—installing your new circuit board! This is where all your prep work pays off. By referencing those photos you took, reconnect the wires to the new board exactly as they were on the old one.
1. Align the board: Position the new circuit board in the same spot as the old one.
2. Secure it in place: Use your screws to fasten the board into its mounting area.
3. Reconnect the wires: One by one, attach the wires to their respective terminals on the new board, following your photos for accuracy.
Test the New Circuit Board
Once everything is back in place, it’s testing time! Before you plug the opener back in, take a minute to double-check all your connections. Ensure everything is secure and there are no loose wires hanging around. You wouldn’t want any surprises!
1. Reattach the cover: Put the cover back on the Genie opener and screw it into place.
2. Power up the unit: Connect the power cord or reset the circuit breaker to provide power to the opener.
3. Test the remote: Grab your remote and press the button. Did the door open? If so, you’ve successfully replaced your Genie circuit board!
Final Thoughts on Circuit Board Replacement
Replacing the circuit board in your Genie garage door opener doesn’t have to be intimidating. With the right tools, a little bit of patience, and this guide by your side, you can tackle the replacement like a pro.
Just remember, regular maintenance goes a long way in prolonging the life of your garage door opener. Occasionally check the circuit board for any issues, and don’t hesitate to troubleshoot problems before they escalate. You’ll keep everything running smoothly, and before you know it, you’ll be the go-to garage door expert among your friends!
By taking control of this small repair, you’ve not only saved time and money but also gained confidence in handling DIY repairs. Keep this guide handy for future reference, and enjoy your smoothly operating garage door!