Craftsman has been a trusted name in garage door openers, and their wall buttons can sometimes wear out or fail for a variety of reasons. Perhaps it’s a malfunction, or maybe the button has simply aged over time. Whatever the reason, you can fix this issue without calling a costly professional. We’ll cover everything you need to know to tackle this task confidently.
Tools You’ll Need
Before diving into the replacement process, it’s essential to gather a few tools to make your life easier. Here’s what you’ll need:
- Screwdriver: Usually, a flathead or Phillips screwdriver works best.
- Replacement Wall Button: Make sure it’s compatible with your Craftsman garage door opener.
- Wire Strippers: These are handy for preparing the wires if needed.
- Voltage Tester: This ensures the power is off before you start working.
Having everything ready before you begin helps avoid interruptions, and trust me, it feels great to have all your tools on hand.
Safety First: Turn Off Power
Before you begin working on your wall button, safety should be your top priority. Garage doors can be heavy, and electrical components need to be handled with care. Here’s a simple approach to keep safe:
1. Locate your garage door opener – This is often found on the ceiling of your garage.
2. Unplug the opener from the outlet – This ensures that there’s no power flowing while you’re working. If your opener is hardwired, raise and close the door using the remote to ensure the power is truly off.
3. Use a Voltage Tester – Check the button for electrical current. If there’s no power, you’re good to go.
Taking these steps not only keeps you safe but also protects your garage door system from any potential damage.
Removing the Old Wall Button
Now that we’ve ensured everything is safe, it’s time to take out the old wall button. Follow these steps:
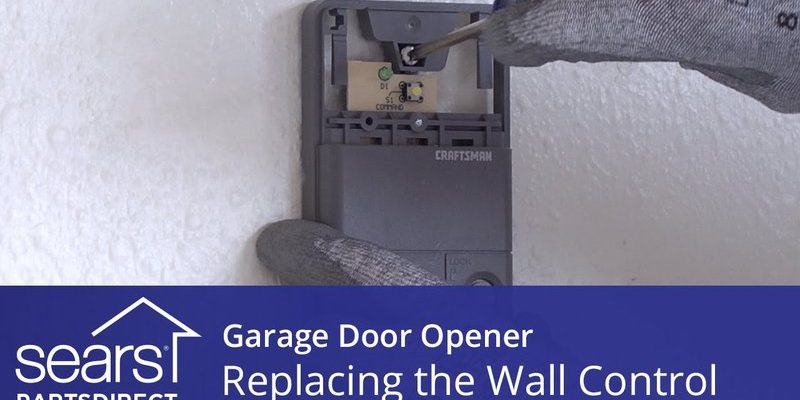
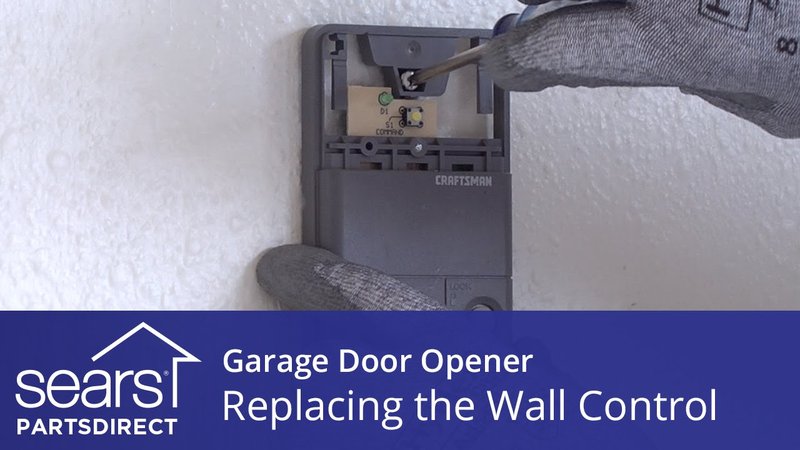
1. Unscrew the Wall Button – Use your screw driver to remove any visible screws securing the wall button to the wall. Set the screws aside in a safe location so you don’t lose them.
2. Disconnect the Wires – After unscrewing it, carefully pull the wall button away from the wall. You’ll likely see two wires connected to the back of the button. Gently disconnect these by either unscrewing the terminals or pulling the wires off if they’re clipped on.
3. Take Note of Connections – It’s wise to note where each wire connects (you might even snap a quick picture) before you remove them, so you can install the new button correctly.
Removing the old button doesn’t take much time, but being methodical helps prevent any mishaps.
Installing the New Wall Button
Now comes the exciting part—installing the new Craftsman wall button. It’s almost like giving your garage a little upgrade. Here’s how to do it right:
1. Attach the Wires – Connect the wires to the new button corresponding to how they were connected previously. Red typically goes to the red terminal, and white goes to the white terminal. Secure them tightly.
2. Secure the Button to the Wall – Position the new wall button in the same spot as the old one and use screws to secure it firmly. Make sure it’s level so it looks nice and professional.
3. Double-check Your Work – Before plugging everything in, take a moment to inspect your connections and ensure everything is snug and secure.
This is the moment you’ll see your efforts start to pay off!
Powering Up and Testing
With your new wall button installed, it’s time for the moment of truth. Here’s what to do next:
1. Plug in the Opener – Bring power back to your garage door opener. Remember, safety first: ensure nothing is obstructing the garage door path.
2. Test the New Button – Press the wall button to see if it opens and closes the door smoothly. If everything is working correctly, congratulations—you’ve successfully replaced your Craftsman wall button!
If the door doesn’t operate, don’t panic. You might need to check your connections to ensure everything is set correctly or consult your owner’s manual for troubleshooting tips.
Troubleshooting Common Issues
Sometimes, even new buttons can have trouble. Here are some quick tips if things don’t go as planned:
– Check for a Dead Battery if You Have a Wireless Button – If you have a wireless wall button, it might just be a battery issue.
– Double-Check Connections – Loose or crossed wires could lead to functionality problems.
– Look for Interference – Sometimes, other electronic devices can interfere with garage door signals.
If you’ve followed all the steps and problems persist, refer to your user manual or contact Craftsman support for professional help.
Replacing your Craftsman wall button doesn’t have to be a daunting project. With a bit of preparation and patience, you can easily handle this task on your own, saving you both time and money. Remember to gather the necessary tools, prioritize safety, and take your time with each step.
Next time you press that button and watch your garage door operate flawlessly, you’ll have the satisfaction of knowing you did it yourself. Plus, it’s a great skill to have under your belt! Happy troubleshooting!