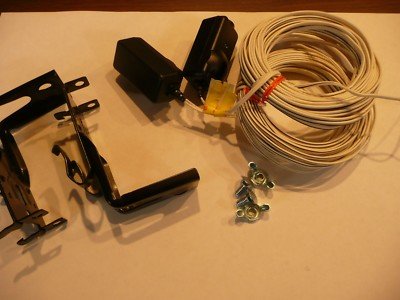
In this guide, we’ll walk through how to replace the safety sensor step-by-step. Chamberlain garage door openers are popular for their reliability, and knowing how to fix small issues can keep your garage door running smoothly. So grab that toolbox, and let’s get started!
Understanding How Chamberlain Safety Sensors Work
Before diving into the replacement process, it’s crucial to understand how these sensors actually function. Chamberlain safety sensors typically consist of two parts: the sending sensor and the receiving sensor. The sending sensor emits an invisible beam, while the receiving sensor detects this beam. If the beam is interrupted—by, say, your car or a toy—the garage door halts or reverses to prevent accidents.
Picture this: You’re in a hurry, and the garage door starts closing but suddenly stops because that beam picks up a presence. It’s a good thing too! These safety measures help avoid injuries and damage to your property. If they’re malfunctioning, it can lead to frustration—and maybe even a few close calls.
Here’s the thing: the sensors can get misaligned, dirty, or, in some cases, busted altogether. Knowing how to judge their condition is vital before you replace them.
Signs You Need to Replace Your Safety Sensor
Recognizing that your safety sensor needs replacing isn’t always straightforward. Here are some signs to look out for:
- Flashing Lights: If the light on your safety sensor is blinking, it usually means there’s an issue.
- Door Won’t Close: If your garage door refuses to close despite pushing the remote, it’s a sign of sensor trouble.
- Misalignment: If the sensors aren’t facing each other correctly, it’s a simple fix—or it could indicate a deeper problem.
- Physical Damage: Check for cracks or breaks. If the sensor is damaged, it needs replacing.
If you’re experiencing any of these symptoms, don’t worry— replacing your Chamberlain safety sensor can solve the problem, and I’ll guide you through every step!
What You’ll Need for the Replacement
Before you start working on your garage door, gather the necessary tools and materials. It helps to have everything within arm’s reach, so you don’t find yourself searching mid-repair. Here’s what you should prepare:
- New Chamberlain safety sensor kit
- Screwdriver (usually Phillips or flathead)
- Wire cutter/stripper (if required)
- Level (for alignment)
- Cleaning cloth (to clear any dirt or obstructions)
Having the right tools on hand can make your job much easier. Think of it like a chef preparing all the ingredients before starting a recipe—it just makes sense!
Step-by-Step: Replacing the Chamberlain Safety Sensor
Let’s get into the heart of the matter. Here’s how to replace your Chamberlain safety sensor in five simple steps:
1. Disconnect the Power
First and foremost, always disconnect power from your garage door opener. Locate the power cord and unplug it, or turn off the breaker that powers the garage door opener. Safety first, right?
2. Remove the Old Sensor
Once the power is off, carefully locate the old safety sensor. It’s usually mounted on the garage door tracks, about six inches above the floor. Use your screwdriver to remove the screws holding the sensor in place. Don’t forget to note where the wires connect—taking a quick picture can be really handy.
3. Install the New Sensor
Now it’s time to install your new sensor. If your new Chamberlain safety sensor came with wires, use that wire stripper to expose enough of the wire to get a solid connection. Connect the wires as per the instructions—typically, it’s color-coded to help you out.
Afterward, fasten the sensor in place with the screws you removed earlier, ensuring it’s secure.
4. Align the Sensors
Alignment is crucial for the sensors to work correctly. Use your level to make sure they face each other directly without any obstructions in the middle. If they’re even a little out of alignment, they may not function properly, so take your time here.
5. Test the New Sensor
Reconnect the power to your garage door opener, then test it. Press the remote or wall button to close the door. Stand in the path as it’s closing (but be safe!)—the door should reverse when it encounters you. If it works, you’ve successfully replaced your safety sensor!
Troubleshooting Common Issues
You might be wondering what to do if the new sensor isn’t working as expected. Here are a few troubleshooting steps you can take:
- Check Alignment: Misalignment is a common problem. If the sensors aren’t lined up, they won’t communicate.
- Inspect Wiring: Double-check that all wires are securely connected. Sometimes, a loose wire is all it takes.
- Clean the Sensors: Dirt and debris can block the sensor’s path. Give them a quick wipe with a cloth.
These steps often solve the issues and get your garage door working again in no time.
Why Regular Maintenance Matters
Now that you’ve replaced your Chamberlain safety sensor, don’t forget it! Regular maintenance can prolong the life of your entire garage door system. Here are some activities to consider:
- Inspect Sensors: Regularly check the alignment and cleanliness of your sensors.
- Listen for Noises: Strange noises can indicate wear and tear in the opener.
- Test the Door: Occasionally test the door’s response to the remote and safety features.
Keeping an eye on these factors helps you avoid larger issues down the line.
Replacing Chamberlain safety sensors can seem intimidating at first, but with the right guidance, it’s straightforward and rewarding. You’ve not only ensured the safety of your family and belongings but also gained confidence in handling garage door repairs. So, the next time those sensors give you trouble, you’ll know exactly what to do. Happy DIYing!