In this guide, we’ll walk through how to program your Sears wall button so it communicates perfectly with your garage door opener. We’ll break it down step-by-step, eliminating any confusion or concern you might have. Before you know it, you’ll master this task, leaving you more time to enjoy what matters most—like that afternoon snack or your favorite show.
Understanding Your Sears Wall Button
Before diving into programming, it’s important to know what you’re working with. The Sears wall button is usually a simple, push-button device mounted on a wall. It can be a bit like your garage’s personal concierge, responding with a click to your command.
You might be wondering why having this button is so significant. It allows for easy access to your garage without reaching for your remote or getting out of the car. Plus, if you happen to misplace your remote—who hasn’t?—you’ll still be able to operate your door.
To make programming effective, it’s essential to familiarize yourself with the layout of your wall button. Usually, it has a single big button and sometimes additional features, like a light or lock function. Knowing your device will help simplify programming.
Gathering Necessary Tools and Materials
Ready to get started? Before you jump in, it’s best to gather everything you might need. Think of it like preparing for a cooking session—you don’t want to end up halfway through a recipe realizing you forgot a key ingredient!
Here’s what you’ll typically need:
- Your Sears wall button
- Power source (check if it needs batteries)
- Owner’s manual (if available)
- A step ladder (if the button is high up)
Take a little time to read through your manual—it often contains helpful diagrams or instructions specific to your model. If lost, don’t fret! Many manuals can be found online.
Programming the Wall Button
Now we’re getting to the exciting part—the actual programming! This process can vary slightly depending on the model of your garage door opener, but don’t worry. Here’s a step-by-step guide to keep you on track.
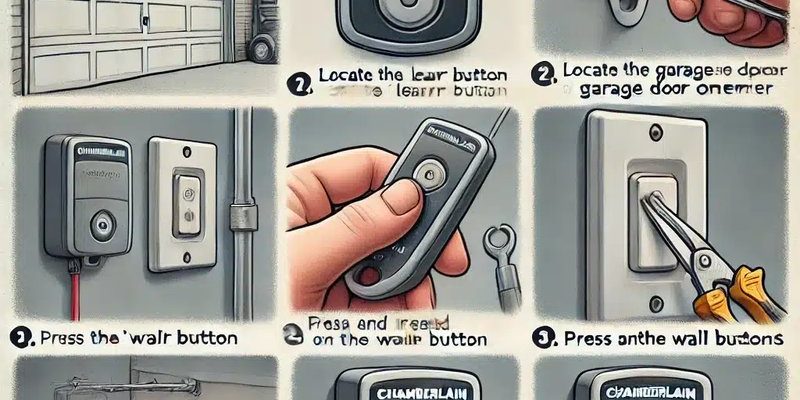
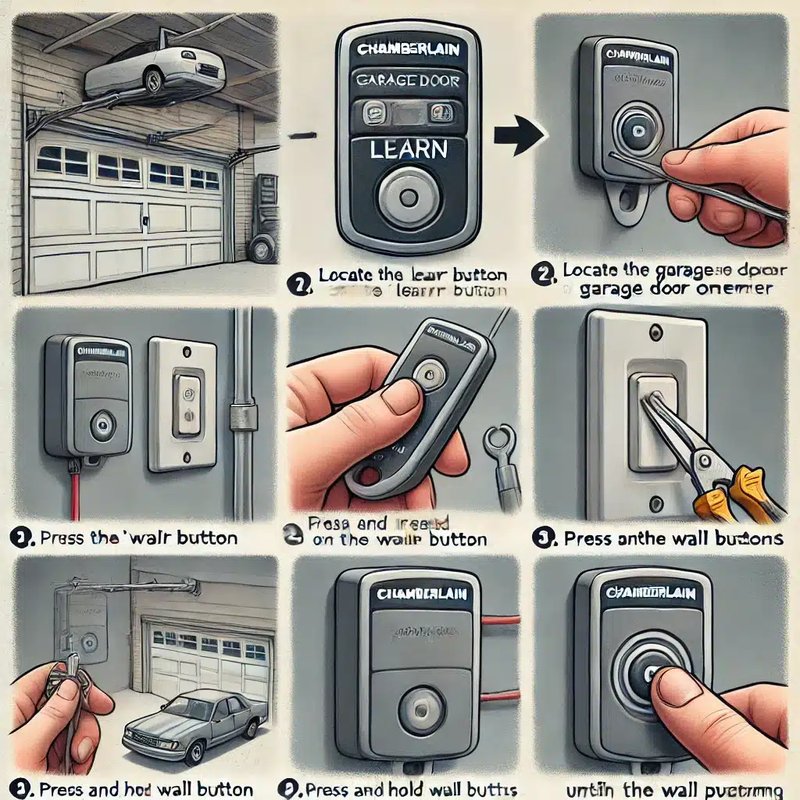
1. Locate the “Learn” Button: First, find the “Learn” button on your garage door opener unit. This is often found on the back or side and may be colored yellow, red, or purple.
2. Press the Learn Button: Once you’ve found it, press and release this button. In most cases, an indicator light will come on, signaling that the opener is in programming mode.
3. Activate Your Wall Button: Meanwhile, head over to your wall button and press it within 30 seconds. You might hear a clicking sound or the door moving—this means you’re on the right track!
4. Confirm Successful Programming: After you press the wall button, the light on the opener should blink or turn off, indicating that the programming was successful.
If the light doesn’t change, don’t panic; just repeat the steps.
Troubleshooting Common Programming Issues
Sometimes, things don’t go as planned. Just like those moments when you’re trying to make a soufflé and it flops, programming can occasionally hit a snag. Here’s how to handle typical issues when programming your Sears wall button:
– Wall Button Not Responding: If nothing happens after pressing the wall button, check if it has functional batteries and is properly connected to the wall.
– Door Doesn’t Move: If the garage door doesn’t respond to your new wall button, recheck the wiring connections. It can help to consult the manual again for specifics related to your model.
– Learn Button Not Functioning: If the learn button isn’t responding, try unplugging the opener for about a minute and plugging it back in. If it still doesn’t work, your opener might need some further attention.
Maintaining Your Wall Button for Longevity
Let’s talk about keeping your wall button in top shape so it continues to work well. Imagine your wall button as a delicate little flower; give it some love, and it will bloom for you!
Here are some tips to ensure everything runs smoothly:
1. Regularly Check the Batteries: If your wall button operates on batteries, it’s a good idea to change them yearly or whenever you notice decreased performance.
2. Clean the Button: Dust and dirt can accumulate, leading to malfunctions. A simple wipe with a damp cloth can keep it clean and responsive.
3. Keep Wiring Secure: If your wall button is wired, check the connections every so often. Loose wires can lead to signal drops.
4. Test Regularly: A quick monthly test of your wall button’s functionality can prevent surprises down the line.
Comparing Wall Button Options
While we’re focused on the Sears wall button, you might have options when it comes to similar devices. Some folks prefer universal remotes or smart phone apps.
Here’s a quick look at how they compare:
| Feature | Sears Wall Button | Universal Remote | Smartphone App |
| Ease of Use | Simple one-touch operation | Requires setup and sometimes programming | User-friendly if set up correctly |
| Cost | Often included with opener | Prices can vary | May be free, but can require investment in smart devices |
| Battery Life | Battery-operated | Varies | Device-dependent |
| Range | Fixed location | Good, but needs line of sight | Unlimited if connected |
Choosing the right device depends on your needs. If you appreciate simplicity, a Sears wall button might be your best bet. If you lean towards modern solutions, explore universals or apps that might work better for your lifestyle.
Final Thoughts on Programming Your Sears Wall Button
Programming your Sears wall button doesn’t have to be daunting. With a little effort and the steps outlined, you’ll enjoy the convenience of a functional garage door opener in no time. Keep your devices clean, batteries fresh, and familiarize yourself with expected operations, and you’ll set yourself up for success.
So go ahead, enjoy the ease of your newly programmed wall button. It’s a small victory worth celebrating, making your everyday life just a bit simpler—because honestly, who doesn’t want a little extra convenience in their day?