
Understanding the Basics of Sears Safety Sensors
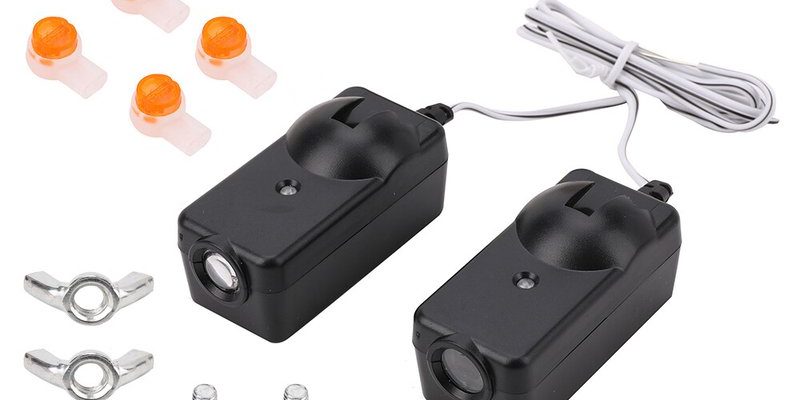
To start, it’s essential to understand what safety sensors do. Most garage door openers, including those from Sears, use these sensors to prevent accidents. Located on either side of the garage door, they emit an invisible beam. If something blocks that beam, the garage door stops or reverses. This serves to keep pets, kids, and your car safe.
You might be wondering how often these sensors need checking or programming. Typically, you won’t need to program your safety sensors unless they’ve been disturbed, like after a power outage or if you’ve moved them during repairs. Knowing how to get them back in sync is essential for maintaining your garage’s safety features.
Gathering the Right Tools
Before you begin the programming, gather the necessary tools. Here’s what you’ll need:
- Your Sears garage door opener manual (if available).
- A step ladder (if the sensors are mounted high).
- A screwdriver to adjust the sensor positions if needed.
- A clean cloth to wipe the sensor lenses.
Having the right tools makes the entire process smoother. If you’re missing the manual, you can often find a PDF version online. It’s always a good idea to have a reference on hand, just in case you encounter any unexpected issues.
Inspecting Your Safety Sensors
Before programming, it’s crucial to check your sensors’ condition. Sometimes, sensors might not work simply because they’re dirty or misaligned. Here’s a quick checklist:
1. Check Alignment: Stand directly in front of the sensors. Are they pointing straight at each other? If not, gently adjust them until they’re aligned.
2. Clean the Lenses: Dust and grime can obstruct the sensor’s beam. Use a clean cloth to wipe the lenses gently. This ensures nothing is blocking their view.
3. Wiring Issues: Look for any visible damage to the wires connected to the sensors. If you spot any fraying or severed wires, that could be a reason for malfunction.
If everything looks good but the sensors still aren’t functioning, it might be time to program them again.
How to Program the Sensors
Now, let’s get into the meat of programming your Sears safety sensors. Follow these steps to sync them properly:
1. Locate the Programming Button: This can usually be found on your garage door opener motor. It might be labeled “Learn” or “Program.”
2. Activate Programming Mode: Press and hold this button for a few seconds until you see a light on the opener start to blink. This indicates that it’s ready for programming.
3. Position the Sensors: Ensure the safety sensors are properly aligned. If they’re not lined up, the programming won’t work. You might need someone to help you by standing at the sensors while you’re at the opener.
4. Complete the Process: Once the sensors are aligned, step away to ensure that nothing is obstructing the beam. The blinking light on the opener should stop, indicating the programming was successful.
Don’t panic if the programming doesn’t work on the first try. Sometimes, the sensors can be a bit finicky. If you’re having trouble, try rerunning the process.
Troubleshooting Common Issues
Even after following the programming steps, you might still face some issues. Here’s how to troubleshoot common problems:
– Sensors Not Aligned: If the garage door doesn’t open or close properly, double-check that the sensors are aligned correctly.
– Flashing Light: If the sensor light is blinking rapidly, it usually indicates an obstruction. Clear any objects that might be in the door’s way.
– Stability Check: If the sensors are loose, they might not work effectively. Tighten any screws holding them in place.
By following these troubleshooting tips, you can often resolve issues without needing extensive repairs or calling a professional.
Understanding Safety Sensor Codes
Your Sears garage door opener might also use specific codes to communicate with the safety sensors. If you’re experiencing significant trouble, it’s worth checking the system’s codes. Here’s how to do it:
1. Check your Manual: Look for a section that discusses codes and what they might signify.
2. Resetting the System: If all else fails, consider resetting the entire garage door system. Turn off the power to the opener, wait a minute, and then turn it back on. You may have to reprogram the sensors afterward.
These codes are like secret messages your opener uses. If you see any errors displayed or flashing lights, refer back to your manual for further instructions.
The Importance of Regular Maintenance
Now that you’ve successfully programmed your Sears safety sensor, it’s vital to keep everything functioning smoothly. Regular maintenance ensures that your safety sensors and garage door mechanics don’t run into issues down the line.
– Monthly Inspections: Make it a habit to check the sensors’ alignment and cleanliness once a month. A quick wipe-down can prevent behaviors that lead to hiccups.
– Listen for Sounds: Keep an ear out for unusual sounds when operating the door. Any grinding or squeaking could indicate a need for lubrication or other maintenance.
– Check the wiring: Inspect the wiring occasionally to ensure there are no vulnerabilities that could create problems later.
By staying proactive with maintenance, you can enjoy peace of mind while using your garage door.
In conclusion, understanding how to program and maintain your Sears safety sensor is key to keeping your garage both functional and safe. When you take the time to learn and follow these steps, you’re not just setting up a system; you’re also safeguarding your home. If you encounter any hiccups along the way, just return to this guide and work through the steps again. Happy garage-ing!