Imagine your keypad as a small control panel that manages not just the garage door but also your peace of mind. Whether it’s letting in family members or just accessing your own stuff, knowing how to program it makes life so much easier. Plus, it can save you from the hassle of searching for keys every time you come home. So, let’s dive into how to program your Sears keypad step by step.
Understanding Your Sears Keypad
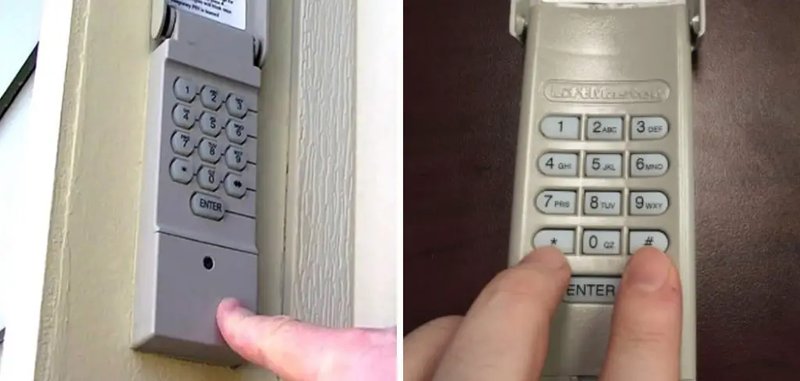
The first step in programming your Sears keypad is understanding what type you have. Most Sears keypads are compatible with various models, but they typically feature a numeric keypad and a few extra buttons for functions like “learn” or “program.” You might find different models in the garage door opener lineup—some older, some newer—but the basic programming steps usually remain similar.
You might be wondering what’s the big deal about knowing your model. Well, different models can have slightly different programming methods. Looking for the model number can be as simple as checking the back of the keypad or referencing your owner’s manual. This way, you can avoid any confusion when it’s time to actually do the programming.
Once you’re familiar with the keypad, you’ll notice most have special features. For instance, some keypads can support multiple codes, which is really handy for family or for those times when you have friends visiting. Let’s keep that in mind as you figure out the programming process!
Gathering What You Need
Before you jump into programming, let’s gather some essentials. You will need:
- Your Sears keypad.
- Your garage door opener (plugged in and ready).
- A step ladder (if necessary, but many keypads can be accessed easily).
- A clean surface to jot down your new code.
- Any tools you may require, though it’s usually just a screwdriver or none at all.
Here’s the thing—getting organized makes the process much smoother. Your code can be anything you want, but it’s a good idea to pick something easy for you to remember but not so obvious that it could be easily guessed. Think of it as creating a new secret password for your little garage fortress.
Oh, and don’t forget to check the keypad’s battery while you’re at it! A dead battery can lead to a lot of frustration. If your keypad isn’t lighting up or responding, that’s a good sign it needs replacing.
Programming the Keypad: Step-by-Step
Now, let’s get to the fun part—programming! If you’re ready, here’s a straightforward step-by-step guide:
1. Locate the “Learn” Button: This button is typically found on your garage door opener motor. It may be red, yellow, or another color depending on the model. It’s like the gateway to linking the keypad with the garage opener.
2. Press the “Learn” Button: Once you locate it, press the “Learn” button until you see the indicator light turn on. This means the unit is ready to sync with a new code.
3. Enter Your Desired Code on the Keypad: Type in a code of your choice. Most keypads allow for 4 to 8 digits, but double-check that!
4. Press the “Enter” Key: After entering the code, press the “Enter” key to save it. If done correctly, you should see the light on the garage door opener blink or go out, confirming the new code is accepted.
5. Test It Out: Finally, step outside and give your new code a try! If the door opens, congrats—you’re done! If not, you may need to repeat the steps or check for any mistakes.
It might sound a bit complex, but honestly, if you follow these steps, you’ll be unlocking your garage in no time.
Troubleshooting Common Issues
Even with a clean setup, sometimes things take a turn for the worse. Here are a few common problems and solutions:
– Keypad Doesn’t Respond: Check the battery, as I mentioned earlier. A simple battery swap might be all you need. Also, ensure that the keypad is properly paired with the garage door opener.
– Code Is Not Accepted: Double-check the code you entered. Make sure it matches what you intended. If the problem persists, you may need to reset the keypad and repeat the programming steps carefully.
– Garage Door Doesn’t Open or Close: Inspect the door tracks and ensure that there are no obstructions. Sometimes, a stuck door could be mistaken for a programming error.
– Interference from Other Devices: Other wireless devices nearby might affect how your keypad communicates with the opener. Keep that in mind and try to keep other electronics away.
Resetting Your Sears Keypad
Maybe your kids decided to have a little fun and changed the code without telling you, or perhaps you just want a fresh start. Resetting your Sears keypad is simple. Here’s how:
1. Locate the “Learn” Button Again: Just like before, find that button on your garage door opener motor.
2. Press and Hold: Press and hold the “Learn” button for about 10 seconds. This action typically erases any existing codes.
3. Reprogram Your Keypad: Once you’ve reset it, you can start from scratch. Go through the programming steps again to set a new code.
An important note: each time you reset the keypad, you wipe out all previous codes, so make sure everyone who needs access knows the new code!
Final Thoughts on Your Sears Keypad
You now have all the tools and tricks needed to master your Sears keypad programming. Knowing how to program this little device gives you a sense of control and security. And honestly, who doesn’t want that kind of ease when coming home?
Whether it’s for convenience or necessity, taking a few moments to understand and program your keypad can save you from a lot of headaches later on. So go ahead—embrace that newfound power, pair your keypad with your opener confidently, and enjoy the ease of entry into your garage.
Remember, if you run into any bumps along the way, reverting to the steps above can help guide you through. Enjoy the peace of mind that comes with being in command of your garage space!