Whether you just upgraded your garage door system or simply lost your remote, a keypad can be a game changer. Imagine having a secure way to access your garage without fumbling for a key or remote key fob. It’s about convenience mixed with that extra sprinkle of security. In this guide, we’ll walk you through the process step-by-step. So, let’s dive in and ensure your Raynor keypad becomes your go-to tool for garage entry!
Understanding Your Raynor Keypad
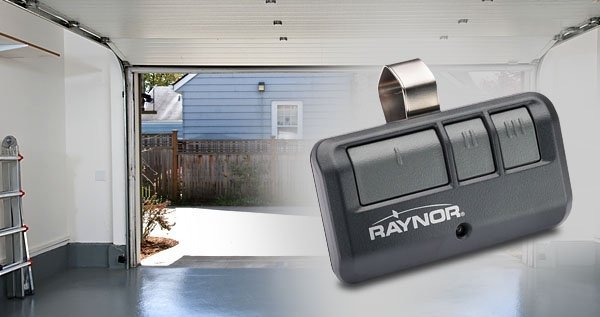
Before jumping into programming, let’s take a closer look at what your Raynor keypad is all about. This sleek device lets you open your garage door with a simple code, removing the need for a physical key or remote. A typical keypad will feature a number pad, usually with 10 digits, and may also have a few extra buttons for functionality. Understanding each part of your keypad is crucial for programming.
The keypad usually needs to be mounted near your garage door for easy access. Make sure it’s within the range of your garage door opener. Every Raynor keypad is designed to pair seamlessly with specific garage opener models. If you’re unsure about compatibility, it’s a good idea to check your product manual. This will often save you a headache later on.
Lastly, keep in mind that most Raynor keypads can handle multiple codes, which is ideal if you want to share access with family or trusted friends. This brings a layer of flexibility—much like having extra keys made. Just remember, with extra convenience comes the need for caution. Always ensure that codes are shared responsibly to keep your space secure.
Gathering What You Need
Alright, let’s make sure you have everything in place before we start programming your Raynor keypad. Here’s what you’ll need:
- Your Raynor Keypad: Make sure it’s powered up and close enough to the garage opener.
- Access to Your Garage Door Opener: Knowing where the main unit is located will help.
- A List of Codes: You might want to write down the codes you want to program, in order to avoid confusion.
- A Helper: If you’re not too confident, having someone lend a hand can simplify things.
With these items on hand, you’re almost ready to program. Before starting, make sure your garage door is closed to prevent any accidents while you’re working. After all, safety comes first when dealing with moving machinery!
The Programming Process Step-by-Step
Now that you’ve gathered everything, let’s get into the nitty-gritty of programming your Raynor keypad. Think of it like following a recipe—you need to have the right steps in place to ensure the outcome is deliciously smooth!
1. Locate the “Learn” Button: On your garage door opener motor, there’s a button labeled “Learn” or “Program”. This is your starting point.
2. Press the Learn Button: Usually, you’ll need to press this button once. You should see a light indicator blink, confirming it’s ready for programming.
3. Enter Your Desired Code: Quickly move to your keypad and enter the desired code (usually 3-8 digits). Make sure it’s something you can remember, but not too easy for others to guess!
4. Finish with Enter/Send: After entering your code, hit the ‘Enter’ or ‘Send’ button on your keypad. You should see a light flash on the opener, indicating the connection was successful.
If you miss your timing, don’t sweat it! Just begin the process again. Every keypad has a timing window, often around 30 seconds, to ensure quick programming.
Troubleshooting Common Issues
Sometimes, even with the best intentions, things don’t go as smoothly as planned. If you find your keypad isn’t working after programming, here are some common issues to consider:
– Double-Check Your Code: Make sure the code you entered on the keypad matches what you programmed into the garage door opener. It sounds simple, but typos happen!
– Battery Check: Is your keypad battery running low? If so, it might not send signals effectively. Replace it if necessary—fresh batteries can revive your device to life.
– Distance from Opener: If the keypad is too far from the garage opener, it might struggle to communicate. Relocate it closer if needed.
Remember, troubleshooting is all about patience. Like trying to find the root of a problem in a puzzle, approaching it methodically will yield the best results.
Maintaining Your Raynor Keypad
Once programmed, your Raynor keypad can look after itself for quite a while. However, regular upkeep can help avoid future headaches. Here are a few helpful tips:
– Regularly Check the Battery: Just like your remote, the keypad needs a good battery to function. Consider checking the status every few months.
– Keep it Clean: Dust and dirt can accumulate on the buttons. Wipe down your keypad regularly to keep it in tip-top shape.
– Reprogram If Needed: If you ever change your code for security reasons, just follow the steps to reprogram it as needed. It’s smart to update your code now and then, similar to changing your passwords online.
Treat your keypad with care, and it’ll serve you well for years to come. Plus, maintaining it is good practice for any technology in your home.
When To Call for Help
There might be times where you feel stuck. Whether you’ve misplaced your manual, can’t get the programming to work, or simply want reassurance that you’re doing things right, knowing when to seek professional help is crucial.
If your keypad consistently fails or you encounter mechanical issues with the garage door opener itself, consider calling in an expert. A technician can diagnose problems more accurately and help with more complex problems that go beyond simple programming. Remember, it’s okay to ask for help! Just like you would consult a plumber for a leaky sink, a garage door professional can make troubleshooting much easier.
In closing, programming your Raynor keypad doesn’t have to be complicated. With these clear steps and a bit of patience, you’ll be able to enjoy the convenience and security it brings. So grab that cup of coffee and prepare for seamless garage access whenever you need it. Happy programming!