Think about it: your garage door is like the gatekeeper to your castle. You need to be in control of who comes in and out, so understanding how to program your opener is crucial. Whether you’ve just bought a new remote or replaced your old one, knowing how to sync it properly to your garage door system is key. Let’s walk through the process step by step.
Understanding Your Raynor Garage Door Remote
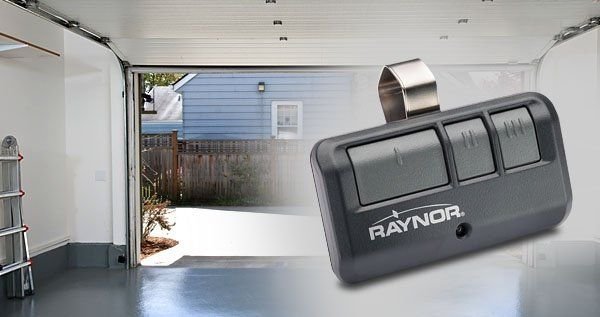
Before diving into programming, let’s take a moment to familiarize ourselves with the types of Raynor garage door remotes. Typically, you’ll encounter two common types: the keychain remote and the keypad entry. The keychain remote is small and slips right onto your keyring, making it super convenient. The keypad entry, on the other hand, is installed on your garage wall and allows you to enter a code for access.
Why does understanding these types matter? Because each has its own unique programming process! If you have a keychain remote, you’ll be pressing buttons while standing in front of your garage door opener. For the keypad entry, you’ll be entering a code to sync it. Knowing which one you’re working with is the first step in the right direction.
Locating the ‘Learn’ Button
Next, let’s find that all-important ‘learn’ button on your garage door opener. Usually, you can spot this little button on the back or side of the unit, often near the antenna. Here’s the kicker: this button is the key to programming your remote!
To locate the learn button, you may want to grab a ladder if your opener is mounted high. Don’t worry, it’s not as scary as it sounds. Just make sure you’re steady, and take a good look. The button will either be colored (commonly yellow, red, or purple) or labeled—just don’t confuse it with other buttons! A quick press of this button gives your opener the signal that it’s ready to receive a new remote.
Programming Your New Raynor Remote
Now that you’ve found the learn button, it’s time to put that knowledge to work! To program your Raynor garage door opener, follow these steps:
1. Press and hold the learn button until the indicator light turns on. This usually takes a second or two.
2. Grab your remote and press the button you want to program. Keep it pressed for about 2 seconds and then release it. You should see the indicator light blink and then turn off.
3. Test the remote by pressing the button again. If your garage door opens, congratulations! You’ve successfully programmed your remote.
But if it doesn’t, no need to panic. Sometimes it takes a couple of attempts, or you might need to reset the opener. Make sure your remote has a fresh battery. A weak battery can make syncing tricky.
Resetting and Troubleshooting
You might be wondering what happens if things don’t go as planned. That’s a common concern when it comes to programming any gadget. The good news is that resetting your Raynor garage door opener is quite straightforward.
To reset, simply press and hold the learn button until the light turns off. This clears all programmed remotes from the system. Afterwards, you can start fresh and program your remote again following the steps above.
Common troubleshooting tips include:
– Checking the battery: Ensure your remote has a fresh battery installed. You don’t want to be halfway through programming only to realize your battery’s dead!
– Confirming distance: Make sure you’re close enough to the garage door opener when programming. Sometimes a few extra feet can make a difference.
– Checking the code: If you’re using a keypad entry, double-check your code for any errors. Typos can lead to confusion!
Using a Universal Remote Alternative
If you’ve tried everything and your Raynor remote still won’t sync, you might be considering a universal remote. Universal remotes can program with various garage door openers, offering flexibility if you have multiple doors or if your original remote is lost.
Here’s the thing: programming a universal remote varies by brand, but the process is usually similar to the steps mentioned earlier. You’ll still need the learn button on your garage door opener, and it may require slightly different button presses. This option could be ideal if you’re frequently losing remotes or just want something that works on several openers.
Taking Care of Your Garage Door System
Once you’ve got everything programmed, it’s a good time to think about overall maintenance. Your Raynor garage door opener is a hardworking component of your home, and keeping it in good shape means it’ll serve you well. Regularly check the:
– Tracks: Keep them clean and free of debris.
– Springs: Inspect for wear or rust—this is key to smooth operation.
– Safety sensors: Make sure they’re aligned correctly and clean.
By inspecting your garage door system regularly, you can extend its lifespan and avoid unexpected repairs when you least expect them.
Final Thoughts
Programming your Raynor garage door opener doesn’t have to be a daunting task. There’s a bit of a learning curve, sure, and after reading through the steps and tips, you should feel ready to tackle the task. Just remember, it’s all about taking it step by step.
If you run into any hiccups, don’t hesitate to revisit these instructions. Once you’ve got everything up and running, you’ll appreciate the convenience of having your garage door at your fingertips. Keep enjoying that sense of control and peace of mind—your garage is now your own personal access fortress!