Programming your Genie control panel isn’t as daunting as it seems. You might be using a remote or a wall control panel, and each type has its own quirks. But don’t worry; I’ll walk you through the process step by step, so you’ll be well on your way to seamless garage entry in no time!
Understanding Your Genie Control Panel
First things first, it’s essential to understand what you’re working with. The Genie control panel is typically sleek and simple, offering a few buttons that all serve unique purposes. Whether you have a wall-mounted unit or a remote, recognizing how these controls function is vital.
Generally, there are buttons for code programming, sensing safety, and manual operations. Your Genie control panel helps communicate with the garage door opener, enabling it to operate with precision. Think of it as the brain of your garage door system. Without proper programming, even the best garage door opener can become a pesky barrier rather than a functional entry point.
Gathering What You’ll Need to Program
Before diving in, make sure you have everything within arm’s reach. The last thing you want is to be halfway through programming and suddenly realize you forgot a crucial component. Here’s what you need:
- Your Genie remote control
- Your Genie garage door opener
- A ladder (if your opener is out of reach)
- Access to the garage
- Batteries (in case of replacements)
Having everything ready allows the whole process to be smoother and faster. Plus, keeping spare batteries on hand ensures your remote stays functional and fresh, much like having coffee beans ready for your next caffeine fix.
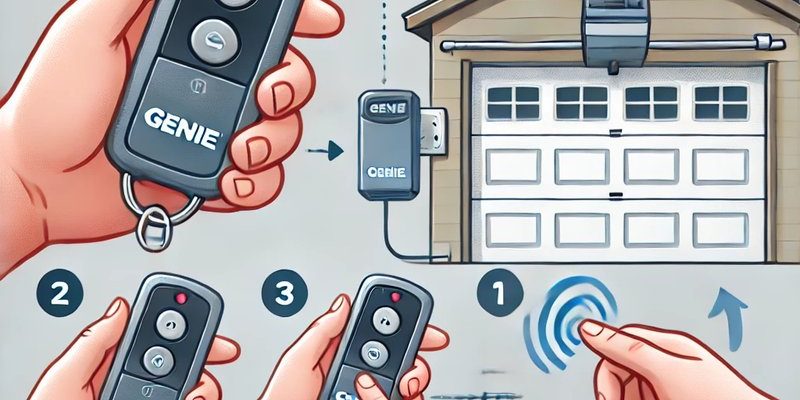
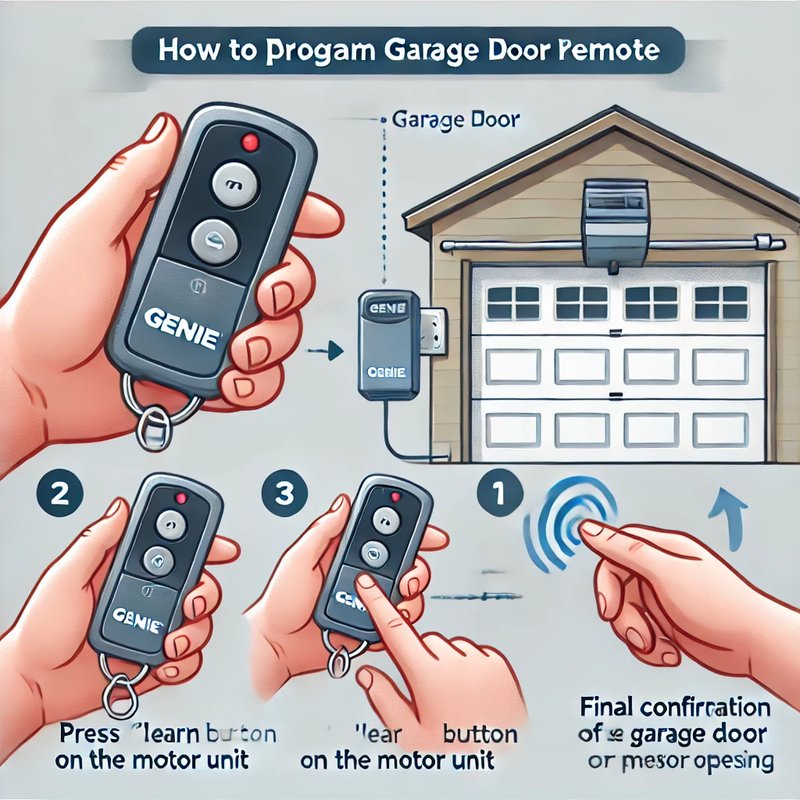
Step-by-Step Guide to Programming Your Genie Remote
Alright, let’s roll up our sleeves and get to the good stuff. Programming your Genie remote is generally a straightforward process. Here’s how to do it:
1. Locate the Learn Button: This is usually found on the garage door opener unit itself. Grab a ladder if your opener is mounted high. The learn button typically has a bright color, making it easy to spot.
2. Press the Learn Button: Once you’ve found it, press and hold the learn button until the light indicator lights up. This means the system is ready to sync with your remote.
3. Press the Remote Button: Now, grab your remote and press the button you wish to program. You should see the indicator light on the opener blink. This confirms your remote and the opener are now paired.
4. Test It Out: Finally, walk to the garage door and press the button on your remote. If it moves up or down, congratulations! You’ve successfully programmed your Genie remote.
Remember, if something doesn’t go as planned, don’t panic. Just reset and try again—sometimes technology just needs a little nudge.
Troubleshooting Common Issues
Even the best-laid plans can go awry. If your remote isn’t controlling the door as expected, here are a few common issues and their fixes:
1. Check the Batteries: A dead battery is often the culprit. Swap out the old battery and try programming again.
2. Revisit the Learn Button: Ensure you’re pressing it correctly and waiting for the indicator light to confirm readiness.
3. Clear Previous Codes: If the remote is still acting up, you might need to clear old codes. To do this, press and hold the learn button until the light turns off (about 6 seconds). Then, try programming the remote again.
4. Inspect the Opener: Occasionally, the opener itself might be at fault. Check for any visible damages or obstructions that could be causing issues.
Here’s the thing—you shouldn’t have to wrestle with programming your Genie control panel. The troubleshooting steps are there to help guide you when things get a bit fuzzy.
Using a Genie Wall Control Panel
If you’re not a fan of remotes or prefer a more permanent fixture, you can also use a Genie wall control panel. Programming this panel is super similar to the remote, but with a few tweaks.
1. Locate the Learn Button: Just like before, find the learn button on your garage door opener.
2. Press the Learn Button: Press and hold until the indicator light is on.
3. Use the Wall Control Panel: Now go to the wall panel and press the “Program” button until the indicator light flashes.
4. Choose Desired Functions: You will then see options to adjust settings like lights and codes for security features.
5. Test It Out: After programming, press the wall button to ensure the garage door responds correctly.
This setup can be quite handy if you often forget where you left your remote!
Considerations for Multiple Openers
If you happen to own multiple Genie garage doors, each unit can be programmed to its respective remote or wall control. The steps remain almost the same. However, you’ll just need to make sure you’re pushing the learn button on the specific unit you wish to program.
When programming multiple remotes to various doors, keep track of which remote controls which door, much like organizing your home keys. Label them if necessary. This small step can save you a lot of confusion down the road.
Benefits of Proper Programming
Now that you know how to program your Genie control panel, you might be wondering why this matters. Here are some compelling reasons:
1. Improved Security: Properly programmed remotes and controls help secure your garage. You can prevent unauthorized access, keeping your belongings safe.
2. Convenience: With everything set up correctly, you can effortlessly access your garage without fumbling around or worrying about entering a key code.
3. Reduced Frustration: No more guessing games when it comes to getting your garage door to move. A well-programmed control means it works every time you press that button.
4. Longer Device Lifespan: Regularly checking and maintaining your remote will keep your devices functioning well, ensuring they last as they should.
In the grand scheme of things, programming your Genie control panel is a small yet significant task. It leads to immense convenience, harmonizing your daily routines with ease.
The process of programming your Genie control panel can seem tricky at first. But think about it this way: once you’ve got it down, it’s like riding a bike—you’ll wonder why you ever found it challenging in the first place. Follow the steps carefully, troubleshoot when needed, and you’ll be the proud owner of a perfectly synchronized garage door setup! Happy programming!
Originally posted 2025-02-04 05:03:59.