
Chamberlain remotes, with their sleek designs and handy features, make your life easier by automating your garage access. When you press a button, you’re not just sending a signal to your door. You’re essentially giving it the green light to open or close. But before that can happen, you need to program the remote to recognize your garage door opener. Let’s jump in!
Understanding Your Chamberlain Remote
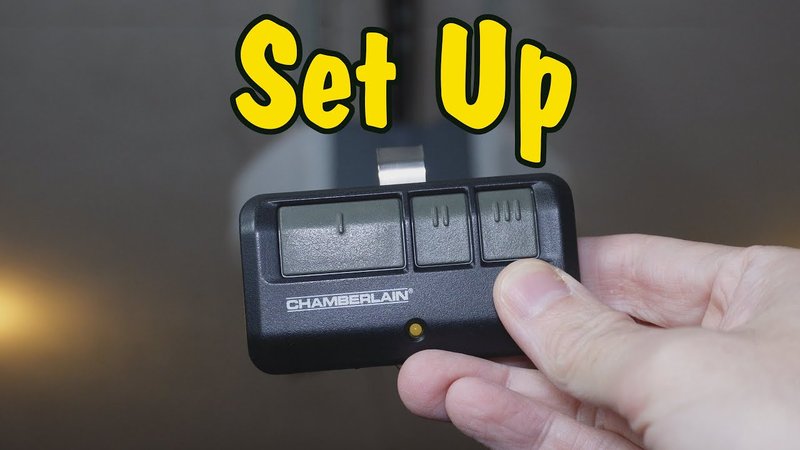
Before diving into programming, it’s essential to know exactly what you’re working with. Chamberlain remotes come in several models, and each may have different features or programming methods. Typically, these remotes have buttons for opening and closing the door, and some might include extras like lights or a lock feature.
You might find wireless models, which rely on battery power, making them incredibly convenient but requiring periodic battery changes. On the other hand, there are wired models that connect directly to the garage opener. Regardless of the type, these remotes are designed to keep your home secure and accessible at your fingertips.
Here’s where it gets fun: most Chamberlain remotes are equipped with a rolling code technology. This means that each time you use the remote, it generates a new code, which keeps your access secure. It’s like changing the locks on your door regularly to keep unwanted guests out.
Gather Your Tools
Before you start programming your Chamberlain remote, make sure you have everything you need. Here’s a handy list:
- Your Chamberlain remote
- Your garage door opener unit
- A sturdy step stool (if necessary)
- Replacement batteries (just in case)
- Pencil and paper (optional, for notes)
Having these items prepared will help streamline the process. If you’re replacing an old remote, be sure to have the new one ready to go. And since we’re on the topic, if your remote isn’t working as expected, it might just be a dead battery. A quick battery swap could save you a lot of hassle!
Locating the Learn Button on Your Garage Door Opener
The first major step in programming your Chamberlain remote is finding the learn button on your garage door opener. This button is typically located on the back or side of the main unit. It’s often a brightly colored button—think red, green, or yellow—making it easier to spot.
Here’s how to find it:
1. Turn off power to your garage door opener for safety.
2. Use your sturdy step stool to reach the unit safely.
3. Look for the learn button. It might be near the antenna wire or along the back of the opener cover.
Once you locate the learn button, it’s good to be aware that you may need to press this button during the programming process, so keep in mind where it’s at!
Steps to Program Your Remote
Now, let’s get into the actual programming. Don’t worry; it’s easier than it sounds! Here’s a step-by-step guide to get your remote operating smoothly:
Step 1: Prepare Your Garage Door Opener
– Make sure the power to your garage door opener is on.
– Stand next to the opener unit; this makes it easier to reach the learn button.
Step 2: Press the Learn Button
– Press and quickly release the learn button. You should see a light blink on the unit—this indicates it’s in learning mode.
– You typically have about 30 seconds to complete the next step, so don’t take too long!
Step 3: Press the Remote Button
– Now, grab your Chamberlain remote and press the button you want to program.
– You should hear a click or the garage door opener lights may blink, signifying that the remote is paired with the door.
Step 4: Test It Out
– Finally, test the remote. Press the programmed button from a short distance and see if your garage door responds.
– If it works, awesome! If not, double-check your steps and try again.
This entire process can usually take less than five minutes, but don’t rush. It’s completely normal to double-check and ensure each step is done properly.
Troubleshooting Common Issues
Even with clear instructions, programming a remote can sometimes lead to a few hitches. Here are some common issues you might encounter and how to address them:
– The remote doesn’t respond when you press the button: First, check that the batteries are fresh. If the batteries are working and it still doesn’t connect, try to reprogram it by repeating the steps above. Sometimes, a fresh start is all it needs.
– Light on the opener doesn’t blink when you press the learn button: This could indicate that the opener is not in the right mode or is having technical issues. Make sure it’s plugged in and functioning correctly. If issues persist, consult your manual for specific troubleshooting.
– Multiple remotes not working together: If you’ve programmed multiple remotes and they are conflicting, you might want to clear all programmed codes. Hold the learn button down for about 6 seconds until the light goes out, and reprogram each remote one by one.
Maintaining Your Chamberlain Remote
To ensure your Chamberlain remote stays in good shape, regular maintenance is crucial. Here are a few simple tips to keep everything running smoothly:
– Change batteries regularly: Just like smoke detectors, your remote needs fresh batteries to function optimally. Aim for a battery change every year or so, or sooner if you notice reduced performance.
– Keep it clean: Wipe down the buttons and casing with a soft cloth. This can help prevent dirt from interfering with your remote’s signals.
– Store it safely: Avoid keeping your remote in places where it could easily get lost or damaged. A designated spot in your car or near the entrance can work well.
Maintaining your remote helps you avoid situations where you find yourself outside your garage, fumbling through your pockets, wondering why it won’t work.
Considering Alternatives
If you’re thinking about getting a new remote, you might be curious about options. While Chamberlain remotes are great, you can also look into universal remotes. They can operate multiple brands with a single remote, which is handy if you’ve got different openers.
However, keep in mind that universal remotes can sometimes be more complex to program. If you’re someone who prefers simplicity, sticking with your Chamberlain remote might save you some time and heartache.
Now you’re equipped to program your Chamberlain remote like a pro! Remember, while it might seem challenging at first, the process is pretty straightforward with a bit of patience. Next time you’re in a hurry to get into your garage, you’ll appreciate how easy it is to just press a button and head inside. Though you may encounter some snags along the way, with these steps and tips, you’ll be ready to tackle any issues that arise. Happy programming!