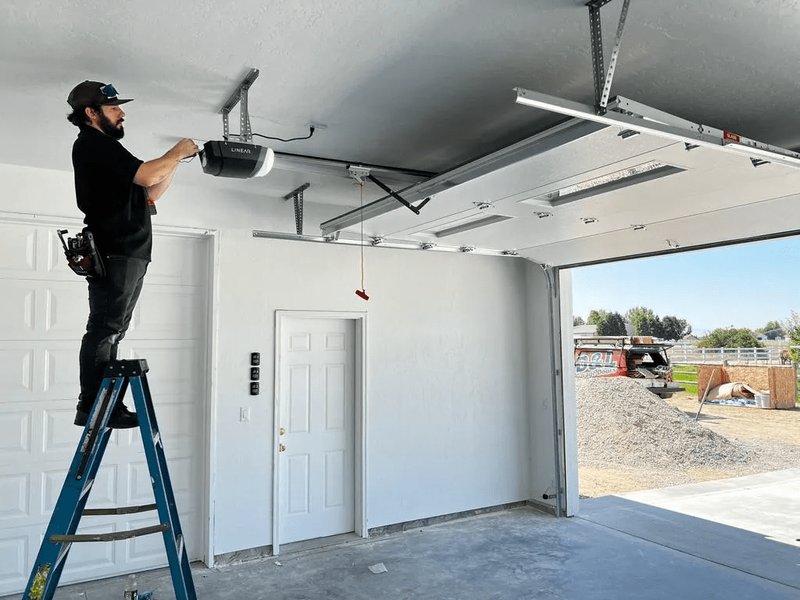
Before that new opener arrives, you’ll want to clear the way and ensure the installation goes smoothly. This means not just tidying up but understanding what to expect and how to set yourself up for success. Let’s dive into how to prepare your garage for a new opener installation, keeping things simple and clear.
1. Clear the Space Around Your Garage Door
The first step in preparing for your new garage door opener is to clear the area around the door. This includes moving any vehicles, bikes, or yard tools that may be blocking the way. Imagine trying to set up a new piece of furniture in a cluttered room—it can be frustrating and time-consuming.
Make sure there’s enough room for the installer to work comfortably. Ideally, you should have a space of at least 5 to 6 feet around the door, allowing access to both the door and the ceiling where the opener will be mounted. If you have items stored on shelves close to the door, consider temporarily relocating those as well. It’s all about making things as easy as possible for a hassle-free installation.
2. Inspect the Garage Door and Hardware
Now that you’ve cleared the space, it’s time to check the garage door and its hardware. Look over the door itself for any signs of damage or wear, such as bent tracks or loose screws. You want to ensure everything is in working order before adding a new opener.
Also, examine the springs, cables, and rollers for any signs of rust or wear. It’s crucial for the safety and functionality of your new opener that these components are functioning correctly. If anything seems off, you might need to contact a professional to assess and possibly repair them before the installation.
3. Gather Necessary Tools and Accessories
While many garage door opener installations will be done by professionals, it’s good to have some tools ready in case they’re needed. Your installer might require items like screwdrivers, a wrench, and a ladder. Check to see if you have these on hand, and if not, it could save time to gather them now.
Additionally, if your new opener requires a remote, make sure you have adequate batteries ready for pairing. If you’ve chosen a smart garage door opener, you’ll also want your Wi-Fi credentials handy for syncing. It’s like getting your guest list in order before the big night!
4. Ensure Power Supply is Accessible
One of the crucial elements of installing a new garage door opener is ensuring that there’s a power supply nearby. Most openers need to be plugged into a standard outlet or hardwired, depending on the model. Check to ensure the outlet is functional and not overloaded with other devices.
You wouldn’t want to throw a party in a venue without electricity, right? Consider labeling the outlet to prevent confusion later on. If there’s no outlet available near where the opener will be installed, you might need to install one beforehand, so don’t hesitate to consult an electrician early in the process.
5. Review Safety Features
Safety should always come first, especially when dealing with anything involving machinery and electronics. Many modern garage door openers come equipped with features like automatic reversal systems and sensors. Before installation, familiarize yourself with these safety features.
Understanding how they operate ensures that you can use your garage door opener confidently after installation. You can think of these features as the safety nets in your new setup, providing peace of mind daily.
6. Consider Wireless Connectivity
If you’ve opted for a smart garage door opener, thinking ahead about wireless connectivity is essential. Check your Wi-Fi signal strength in the garage—this is especially important if your garage is detached from your home. If the signal is weak, you might have issues with syncing your new opener with your home Wi-Fi network.
You might wonder what to do if the signal isn’t strong enough. One solution could be moving your router or getting a Wi-Fi extender. This ensures your new opener can connect properly.
7. Understand Your Garage Door Opener Features
With so many models out there, it’s worth understanding the specific features of the opener you’ve chosen. For example, some openers come with more advanced features like smartphone integration or battery backup. Familiarizing yourself with these features now will not only help during installation but also enhance your user experience later.
Here’s the thing: Using a garage door opener isn’t just about pressing a button. It’s about understanding how it fits into your daily life and how you can best utilize its features.
8. Prepare for Potential Troubleshooting
Sometimes, installations don’t go as smoothly as planned. Be prepared for potential troubleshooting after the setup. For instance, if the garage door opener doesn’t respond to the remote initially, it may need to be paired or reset.
Check the manual that comes with your opener, as it typically provides all the reset or sync instructions. Being informed about possible hiccups means you won’t get frustrated later on—it’s all part of the user experience.
9. Plan for Cleanup After Installation
After your new garage door opener is installed, there might be some mess left behind. Hardware, packaging, and any old equipment from your previous opener can clutter the space. Have a plan for cleanup in advance, so you don’t end up with debris scattered around.
Honestly, who wants to trip over scrap cardboard when they’re trying to show off their new tech? Having trash bags and a broom on hand makes this process easier.
10. Test Everything Thoroughly
Once the installation is complete, it’s time to put your new opener to the test. Open and close the door a few times using the remote and see how smoothly it operates. Here’s the fun part: it’s your chance to get a feel for all the features—from the remote control to any smart features you have.
Pay attention to any odd noises or jerky movements. If you notice anything unusual, don’t hesitate to call the installer back for a follow-up.
11. Register Your Warranty
Finally, don’t forget this essential step: registering your warranty for the new garage door opener. Keeping your receipt and warranty documents handy will help protect you in case there’s a need for repairs or replacements later on.
Here’s a pro tip: Take a moment to read the warranty details. Knowing what’s covered will provide peace of mind in the long run.
12. Enjoy Your Upgraded Garage System
Once everything is up and running, it’s time to enjoy your newly installed garage door opener! It’s like hitting the lights at a party—the moment you’ve been waiting for. Revel in the convenience, safety, and high-tech features your new setup brings to your day-to-day life.
Remember, your garage door opener is not just a functional tool but also an enhancement to your convenience and home security. Enjoy it!
Preparing your garage for a new opener installation doesn’t have to be overwhelming or complicated. With these steps, you’ll set the stage perfectly for a smooth installation process.
From clearing the space to enjoying the final product, you’re on your way to making your life easier every time you enter or exit your garage. Happy preparing!
