
First, you’ll want to make sure you have the right tools and parts handy before you dive in. You’ll be working with a Sears garage door opener, which typically comes with two sensors that need to be set up a certain way. If you follow the steps I’m laying out, you’ll have those sensors up and running in no time, giving you peace of mind as your garage door operates smoothly.
Understanding the Role of Safety Sensors
Before we jump into the installation process, let’s clarify what exactly these safety sensors do. Think of them as the watchful eyes of your garage door. They communicate with each other, ensuring that if something is in the way, the door won’t just come crashing down.
– Prevention of Accidents: When the sensors are aligned correctly, they create an invisible beam. If anything interrupts this beam while the door is closing, the door will stop and reverse. This feature is vital for preventing accidents, especially during busy moments.
– Automatic Reversal: If you’ve ever seen a car backing out quickly, you know how crucial it is to have an automatic system in place. The safety sensors mimic this function, acting quickly to avoid any collisions or injury.
– Simple But Complex: It sounds simple, but those little devices are actually quite complex in their function. They rely on infrared signals to communicate, which is why proper installation and alignment are critical.
Understanding how your safety sensors work can make the installation process clearer and give you confidence that you’re setting them up right.
Gathering the Right Tools and Parts
Okay, now let’s grab what you need to make this installation happen. The list is pretty straightforward, so there’s no need to panic.
– Safety Sensors: Make sure you have your Sears safety sensors ready. They usually come packaged with your garage door opener or can be ordered separately.
– Screwdriver: A standard or Phillips-head screwdriver will do the trick.
– Drill: If you need to install brackets, a drill will help with that.
– Level: To ensure that the sensors are perfectly aligned.
– Measuring Tape: This will help you measure the distance between the sensors and ensure they’re the correct height.
Having these tools ready will save you some frustration during the installation process. Nothing ruins your DIY momentum like scrambling around looking for a tool!
Finding the Perfect Location for Your Sensors
Once you have everything ready, the next step is to find the right spots for the sensors. They’ll usually be positioned near the base of your garage door tracks.
1. Height Matters: The sensors should be installed about 4 to 6 inches above the ground. This height allows them to detect any obstacles while still being out of the way of foot traffic.
2. Placement Along the Door Tracks: Position one sensor on each side of the door tracks, keeping them aligned with each other. An easy way to visualize this is to think of them as partners in a dance; they need to be facing each other directly.
3. Avoid Blockages: Make sure the area isn’t cluttered with items like bikes or trash cans. If anything blocks the beam, the sensors won’t function properly.
Getting this placement right is crucial because misalignment can lead to frustrating experiences where your garage door behaves erratically.
Installing the Sensors Step-by-Step
Now we’re getting into the meat of the installation process. It’s like following a recipe; if you take your time and follow the steps, you’ll end up with a great result.
1. Attach the Mounting Brackets: Most safety sensors come with a mounting bracket. Use your drill to attach the brackets to the wall or door frame where you’ll position the sensors.
2. Secure the Sensors: Once the brackets are set, it’s time to attach the sensors. Make sure they click securely into place, so they won’t come loose over time.
3. Wiring the Sensors: Connect the wires from each sensor to the garage door opener’s motor unit. Typically, there are two wires for each sensor—one for power and one for the signal. You can usually follow the color coding to ensure you’re connecting them correctly.
Take your time with this step; rushing may lead to mistakes that can complicate the process later on.
Aligning the Sensors for Optimal Function
After you install the sensors, it’s time to make sure they’re properly aligned. This step is essential for guaranteeing that your garage door opener reacts accurately when the sensors are in use.
– Use a Level: Check that both sensors are level. If one is slightly higher or tilted, it won’t detect the beam properly.
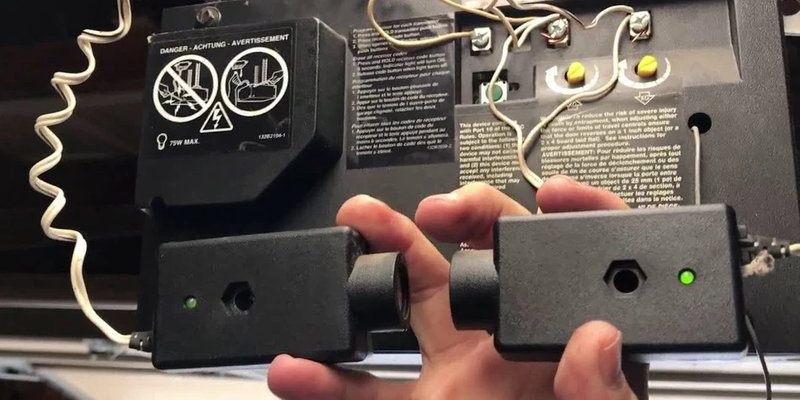
– Test the Alignment: Close the door (carefully!) and see if the sensors react correctly to any obstacles. Many newer models will show an LED light when aligned properly. If both lights are lit, you’re good to go!
– Adjust If Necessary: If one sensor’s light is off, adjust its angle or position until both lights are consistently on. It’s a small tweak, but it can make a huge difference.
Proper alignment might require a little patience, but once you get it right, you’ll feel satisfied knowing your safety sensor setup is on point.
Testing Your New Safety Sensors
Now that you’ve installed and aligned your sensors, it’s time for the grand finale: testing them!
1. Conduct a Safety Test: Before using the garage door regularly, perform a test. Stand near the door, and while it’s closing, try interrupting the sensor beam (you can use a ball or a broom, as long as it’s safe). The door should stop and reverse immediately, confirming your sensors are working correctly.
2. Watch for Indicator Lights: Most sensors feature LED lights; these should light up when aligned correctly and blink when an obstacle is detected. Familiarize yourself with these signals; they help you troubleshoot any future issues.
Going through this testing phase helps ensure you’re not just installing sensors but actually putting a safety measure in place.
Common Issues and Troubleshooting Tips
You might encounter a few bumps in the road during the installation and testing process. Here are some of the most common issues and how to tackle them.
– Sensor Lights Not On: If the indicator lights don’t illuminate, check the connections to the garage door opener. Ensure the wires are connected properly, and troubleshoot from there.
– Door Not Reversing: If the garage door doesn’t reverse when the beam is interrupted, realign the sensors. Sometimes a slight adjustment can work wonders.
– Interference: If nearby objects block the sensors or there’s a lot of sunlight shining directly on them, your sensors might malfunction. Try to keep the area tidy and assess the positioning of any obstructions.
Solving these issues might require a bit of trial and error, but don’t get discouraged. Each challenge is a chance to learn something new about your systems.
Installing Sears safety sensors isn’t just about mechanics; it’s about ensuring your home is safe for everyone who goes in and out of your garage. Following these steps can seem a bit tedious, but once you see the benefits of those safety features in action, it’ll be totally worth it.
Take your time, pay attention to detail, and you’ll discover that even a beginner can confidently install these sensors. Plus, you’ll feel great knowing you’ve added an important layer of safety to your home. So, roll up your sleeves, grab those tools, and get started—you’ve got this!