In this guide, we’ll walk through the process step by step. After all, it’s about more than just clicking a button; it’s about having the freedom to come and go from your garage with ease. So, grab your remote, and let’s dive into how to install your Sears remote and get your garage door opening and closing smoothly.
Gathering Your Tools
Before we jump into the installation process, let’s make sure you have everything you need on hand. Luckily, you don’t need an extensive toolkit for this job. Here’s what you should gather:
- Your Sears remote: It’s time to dust it off and get it ready for action.
- Step ladder: If your garage door opener is mounted high, a ladder can help you reach those buttons.
- Phillips screwdriver: This might be needed for mounting the system or making adjustments.
- User manual: Keep it handy just in case you have to troubleshoot any issues.
Having everything in one place makes this whole process smoother. Trust me; you don’t want to be halfway through installation only to realize you’re missing a tool. Let’s keep the momentum going!
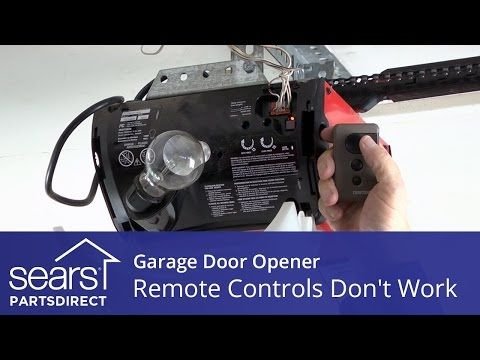
Locating the Garage Door Opener
Next, you’ll want to locate your garage door opener, which is usually a box hanging from the ceiling of your garage. It’s the brain behind the whole operation. If you’re having trouble finding it, look for:
- Wires and lights: The opener is typically connected to power, so there will be some wires and maybe even an indicator light that shows it’s working.
- Mounting brackets: The opener is secured with brackets to the ceiling; you might see these as you look up.
If it seems daunting, remember you’re not alone in this. A lot of folks have found themselves in the same boat. Once you spot it, take a moment to appreciate how this little device makes your life easier every day!
Preparing Your Remote for Installation
Now comes a bit of a crucial step: preparing your Sears remote for installation. This usually involves setting it up to communicate with your garage door opener. Here’s how:
1. Open the battery compartment on your remote. Usually, there’s a small divider or tab that you can slide or push to access the batteries.
2. Check or replace the batteries if needed. Make sure they’re fresh to avoid any pesky communication issues.
3. Locate the programming button on the garage door opener. This is often found near the main control panel. Consult your user manual if you can’t find it.
By preparing your remote properly, you’re setting the stage for a smooth installation.
Programming Your Sears Remote
This is the moment of truth! Programming your new Sears remote so that it syncs with your garage door opener is straightforward. Here’s how it typically goes down:
1. Press and hold the programming button on your garage door opener. Some openers may require you to press this button multiple times—again, your manual will clarify.
2. While holding the programming button, press the button on your remote that you want to use to operate the garage door. Hold it down for about 2 seconds.
3. Release both buttons. At this point, you should notice an indicator light on the opener blinking to confirm it’s received the signal.
As you complete this step, you might feel a wave of relief. It’s like successfully navigating a small minefield; you’re almost there!
Testing Your Remote
With the programming finished, it’s time to put your new remote to the test. This part can often be the most satisfying. Here’s what to do:
1. Stand within a few feet of the garage door, aiming the remote at the opener.
2. Press the button you programmed. If your garage door opens or closes, congratulations! You did it!
3. If it doesn’t work, consider double-checking the programming steps. Sometimes it’s as simple as repeating the previous steps if something didn’t sync.
Remember, it’s all about getting the right connection, and it might take a couple of tries. Don’t lose heart; many people have had to repeat steps!
Troubleshooting Common Issues
If your remote isn’t working despite following the steps, you might be in troubleshooting mode. It’s not uncommon! Here are some common issues and solutions to consider:
- Dead batteries: Have you checked them? Sometimes, a fresh set can work wonders.
- Distance: Make sure you’re not too far from the opener when you’re trying to program or use the remote.
- Interference: Check for any obstacles between the remote and the opener, such as large metal objects or electronic devices.
Taking a moment to troubleshoot can save you time and frustration. Know that every hiccup can lead to a learning moment.
Maintaining Your Remote
Once everything’s up and running, maintenance is key to keeping your Sears remote in good shape. A few simple practices can go a long way:
- Keep it clean: Dirt can get into the buttons and cause sticky situations. Wipe it down with a damp cloth occasionally.
- Check batteries regularly: Don’t wait until it stops working; swap them out at the season change or every few months.
- Store it safely: Try to keep it in a designated spot. This prevents it from getting lost—like in that couch pit where lost TV remotes go to hide!
By taking care of your remote, you ensure it will serve you well for years to come. A little maintenance can save you from headaches down the line.
In conclusion, installing your Sears remote is a straightforward process if you take it step-by-step. From gathering the tools to programming and troubleshooting, each move brings you closer to the ease and convenience of operating your garage. Embrace the small victories along the way, and before you know it, you’ll be gliding in and out of your garage with just the push of a button. Enjoy that newfound freedom!