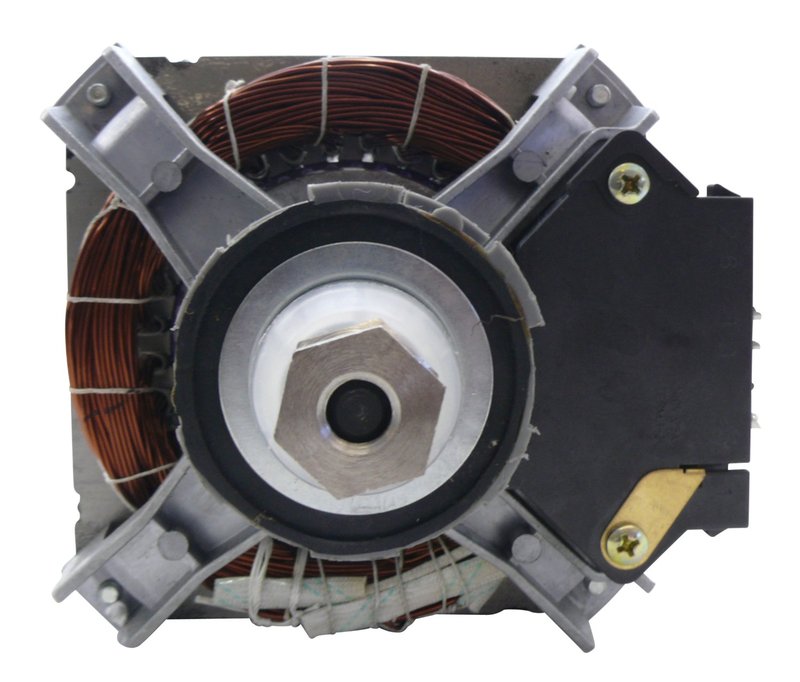
The process is a bit like putting together a puzzle; all you need to do is find the right pieces and fit them together. Whether you’re using a Sears remote or another compatible unit, understanding how to install your garage door opener’s motor can save you money and boost your home’s value. So, grab your tools and let’s get started!
Gather Your Tools and Materials
Before diving into the installation, you want to ensure you have everything you need handy. Think of this step like prepping for a delicious dinner—you wouldn’t want to run out of ingredients halfway through, right? Here’s what you’ll likely need for the installation:
- New Sears motor unit
- Power drill with screwdriver bits
- Socket and wrench set
- Pliers
- Wire connectors
- Measuring tape
- Safety goggles and gloves
Having everything organized will make your job go smoother. Plus, it will give you a sense of accomplishment as you prepare to tackle this project. Don’t forget your safety gear! Protecting your eyes and hands is crucial when working with power tools and heavy equipment.
Remove the Old Motor Unit
Now that you’re geared up, it’s time to say goodbye to your old motor unit. Here’s the thing: the steps for removing the existing unit can vary slightly based on how it was installed, but generally, here’s what you’ll do:
1. Disconnect Power: To ensure your safety, start by unplugging the garage door opener from the electrical outlet. This step is crucial; mishaps during installation can lead to injury or damage.
2. Take Off the Cover: Most motor units have a cover that you’ll need to remove. Use your screwdriver to take off any screws, and gently lift the cover off. You might want to jot down the wiring connections as a reference for later.
3. Disconnect the Wires: Carefully remove the electrical connections, noting where each wire connects. This step is vital for reinstalling your new unit correctly.
4. Uninstall the Old Motor: Once the wires are disconnected, check if there are any mounting screws or bolts holding the motor in place. Remove those and gently take out the motor unit from its bracket.
You might be wondering if this is really as easy as it sounds—and honestly, most people find this part straightforward as long as they take their time.
Install the New Sears Motor Unit
You’ve made it this far! Now, let’s get your new Sears motor unit ready for action. Installing it is like following a map: if you keep your bearings, you’ll land right where you want to be. Here’s a step-by-step guide:
1. Positioning: Place your new motor unit in the same position as the old one. Ensure it aligns properly with the garage door setup.
2. Secure the Unit: Use the mounting screws or bolts to secure the new unit in place. Tighten them well, but don’t go overboard; there’s no need for a wrestling match here!
3. Reconnect Wires: Now, following the notes you made earlier, connect the wires to the corresponding terminals on your new motor unit. Make sure the connections are tight and use wire connectors if necessary to ensure a solid grip.
4. Replace the Cover: After securing the wires, place the cover back onto the motor unit. Fasten it down with screws, just like you did when you removed the old unit.
Now, take a moment to admire your handiwork. You’re almost there!
Syncing Your Sears Remote
With the new motor unit installed, it’s time to bring your remote back into the picture. Syncing your Sears remote is the final piece of the puzzle, and it’s simpler than you might think. You might even find it satisfying—like the “ding” when that long-awaited microwave meal finally finishes. Here’s how to sync it:
1. Locate the Learn Button: Most Sears units have a learn button on the back or side of the motor unit. You’ll want to press and hold this button until the indicator light blinks.
2. Press Your Remote Button: While the light is blinking, press the button on your remote that you want to use for opening the door. Keep it pressed until you see the light on the motor unit change its pattern.
3. Test It Out: Now that you’ve paired the remote, take a step back and press that magic button. If everything went smoothly, your garage door should open like new!
If it doesn’t work right away, don’t panic. Refer to your user manual or consider resetting the unit and trying again.
Troubleshooting Common Issues
Despite your best efforts, things don’t always go according to plan. Thankfully, common issues with garage door openers are often simple to troubleshoot. Let’s cover a few potential hiccups you might encounter:
– Remote Not Working: If your remote isn’t responding, check the battery first. Replacing it is often the easiest fix to a stubborn opener. If that doesn’t work, you may need to sync it again.
– Door Not Closing Properly: If the door reverses and goes back up when it hits the ground, it might be misaligned. Check the door’s sensors; they might be blocked by dirt or debris.
– Motor Running But Door Doesn’t Move: This can happen if there’s an issue with the belt or chain drive. Take a closer look to see if it’s disconnected or worn out.
When in doubt, consult your Sears manual for more specific troubleshooting steps tailored to your motor unit.
Regular Maintenance for Longevity
You’re not just installing a motor unit; you’re also committing to maintaining it over time. Regular upkeep can prevent bigger headaches in the long run. Think of it like a car: Just because it runs well today doesn’t mean it shouldn’t be cared for. Here’s how to keep your motor unit in prime condition:
– Lubricate Moving Parts: Every few months, use a silicone-based lubricant on the moving components to keep everything running smoothly.
– Inspect Cables and Springs: Check the cables and springs for fraying or wear. If you spot any issues, they should be addressed immediately by a professional to avoid a potential hazard.
– Clean the Sensors: Dust and debris can build up on the sensors over time. Wipe them down regularly with a soft cloth to ensure they operate correctly.
By following these simple maintenance tips, you’ll help your Sears motor unit last longer and function efficiently.
In summary, installing a Sears motor unit for your garage door may seem daunting, but with the right tools and a careful approach, it’s definitely achievable. So, whether you’re replacing an old unit or setting one up for the first time, just remember to take your time, connect the dots, and before you know it, you’ll be enjoying the easy convenience of a fully functioning garage door opener. Happy DIY-ing!
