In this guide, we’ll walk through each stage of installing your Raynor circuit board. It’s a hands-on project, so don’t worry if you’ve never tackled anything like this before. By the end, you’ll feel more confident and understand how to troubleshoot any problems you might encounter along the way. Let’s get started.
Gather Your Tools and Materials
Before you dive into the installation, you need to gather the right tools and materials. You don’t want to start the process only to discover you’re missing something crucial! Here’s a quick list:
- New Raynor circuit board
- Flathead screwdriver
- Phillips screwdriver
- Wire cutters/strippers
- Multimeter (optional, for troubleshooting)
Having the right tools at hand makes the job smoother. For instance, you’ll need the flathead screwdriver to remove the cover from the garage door opener unit. The Phillips screwdriver will help you detach the existing circuit board, and wire cutters or strippers will be essential when handling any wires connected to the board. Remember, safety comes first! Make sure to unplug your garage door opener before you start any work.
Remove the Existing Circuit Board
Now that you have everything ready, it’s time to remove the old circuit board. Start by locating your garage door opener unit. If it’s mounted on the ceiling, grab a sturdy ladder (safety first!) and carefully climb up.
Once you’re at the unit, use your flathead screwdriver to pop off the cover. Be gentle; you don’t want to break any clips holding it in place. Here’s a pro tip: take a picture of the wiring before you disconnect anything; this visual guide will save you tons of trouble later.
Next, locate the wires connected to the existing circuit board. These are usually attached using screw terminals or push connectors. If it’s screw terminals, gently loosen them with your Phillips screwdriver. If you encounter push connectors, you may need to pull them off carefully. Make a note of where each wire goes—this step is crucial for the reinstallation process.
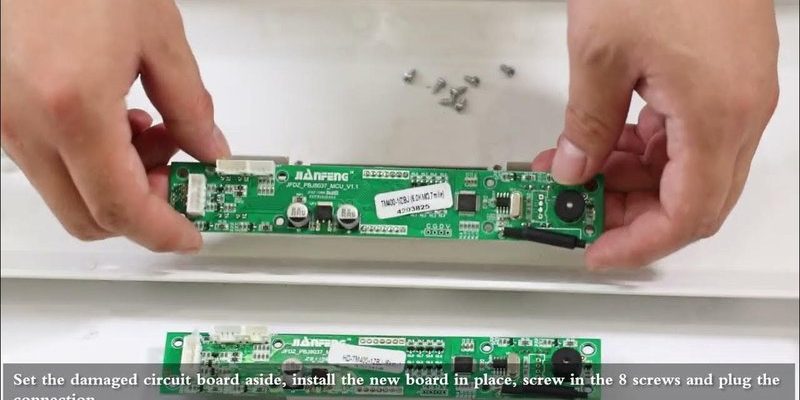
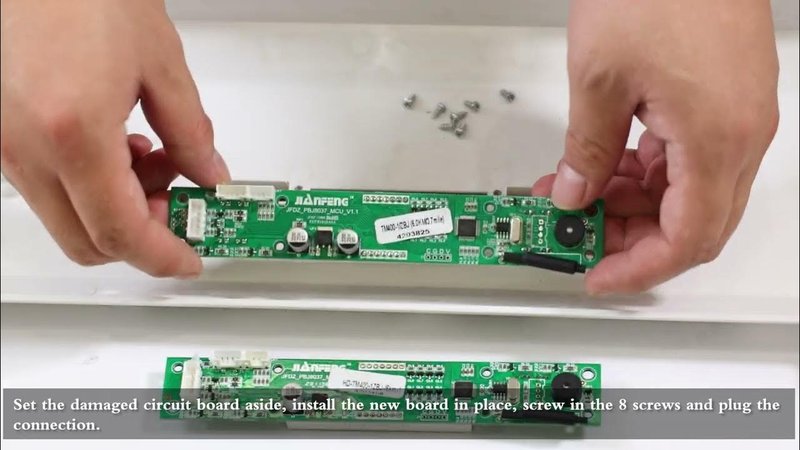
Install the New Circuit Board
With the old circuit board out of the way, it’s time for the fun part: installing the new Raynor circuit board. First, unpack your new board and ensure it matches the specifications required for your specific model. It’s crucial that you have the right type; otherwise, it won’t work properly.
Position the new board in the same spot where the old one was located. If you took any photos, now is the time to refer back to them. Start reconnecting the wires one by one, following your notes or pictures closely. This is where a multimeter can come in handy for checking connections, but if you’re confident, you can skip it.
Once all the wires are securely attached, make sure to tuck them neatly away so they don’t interfere with the board when you put the cover back on. After everything feels tight, use the screws provided to secure the circuit board in place.
Power On and Program the Opener
With the new circuit board installed, it’s time to power everything back up. Plug in your garage door opener and listen carefully. You should hear the usual hum or beep that indicates power. If something sounds off, double-check your connections. If everything seems normal, it’s time to program the opener.
To sync your remote, you’ll typically need to follow a specific button sequence. Look for a learn button on your opener—this is often a small, round button near the circuit board itself. Press the learn button until the LED light turns on, then press the button on your remote. Hold it until you see the light flash off, and voila! Your remote should now be paired with the new circuit board.
Troubleshooting Common Issues
Sometimes, even after a successful installation, things might not be as smooth as you’d like. If your garage door opener isn’t responding, here are a few troubleshooting steps to consider:
1. Check the Power: Ensure your opener is plugged in and that the outlet is working. You can use a multimeter to test the outlet if you’re unsure.
2. Revisit Connections: It’s all too easy to miss a wire or connect it incorrectly. Double-check each wire back to the circuit board—especially if you took a break or got distracted during installation.
3. Reset the Opener: If the remote still doesn’t work, try resetting the opener. This often involves unplugging it for several minutes before plugging it back in and trying the programming steps again.
4. Inspect the Remote: Batteries can be a simple fix. Replace the batteries in your remote to eliminate this common issue right away.
If all else fails, consult the user manual or contact Raynor customer support. They can offer specific guidance tailored to your model.
Enjoy Your Newly Installed Circuit Board
After successfully installing your Raynor circuit board, it’s time to sit back and enjoy the convenience it brings. With your garage door opener humming along, you can look forward to that daily ease of access. Remember, taking these DIY steps can not only save you money but also give you a sense of accomplishment.
If you run into issues, don’t hesitate to revisit this guide or consult community forums. Many experienced users are happy to help troubleshoot problems, share tips, or offer advice based on their own experiences.
Installing a Raynor circuit board can seem intimidating if you’ve never done it before, but with patience and careful attention to detail, it’s a project you can tackle successfully. Just think of it as piecing together a puzzle; focus on one step at a time, and you’ll find that before you know it, your garage door opener is back in action. Now you have the tools, steps, and know-how to handle this task with confidence. Enjoy your smooth, hassle-free operation!