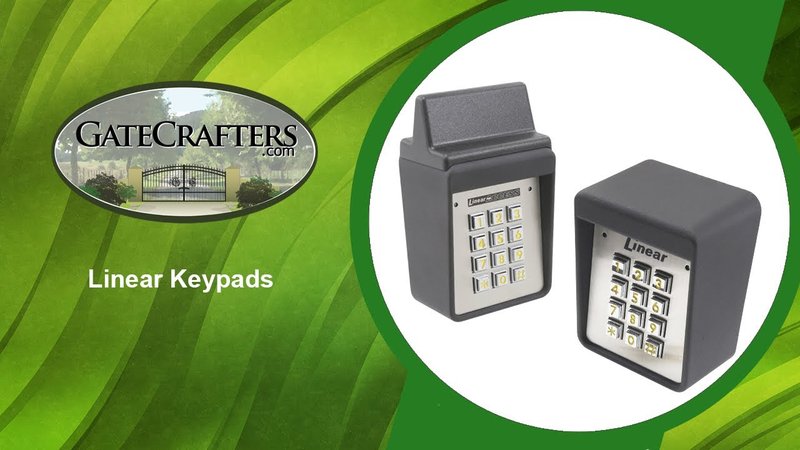
Linear keypads are popular because they combine reliability and simplicity. When you think of a keypad for your garage, you’re typically looking at two main features: the remote control capability and the ease of installation. If you’re a beginner, don’t worry! This guide is here to walk you through every step of the installation process.
What You Need for Installation
Before diving into the steps, gather all the necessary tools and materials. Having everything on hand makes the process smoother and keeps you from making multiple trips to the hardware store. Here’s a quick checklist to get you started:
- Linear keypad
- Screwdriver (Phillips and flathead)
- Drill (if needed for mounting)
- Batteries (check the keypad requirements)
- Measuring tape
- Pencil or marker
- Level (if you want to ensure it’s straight!)
Once you have these items, it’s time to begin! Here’s the thing: the smoother your preparation, the easier the installation will be.
Finding the Right Location for Your Keypad
Location matters when installing a Linear keypad. You want it easily accessible but not in a spot where it can be easily tampered with. Think about your daily routine. Do you typically come in from the garage or the side entrance? Your keypad should be close to your main entry point.
Measure the height! Aim for approximately 4-5 feet above ground level—this generally accommodates both adults and children. Of course, if you have little ones, you might consider adjusting it slightly lower. Once you pinpoint the perfect spot, mark it lightly with a pencil.
Mounting the Keypad: Step by Step
Now comes the exciting part: mounting the keypad! Here’s how to do it in a few simple steps:
1. Align the keypad with your pencil marks to ensure it’s straight.
2. Use your level to double-check; you don’t want a crooked keypad!
3. If you need to drill holes, do it gently to prevent chipping the wall.
4. Secure the keypad using screws or anchors provided in the package.
If your wall happens to be particularly tough, a masonry drill may be necessary. Just make sure to follow the specific instructions that come with your Linear keypad. Sounds easy, right? It is!
Powering Up: Installing Batteries in Your Keypad
Before you can start using your Linear keypad, you need to install the batteries. Most keypads use simple AA or AAA batteries, but always check your model’s specifications.
To do this:
1. Locate the battery compartment on the back of the keypad.
2. Open it up, following the provided instructions.
3. Insert the batteries, ensuring they’re in the correct position—pay attention to the plus (+) and minus (-) symbols.
4. Close the compartment securely.
It’s worth noting that using fresh, high-quality batteries will help avoid any functionality issues later on. Honestly, there’s nothing more frustrating than a keypad that won’t work because of weak batteries.
Coding Your Keypad for First-Time Use
This part is crucial: you want your keypad to work seamlessly with your Linear garage door opener. Setting up a code makes it unique to you and your space.
1. First, locate the programming button on your Linear garage door opener. It’s usually found on the motor unit.
2. Press and hold the button until a light blinks.
3. Within 30 seconds, enter the desired four-digit code on your keypad. You’ll usually need to press the Enter button after entering your code.
4. Wait for the light to blink twice to confirm.
Voila! Your keypad should now be synced with your garage door opener. Remember, if you encounter problems, a quick reset of the keypad usually resolves minor issues.
Troubleshooting Common Keypad Issues
Even the best installations can come with some hiccups. If your keypad isn’t working as intended, start with these common troubleshooting steps:
– Check the batteries. Low battery power is often the culprit.
– Re-synchronize your keypad. Sometimes the initial sync doesn’t take. Just repeat the coding steps.
– Ensure you’re entering the correct code. Typos happen!
If you’re still having trouble, consult the user manual or reach out to customer support. They know the ins and outs of their products and can offer tailored solutions.
Enjoy Your New Keypad!
Congrats! If you followed these steps, you should now have a fully operational Linear keypad. Enjoy the ease of access it provides. You’re one step closer to making your garage space more convenient and secure.
Just remember to share your code wisely and change it periodically for added security. Installing a keypad may seem daunting at first, but when broken down into small steps, it’s completely manageable and rewarding.
In the end, having a Linear keypad isn’t just about convenience; it’s about feeling safe and making your daily life a little easier. So go ahead, enter that code, and open those garage doors with confidence!
