Installing a Linear battery backup isn’t as tricky as it might seem. With the right tools and a little bit of patience, you can have it up and running in no time. In this guide, I’ll walk you through the steps, share some tips, and even tackle common questions you might have. So, grab your tools, and let’s get started on installing that battery backup!
What You Need for Installation
Before diving into the installation process, let’s gather everything you’ll need. Having the right tools makes all the difference. You won’t want to be running back and forth to find a screwdriver mid-job!
- Linear Battery Backup Kit: Make sure you have the correct kit for your model.
- Screwdrivers: A Phillips head and flat head screwdriver will cover most needs.
- Drill: This is essential for creating pilot holes if needed.
- Wire Strippers: You’ll need these to prepare the wires for connection.
- Safety Glasses: It’s always best to protect your eyes when working with tools.
Once you have everything organized, you’ll feel more confident as you embark on this installation adventure. Don’t forget to read through the Linear battery backup manual thoroughly for any specific requirements regarding your model.
Preparing for Installation
Setting yourself up for success starts with preparation. First, ensure that your garage door opener is compatible with the Linear battery backup. It’s a bit like trying to fit a square peg into a round hole; compatibility is key. Check the specifications on the battery backup packaging or the manufacturer’s website if you’re unsure.
Next, unplug your garage door opener from the power source. This is so you can work safely without the risk of electrical shock. Think of it like turning off the stove before you clean it—better safe than sorry! If your opener has a light indicator, wait for it to go dark to confirm it’s fully powered down.
Finally, clear the area around your garage door opener. This can help you move freely and keep any small parts from getting lost. Safety and organization go hand-in-hand.
Step-by-Step Installation Process
Now that you’re prepped, let’s get into the actual installation. Don’t worry; I’ll break it down into manageable steps to keep it simple.
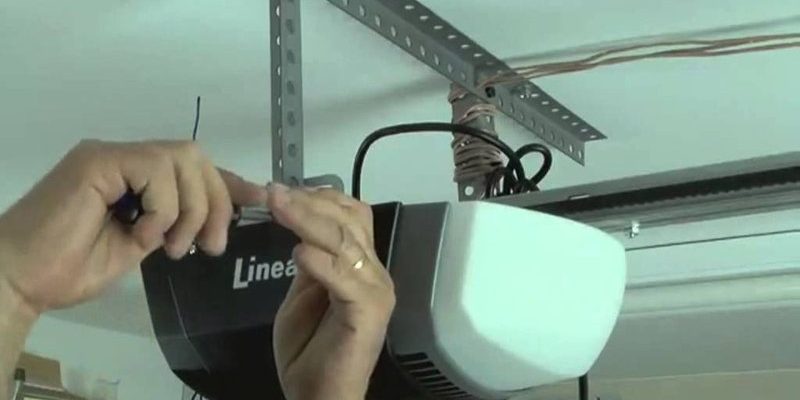
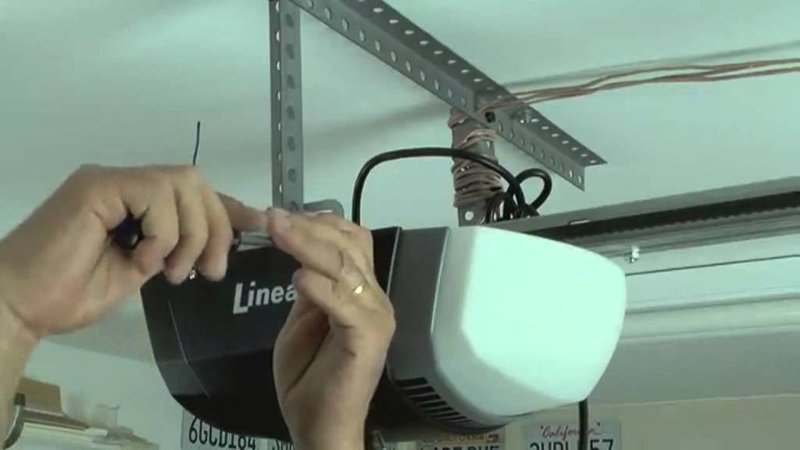
Step 1: Mounting the Battery Backup
Start by locating your garage door opener. The battery backup unit will typically need to be mounted to the wall, near the opener. Use your drill to create holes in the wall, measuring carefully to ensure it’s level. If you’re attaching it directly to the opener, make sure to follow the specific guidelines in your manual.
Step 2: Connecting Wires
Once the battery backup is mounted securely, it’s time to connect the wires. Use the wire strippers to peel back about half an inch of insulation from the ends of the wires. This is essential for creating a good connection.
Carefully connect the wires from the battery to the terminals on the garage door opener. Take your time here; it’s like putting together a puzzle. Make sure to match colors and polarity according to the manual. Check twice before tightening any screws!
Step 3: Testing the Setup
After connecting everything, it’s time to test your installation. Start by plugging the garage door opener back into the power outlet. You should see a light indicator coming on. Check your user manual to confirm that there’s a specific signal or light pattern that verifies the battery backup is functioning correctly.
You might be wondering, “How can I really test it?” You can perform a quick function test by pressing the remote to open and close the garage door. If it moves smoothly, you’re in great shape!
Step 4: Ensuring Proper Battery Maintenance
With everything set up, you’ll want to keep an eye on your battery backup’s health. Much like maintaining a car, regular checks ensure longevity. Make it a habit to run a function test on the battery backup at least every few months. Look out for any warning lights—if they’re on, refer to the manual for troubleshooting tips.
Strongly consider noting when you’ve last tested the battery so you can maintain a consistent routine. Think of your battery backup as your garage’s insurance policy; it’s there when you need it most.
Troubleshooting Common Issues
Even with a careful installation, things can occasionally go awry. Here are a few common hiccups you might encounter and how to fix them.
If your garage door doesn’t open with the battery backup, check the power indicating light on the unit. If it’s off, make sure everything is connected properly, or consider resetting the system. Sometimes a simple sync can resolve communication issues between your battery backup and your garage opener.
If it works, but the battery seems to run out too quickly, there might be something draining it. Look into minimizing additional loads—like checking the remote control settings or other electronics that may be connected to the same circuit.
The key is to stay patient and use the troubleshooting section of your battery backup manual frequently for deeper insight.
When to Call for Professional Help
Sometimes, DIY just doesn’t cut it, and that’s okay! If you’ve followed all the steps and you’re still running into problems, it might be time to call in a professional.
Consider seeking help if:
– Your opener isn’t responding at all.
– You notice sparks or unusual noises while testing.
– There are issues with electrical components that you’re uncomfortable dealing with.
Hiring a pro can save you time and ensure safety, so don’t hesitate to take that route if needed.
Final Thoughts on the Installation
Installing a Linear battery backup can feel daunting at first, but with a little preparation and patience, you can easily tackle it yourself. This handy device provides peace of mind, ensuring that you won’t be stuck outside your garage when the power goes out.
Remember, taking your time is key. Always refer to the manual for specific instructions or troubleshooting tips unique to your model. With regular maintenance checks and a little know-how, you’ll be well-prepared for whatever comes your way. Enjoy your newfound ability to keep your garage functional, even when the lights go out!