Here’s the thing: understanding the key differences between installing a garage door opener on a single or double door will make your job easier and quicker. Each type comes with its own set of challenges and requirements. Let’s break it down into bite-sized pieces so you can confidently tackle this home improvement project!
Choosing the Right Garage Door Opener
Before diving into the installation process, it’s crucial to choose the right garage door opener for your specific door type. If you’re working with a single door, you typically don’t need as much power as you do for a double door.
Single door openers are usually lighter, which can work well for your standard-sized doors. They range from 1⁄2 horsepower to about 3⁄4 horsepower. On the other hand, double doors generally require openers that have at least 3⁄4 horsepower to handle the weight and lift it effortlessly.
Take a moment to check the specifications of your garage door before purchasing. The last thing you want is to find out post-installation that your opener is struggling to lift your door!
Gathering the Necessary Tools
Every successful installation starts with the right tools. Here’s a quick list of what you’ll need for installing a garage door opener:
- Drill and drill bits
- Wrenches (adjustable works best)
- Screwdrivers (Phillips and flathead)
- Stud finder
- Level
- Measuring tape
- Pliers
- Safety glasses
- Ladder
Having these tools ready upfront will save you from running back and forth during the installation. Once you’re armed with everything, you’ll feel prepared and ready to tackle the project head-on.
Preparing Your Garage Door
Before you even think about attaching anything, take a moment to inspect your garage door. Make sure it operates smoothly without any weird noises or hiccups. Check for any broken springs or worn-out rollers, as these can affect the opener’s functionality.
Once you’re confident your door is in good shape, clear the area of any clutter. You don’t want tools or boxes in your way while you’re trying to install your garage door opener. Keep everything organized—it’ll make the installation process smoother.
Installing the Components for a Single Door Opener
When you’re installing a garage door opener for a single door, you’ll typically follow these steps:
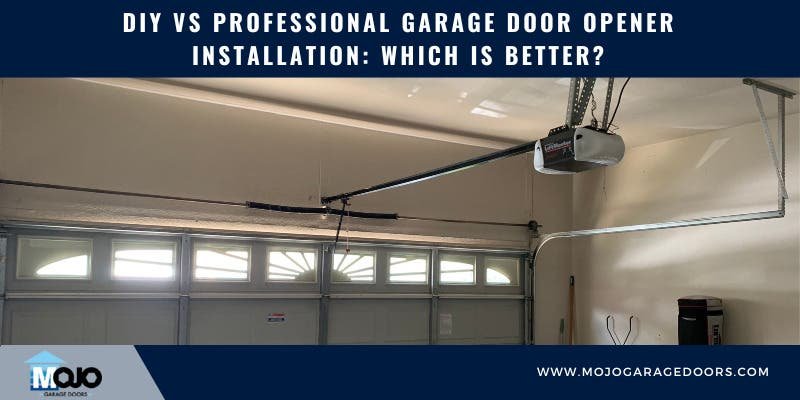
1. Mount the Motor Unit: Start by attaching the motor unit to the ceiling, making sure it’s centered over the door. You’ll want to use a level to ensure it’s perfectly aligned.
2. Secure Rail Assembly: Connect the rail to the power unit and slide it through the bracket you’ll attach to the wall. Ensure it’s firmly secured.
3. Connect the Trolley: Attach the trolley to the rail through which the door will move. Make sure that this connection is tight for safety.
4. Install the Safety Sensors: These sensors will help ensure that nothing gets caught in the closing door. Follow the instructions that come with your opener for placement details.
This process is generally straightforward, so take your time and double-check each connection. Now, let’s pivot to double door installations.
Installing the Components for a Double Door Opener
Installing a double door opener is slightly different due to the added complexity and bulk. Here’s how to do it effectively:
1. Mount Two Motor Units: For double doors, you usually need two motor units—one for each side. Make sure they’re positioned evenly above their respective doors.
2. Align the Dual Rails: Connect the rail pieces for both motor units and ensure they sync smoothly with the trolleys. A level is crucial here.
3. Ensure Synchronization: Proper adjustment is key, as both motors need to operate in harmony. Adjust the travel limits to make sure both doors open and close together.
4. Install Safety Sensors: Just like with the single door, install safety sensors that will prevent accidents as the doors close.
Keep in mind that since you’re managing dual motor systems, it’s critical to follow the manual closely to prevent any operational hang-ups!
Wiring the Garage Door Opener
Wiring your garage door opener doesn’t have to be intimidating, but it does require careful attention.
– Power Supply: Begin by connecting the power supply wires to your opener. Make sure the unit is unplugged while you’re doing this to avoid accidents.
– Connect Wall Switch and Remote: Next, connect the wall-mounted switch and any remote control capabilities. Most openers come with easy-to-follow color-coded connections, so it shouldn’t be hard to make sense of it all.
Take your time with the wiring, as improper connections could result in malfunctioning. If you have any doubts, consulting an electrician is always a good idea.
Testing Your Garage Door Opener
Once everything is installed, it’s time to test your work. Here’s how:
1. Plug in the System: Turn on the power and watch for any unusual behavior.
2. Operate Using the Remote and Wall Switch: Try opening and closing the door with both the remote and the wall switch to ensure both are functional.
3. Set and Test the Safety Sensors: Wave your hand in front of the sensors while the door is closing. It should reverse direction immediately.
Testing is crucial, and you might find minor adjustments are needed. Don’t skip this step—safety first!
Troubleshooting Common Issues
Sometimes, even after installation, things can go haywire. Here are a few common issues you might encounter:
– Door Doesn’t Open or Close: Check the power supply and ensure the wiring is connected properly.
– Remote Not Pairing: Try resetting the remote and re-pairing it with the unit. Consult your user manual for the reset procedure.
– Safety Sensors Not Functioning: Make sure there’s nothing blocking the sensors and that they’re aligned correctly.
It’s always a good idea to keep the manual handy for troubleshooting—it’s like having a safety net while you get the hang of things.
Maintenance Tips for Your Garage Door Opener
Just like any other home appliance, your garage door opener needs regular maintenance to keep it functioning smoothly. Here are a few tips:
– Annual Inspections: Schedule yearly checks to examine the springs, cables, and rollers.
– Lubricate Moving Parts: Use a silicone-based lubricant for smooth operation and to minimize wear.
– Check the Balance: Make sure your door is balanced. If it’s not, it might need adjustment, and you can handle this with a little help from a professional.
Routine maintenance doesn’t just extend the life of your opener; it keeps your garage door functioning safely and efficiently.
Final Thoughts on Installation
In the end, installing a garage door opener—whether for a single or double door—is a project many can tackle without calling in the pros. Just take your time, follow detailed instructions, and lean on the resources available to you. The satisfaction of finishing a DIY project like this is rewarding, and the convenience it brings makes it all worth it.
So grab your tools, prepare your garage, and get ready to master your garage door opener installation!