In this guide, let’s dive into how to fix the Sears safety sensor step-by-step. You don’t need to be a handyman or have a toolbox filled with fancy tools. I’ll explain everything clearly and simply, just like you would chat over coffee with a smart friend. So, grab a cup, and let’s start troubleshooting that pesky sensor!
What is a Garage Door Safety Sensor?
A garage door safety sensor is a small, but crucial, part of your garage door opener system. It consists of two little units: one sends a signal, and the other receives it. Imagine a game of catch—one player throws, and the other catches. If the throw goes awry, the catch won’t happen, right? If the signal doesn’t come through, the garage door assumes something is in the way and refuses to close. This prevents accidents, keeping your family and pets safe.
You might wonder why this really matters. Well, without working safety sensors, that garage door could unintentionally crush anything—or anyone—in its path. It’s designed for safety, and when it acts up, it can be a real headache. Common symptoms of malfunctioning sensors include a garage door that won’t close or one that reverses back up after trying to shut. Luckily, you can often fix it yourself!
Diagnosing the Issue
Before jumping into any fix, let’s pinpoint the issue. Sometimes, it’s as simple as dust, dirt, or misalignment. Follow these steps to diagnose your Sears safety sensor problem:
1. Check for Obstructions: Look around the sensor’s path. Even a small twig or dirt can disrupt the signal. Clean the area thoroughly.
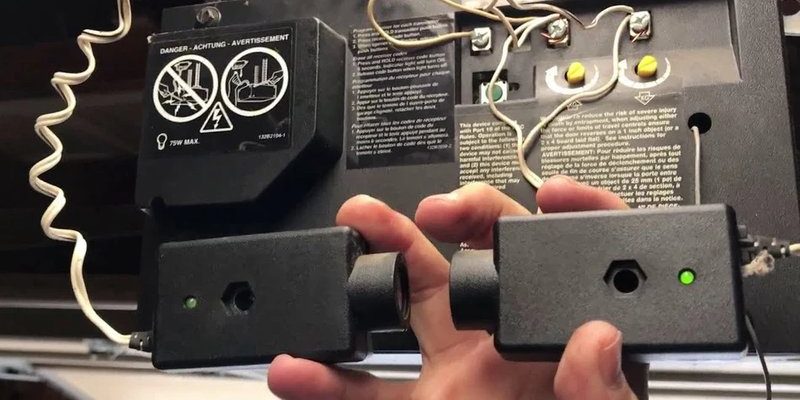
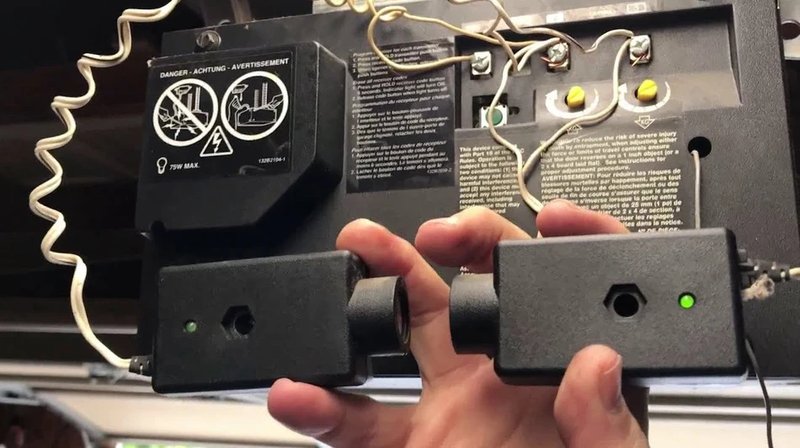
2. Observe the LED Lights: Most Sears sensors have small LED lights. A blinking light often indicates a misalignment or blockage. A solid light shows they’re functioning correctly.
3. Inspect Wiring and Connections: Check for any visible damage to the wires leading to the sensors. Loose or damaged connections can hinder performance.
Here’s the thing: if everything looks okay but the issue persists, it might be time to try some more detailed fixes.
Adjusting the Sensor Alignment
If the lights are blinking, your sensors may be misaligned. Don’t worry; fixing this is straightforward. Here’s how:
– Loosen the Mounting Brackets: Using a screwdriver, gently loosen the screws holding the sensors in place. You don’t need to remove them entirely.
– Position the Sensors Properly: Align them so that they face each other directly. You want them to be about six inches above the ground—think of them as a high-tech version of a “keep-off-the-grass” sign.
– Tighten Everything Back Up: Once they’re lined up, tighten the screws, ensuring they stay in place.
After adjusting, test the garage door. Press the remote or wall button, and watch the magic! If not, let’s move on.
Checking for Power Supply Issues
If alignment didn’t solve the problem, you might be dealing with power supply issues. Here’s a quick rundown on what to do:
– Inspect Door Opener Power: Ensure that your garage door opener has power. If it’s plugged in and the lights turn on, you’re good. If not, check your power outlet or circuit breaker.
– Replace the Sensor Batteries: If your Sears safety sensor operates on batteries, try replacing them. You’d be surprised how often new batteries can solve the issue!
– Reset the System: Sometimes, all your garage door opener needs is a fresh start. Unplug the unit from the wall for about 30 seconds, then plug it back in. This can reset the brain of your opener.
Power issues are often easy to overlook, but they play a significant role in your safety sensors’ performance.
Cleaning the Sensors
A dirty sensor is usually the culprit behind many garage door woes. Here’s how to ensure yours are crystal clear:
– Grab a Soft Cloth: Dust and dirt can build up on the lenses. Use a clean, dry cloth and gently wipe the sensor lenses until they shine.
– Avoid Harsh Chemicals: Stick with plain water or some glass cleaner. Harsh chemicals can damage the sensor’s coating.
– Regular Maintenance: Make a habit of cleaning the sensors every few months. This little routine can extend their lifespan.
When your sensors are clean, they’ll be able to communicate effectively, which means a fully operational garage door!
Replacing the Safety Sensors
If you’ve tried everything and the safety sensors are still malfunctioning, it might be time for a replacement. Here’s how:
– Purchase Replacement Sensors: Look for ones that are compatible with your Sears model. You can find them online or at your local hardware store.
– Disconnect the Old Sensors: Make sure to unplug the opener before removing the sensors. Loosen the screws and gently detach the wires.
– Connect the New Sensors: Follow the same wiring method as the old ones. Ensure wires are tight and secure.
– Reattach the Sensors: Use the mounting brackets to fix them onto the wall at the right height.
Now, give it a try. Press your remote and watch that door function smoothly.
Final Thoughts on Sears Safety Sensors
Fixing the Sears safety sensor doesn’t have to be a daunting task. By taking it step by step, you can save yourself time and money, all while ensuring your family stays safe. Whether it’s cleaning, adjusting alignment, checking power, or replacing the sensors, there’s a solution for every issue.
Remember, regular maintenance goes a long way in keeping your garage door functioning smoothly. So, keep an eye on those sensors, and don’t let a little hiccup get in the way of your day. If you ever feel stuck, don’t hesitate to ask for help—sometimes a friendly expert can save the day! Happy tinkering!